
Project Overview
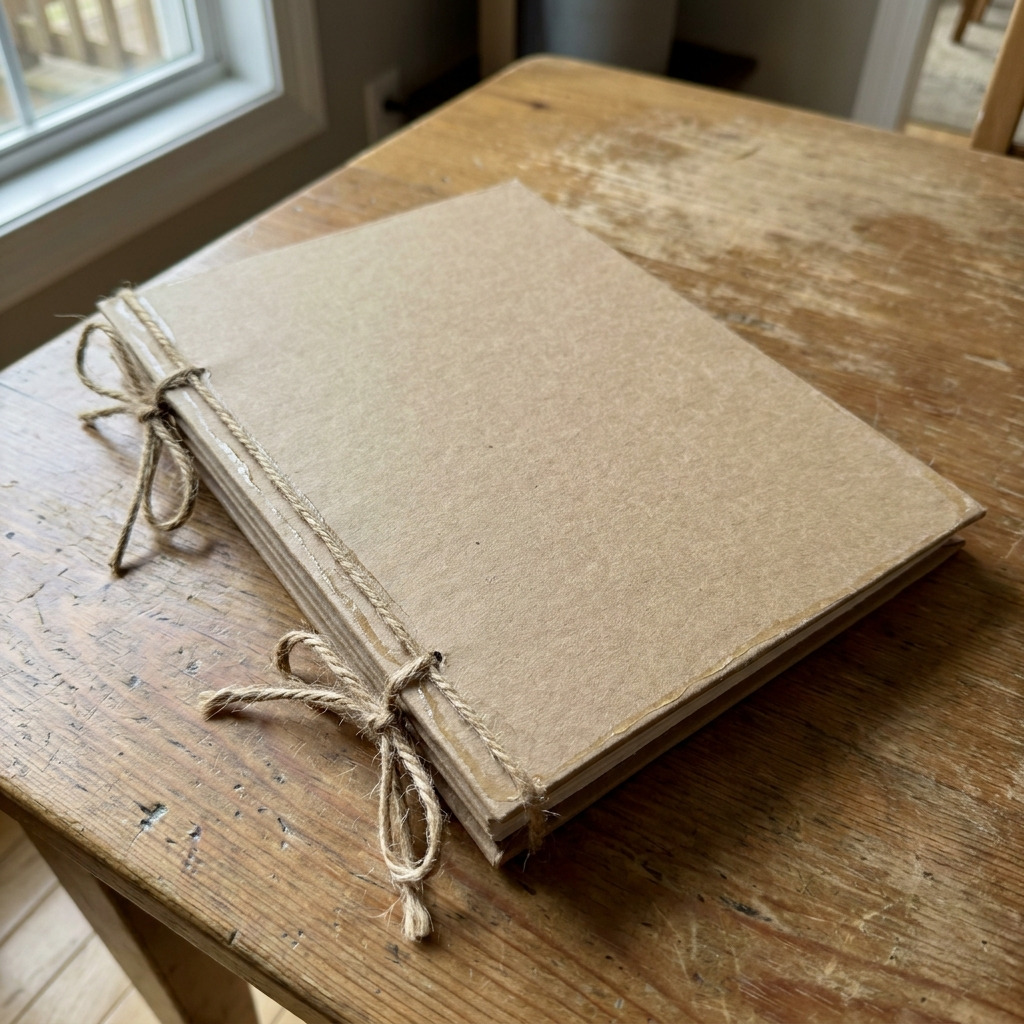
This project involves creating a custom photo album book using sturdy kraft paper for pages and simple ribbon for binding. The result is a durable, rustic-inspired album that can hold treasured memories in an organized and personal way.
Project at a Glance
- Time required: 2 hours active working time; total elapsed time 2.5 hours (including drying time)
- Difficulty level: Easy, requiring basic folding and cutting skills
- Estimated cost: $15 to $30 (cost varies based on material choices and availability)
- Finished dimensions: 9 inches wide x 12 inches tall (closed)
- Yield: One photo album book
[Image]
[Descriptive image caption of the finished project]
Materials and Tools
Materials
- Kraft paper: 10 sheets, 12 inches x 18 inches (brown, uncoated)
- Cardstock (optional for cover): 2 sheets, 12 inches x 18 inches (matching color)
- Natural fiber ribbon: 1 roll, 1 inch wide, 5 yards long (e.g., jute twine or cotton twill)
- Glue stick: 1 (for adhering pages)
- Double-sided tape: 1 roll (for securing photos)
- Cutting mat: 1
- Bone folder: 1 (for crisp folds)
- Paper clips or clamps: several (to hold pages together while gluing)
Optional materials
- Decorative paper or washi tape: for embellishing the cover or pages
- Stickers or stamps: for adding personal touches to pages
Tools
- Ruler: 12 inches
- Pencil: for marking measurements
- Craft knife or scissors: for cutting paper
- Hole punch: 1/8 inch
- Cutting board: to protect your work surface
- Safety equipment: goggles (if using a craft knife)
Preparation & Setup
- Workspace setup: Choose a clean, flat surface to work on and lay down a cutting mat to protect it.
- Cutting list: – Kraft paper pages: 10 sheets at 9 inches x 12 inches (folded) – Cover: optional two sheets of cardstock at 9 inches x 12 inches each (if desired)
- Pre-treatment of materials: If using cardstock for the cover, prepare it by cutting to size. Smooth out any wrinkles in the kraft paper.
Instructions
Preparing the Pages
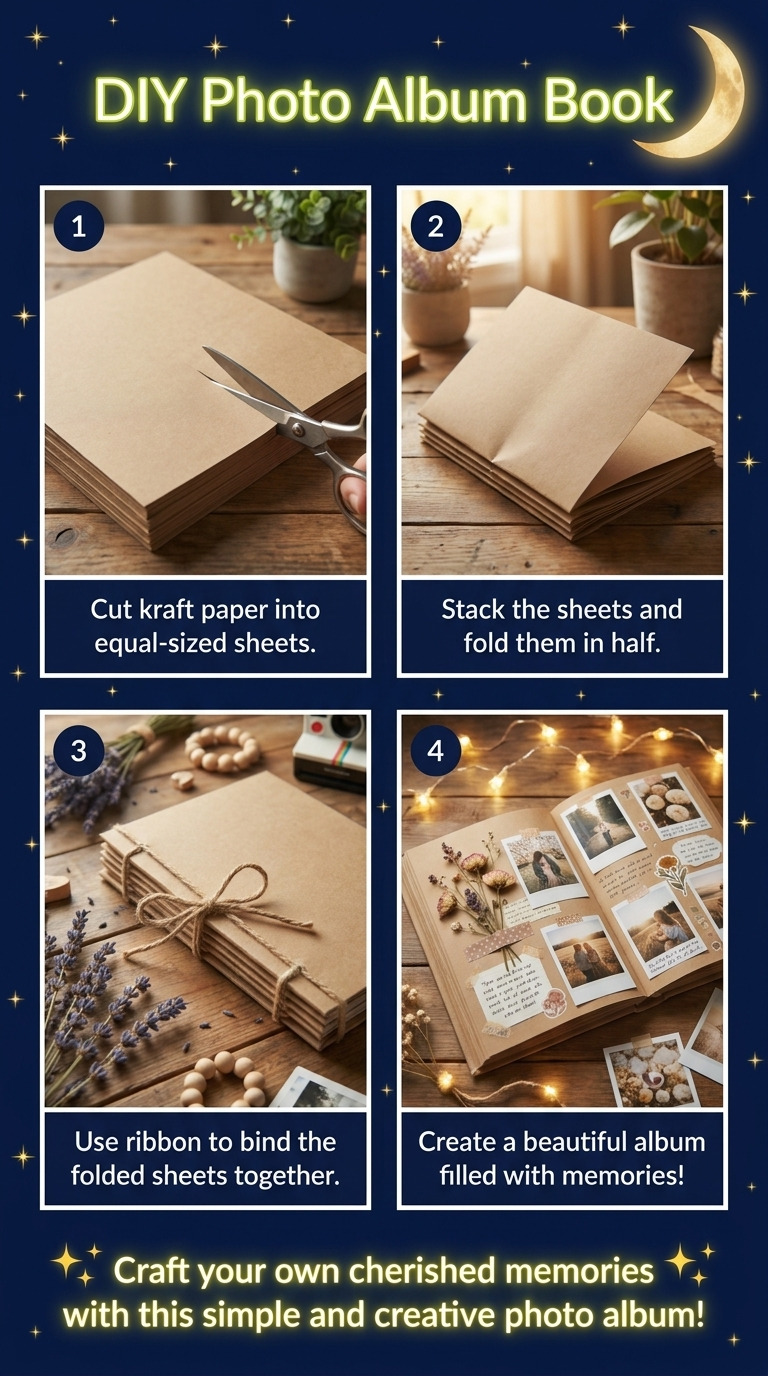
- Step 1: Fold the Kraft Paper Take one sheet of kraft paper and fold it in half lengthwise (12 inches side). Crease with the bone folder well for a sharp edge. The fold should create two sections measuring 9 inches x 12 inches.
- Step 2: Repeat the Folding Process Repeat step 1 for the remaining 9 sheets for a total of 10 folded pages. Each page should now be 9 inches wide x 12 inches tall after folding.
- Step 3: Clip the Pages Together Clip the folded pages together using paper clips or clamps to hold them in place. Ensure that the creases are aligned.
Assembling the Cover
- Step 4: Prepare the First Cover If using cardstock for the cover, take one sheet and leave it flat as the first cover.
- Step 5: Attach the Second Cover Sheet On the second sheet of cardstock, apply glue along one edge and attach it to the back of the first cover sheet. This will create a thicker and sturdier cover.
Binding the Album
- Step 6: Stack the Pages Inside the Cover Stack the folded kraft pages inside the cover, ensuring they are centered and the creases are aligned with the cover. Check for uniformity all around.
- Step 7: Punch Holes for Binding Using the hole punch, make 4 evenly spaced holes along the folded edge of the cover and pages, approximately 1 inch from each edge and 1.5 inches apart. This will allow for the ribbon binding.
- Step 8: Cut the Ribbon Cut a length of ribbon approximately 4 feet long. This length will provide enough material to securely bind the pages.
- Step 9: Thread the Ribbon Through the Holes Thread the ribbon through the top hole from the outside in, then through the bottom hole from the outside in. Pull the ribbon taut but not too tight to allow for a flexible opening.
- Step 10: Sew the Middle Holes Repeat with the middle two holes, sewing the same manner as before but leaving some slack for the album to open easily. This ensures that the pages can turn smoothly.
- Step 11: Secure the Ribbon Tie the ribbon at the top and bottom in a bow to secure the pages in place. Ensure the pages are held firmly but can still move freely.
Final Touches
- Step 12: Adhere Photos to Pages Use double-sided tape to adhere photos to the pages as desired. You may also embellish the cover using decorative paper, washi tape, stickers, or stamps for personalization.
Measurements & Dimensions
- Each page (after folding): 9 inches wide x 12 inches tall
- Finished album: 9 inches wide x 12 inches tall
- Ribbon length used: approximately 4 feet
Timing Information
- Estimated active working time: 2 hours
- Drying time for glue: 30 minutes (allow to fully set before use)
- Total time: 2.5 hours
Troubleshooting and FAQ
Troubleshooting
The pages don’t align correctly. The pages may be misaligned if not stacked properly. Reopen the cover and ensure all folded pages are positioned evenly before binding.
The ribbon binding is too tight. If the ribbon is pulled too taut, it may restrict the opening of the album. Carefully loosen the ribbon from its bow and re-thread it with slightly more slack.
The glue is not adhering properly. If the glue stick is insufficient, a stronger adhesive may be required, such as PVA glue. Ensure that enough glue is applied to the edge and allow it to dry completely before handling.
The holes are not evenly spaced. Use a ruler to mark the hole positions before punching to ensure equal spacing. Redo the holes if necessary to avoid inconsistencies.
Frequently Asked Questions
Can I use different sizes of kraft paper? Yes, you can use different sizes of kraft paper. Just adjust the dimensions of the pages and binding holes accordingly to maintain proportions.
What if I can't find natural fiber ribbon? Any type of sturdy ribbon can be used as a substitute. Synthetic ribbon will work but may alter the aesthetic of the rustic design.
How can I protect my photos in the album? Using double-sided tape is effective for adhering photos. You may also use photo corners for a more removable option, ensuring photos remain protected from excessive handling or damage.
What if I want to add more pages later? You can bind additional pages by repeating the same binding process. Use longer lengths of ribbon if adding significantly more pages.
Save This Guide
Save this guide to Pinterest for the detailed cut list, exact measurements, cure times, and troubleshooting entries all in one place while you build your album. Please share any corrections, measured results, or substitutions that worked for you so the guide can remain accurate and helpful.
Leave a Reply