
Project Overview
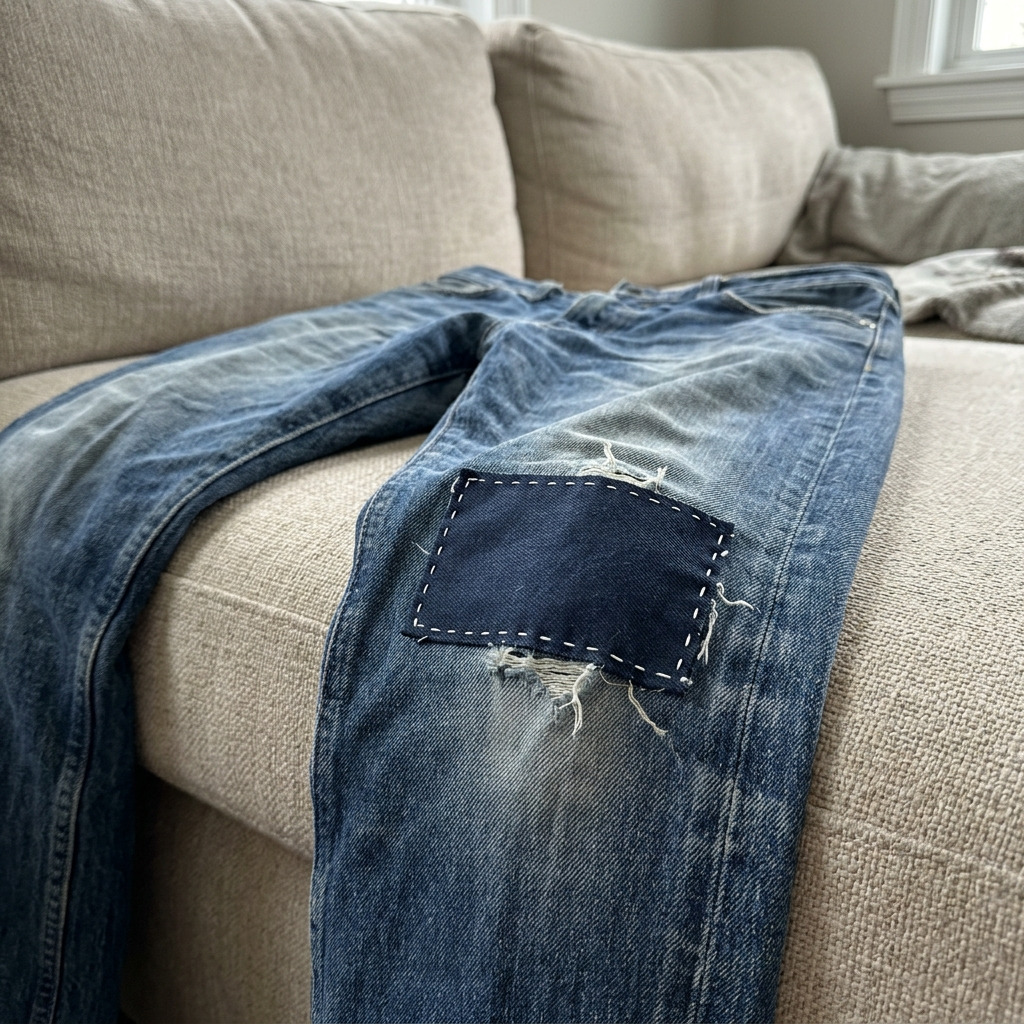
In this project, you will learn how to hand-embroider a sashiko patch onto the knee of your favorite jeans, allowing you to reinforce the area while adding a decorative touch.
Project at a Glance
- Time required: 1 to 2 hours active working time; total elapsed time of 1 to 2 hours including preparation
- Difficulty level: Beginner — basic hand sewing skills required
- Estimated cost: $10 to $30 depending on the choice of materials
- Finished dimensions: Patch dimensions approximately 6 inches wide by 3 inches tall (adjustable based on hole size)
- Yield: One patched knee per project
HERO IMAGE PLACEHOLDER
[Image showing a completed sashiko patch on jeans]
Materials and Tools
Materials
- Denim fabric: 1 piece, 100% cotton, approximately 7” x 10” in color that matches or contrasts with your jeans (navy or blue preferred)
- Sashiko thread: 1 skein, white or contrasting color (e.g., bright yellow or red)
- Sashiko needle: 1, long (size 8 or 9 recommended)
- Fabric scissors: 1 pair
- Embroidery scissors: 1 pair (optional for detail)
- Iron-on fusible webbing: 1 small sheet (optional but helps secure the patch)
- Fabric marker or tailor’s chalk: 1 for marking
- Pins: 4-6 to hold the patch in place
- Embroidery hoop: optional, 6 inches
- Fray check or clear fabric glue: 1 small bottle (optional)
Tools
- Iron: for pre-treating and securing fabric
- Ironing board: for flat surface
- Measuring tape or ruler: for measuring dimensions
- Cutting mat: for clean cuts (optional but useful)
- Safety equipment: none required, but ensure workspace is well-lit.
Instructions
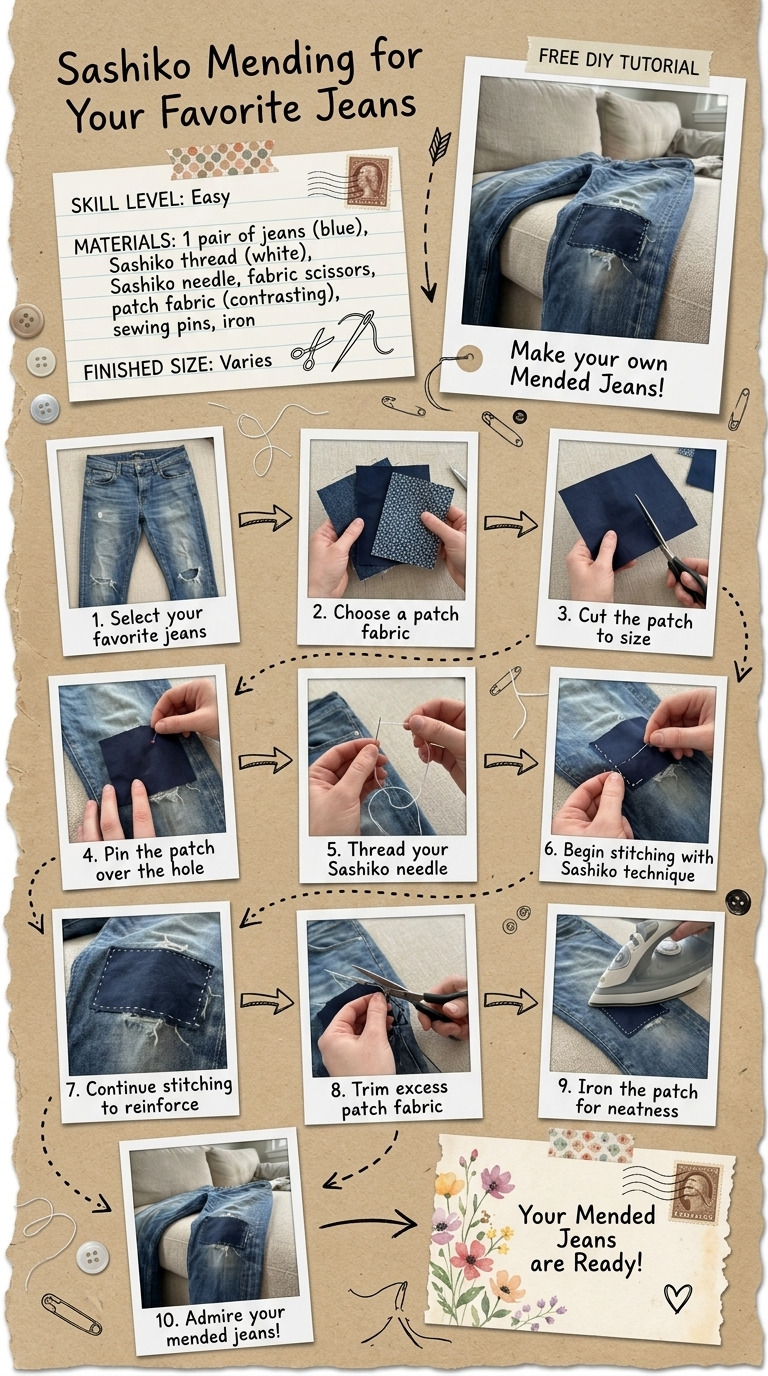
Step 1: Workspace Setup
Choose a clean, flat surface to work on. Lay down a cutting mat if available to protect your workspace. Gather all materials and tools within reach. Ensure your jeans are clean and dry.
Step 2: Cut the Patch
Cut a piece of denim to measure 7” x 10” or adjust based on the size of the knee hole. Use fabric scissors for clean edges.
Step 3: Prepare the Jeans
Lay the jeans flat, with the knee area exposed. Ensure the area around the hole is clean. If desired, use the fabric marker to outline around the hole with about ½ inch of extra space for the patch.
Step 4: Secure the Patch
Position the patch over the hole on the knee. Adjust to ensure the patch entirely covers the hole. Pin the patch in place with at least 4-6 pins, ensuring it’s secured firmly.
Step 5: Start Stitching
Thread the sashiko needle with a long length of sashiko thread (about 3-4 times the length of the patch for ease). Start on the backside of the patch (if using fusible webbing, keep it face down). Bring the needle up through the patch and jeans fabric. Pull the thread through leaving about a 2-3 inch tail underneath.
Step 6: Sashiko Stitching Technique
Make running stitches (1/4 inch long) along the edges of the patch. Aim for a consistent spacing of about 1/4 inch between each stitch. Consider using traditional patterns such as “asanoha” (hemp leaf) or “seigaiha” (blue ocean waves) if desired.
Step 7: Adding the Second Layer of Stitching
Once the edges are complete, you can add cross-stitches or decorative patterns inside your patch using the same sashiko technique. These stitches should be done in a contrasting color for visual interest.
Step 8: Trim Excess Thread
Once finished stitching, tie off the thread securely on the backside and trim off excess.
Step 9: Final Touch
If using fray check, apply a small amount around the edges of the patch to seal the fabric and prevent fraying.
Assembly & Finishing
Ensure the patch is securely stitched to the jeans and that there’s no fabric movement. If necessary, carefully iron the patched area with a low setting to smooth out any wrinkles. Optional: You can wash the jeans once the embroidery is secure to remove any markings or excess glue.
Measurements & Dimensions
- Final dimensions of the finished patch: Approximately 6” wide by 3” tall.
- Each patch cut size: 7" x 10."
- Stitches: Each stitch should be approximately 1/4 inch in length.
Timing Information
- Estimated active working time: 1-2 hours, depending on embroidery complexity
- Drying/curing time: Optional fray check (follow product instructions)
- Total time: 1-2 hours including preparation
Variations & Notes
For a clean result, make sure your stitches are even and spaced consistently. Common mistakes to avoid include not pre-treating (ironing) the patch, which can lead to puckering, or using too short of a thread for stitching that would lead to inadequate durability. Consider using different colors for the patch, stitch thread, or even patterned fabrics for personalized styles. To care for the jeans, wash them separately in cold water and line dry to preserve the patch. Avoid heat from direct sun to prevent colors from fading.
Troubleshooting and FAQ
Troubleshooting
The stitches are uneven or loose. Cause: Inconsistent tension while stitching. Correction: Make sure to maintain even tension on the thread and take consistent-sized stitches throughout the process.
The patch is shifting while stitching. Cause: Insufficient pinning of the patch. Correction: Add more pins to secure the patch firmly in place before stitching.
The patch is too small for the hole. Cause: Incorrect measurements taken. Correction: Cut a larger patch that adequately covers the hole, ensuring at least a ½ inch margin beyond the hole for secure stitching.
Fray check is causing discoloration. Cause: Excess application of the product. Correction: Use only a small amount applied with precision around the edges; let it dry thoroughly.
Frequently Asked Questions
Can I use a sewing machine instead of hand stitching? Yes, while hand stitching is traditional for sashiko, you can use a sewing machine with a straight stitch to attach the patch. However, you will miss the fine detail and texture of the hand-embroidered look.
Can I use this technique on other fabrics besides denim? Yes, sashiko can be used on various woven fabrics. However, lightweight fabrics may require additional backing to support the stitchwork.
How do I maintain my patched jeans? Wash the jeans in cold water and avoid direct sunlight when drying to prevent fading. It is also advisable to turn them inside out during washing to protect the embroidery.
Can I use other colors for the patch or thread? Yes, you can choose any color that contrasts or complements your jeans. Experimenting with colors can add a unique touch to your patches.
Save This Guide
Save or pin this guide to Pinterest for a quick reference to the cut list, exact measurements, cure times, and troubleshooting entries while you build. Your contributions or corrections help keep this guide accurate for all users.
Leave a Reply