
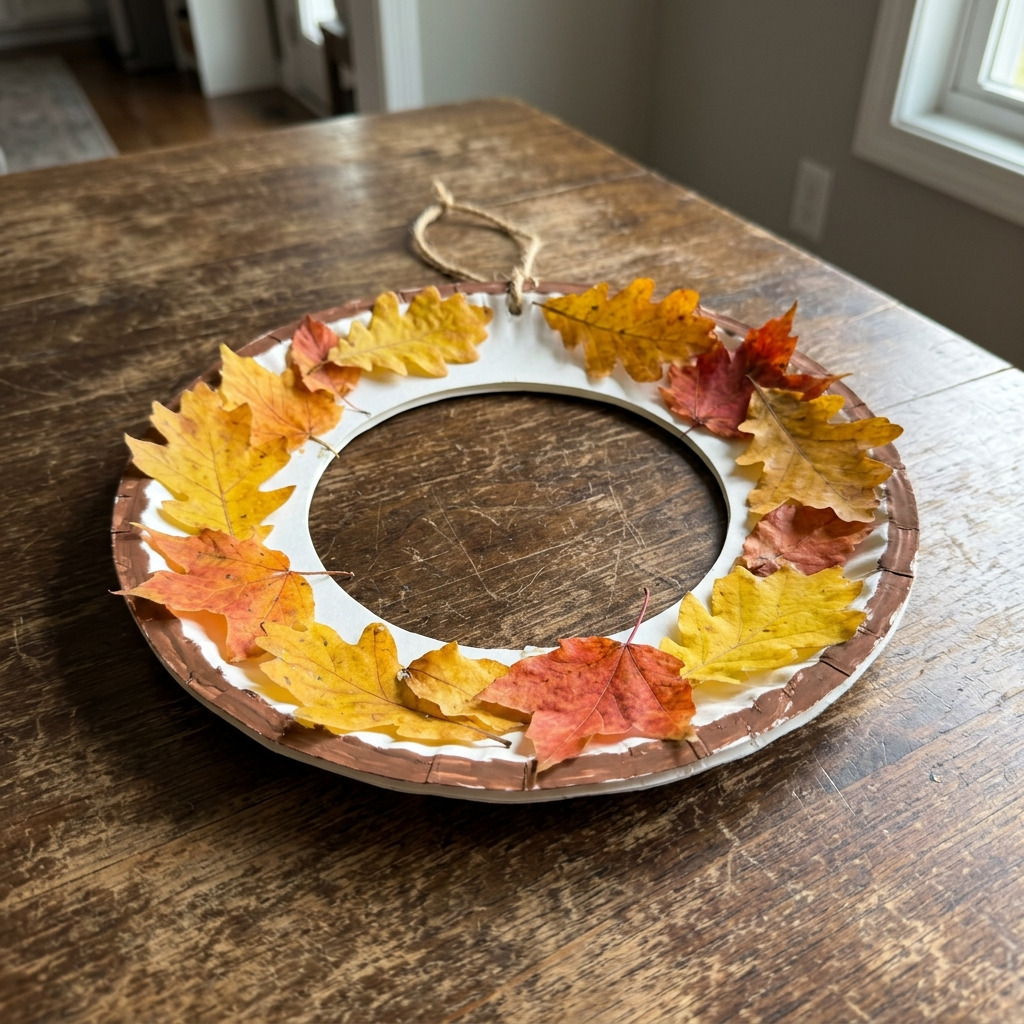
Project Overview
This project involves creating a beautiful autumn wreath using a paper plate as the base and decorating it with real fall leaves, capturing the vibrant colors of the season. The finished product serves as a seasonal decoration that enhances home aesthetics during the autumn months.
Project at a Glance
- Time required: 1 hour active working time; 1 hour total elapsed time (including drying)
- Difficulty level: Easy — this project requires basic cutting and gluing skills
- Estimated cost: $5 to $15, depending on the availability of leaves and embellishments
- Finished dimensions: Approximately 12 inches in diameter
- Yield: One wreath
[Descriptive image caption of the finished project]
Materials and Tools
Materials
- Paper Plates: 2 standard (9-inch) white paper plates
- Real Fall Leaves: About 15-20 assorted leaves in colors of yellow, orange, and red
- Acrylic Paint: 1 bottle of brown (2 oz.)
- Glue: White school glue or glue stick (4 oz.)
- Scissors: Standard size
- String or Yarn: Natural jute twine or orange yarn (12 inches)
- Optional Embellishments: Small pinecones, acorns, or glitter (for extra decoration)
Tools
- Scissors: Standard size (optional child-safe scissors)
- Paintbrush: 1-inch width
- Activity-safe glue: Non-toxic, such as white school glue
- Clothespins: For holding leaves while drying
Instructions
Step 1: Prepare the Plate Base
- Take two paper plates and stack them together with the bottoms facing each other to create stability.
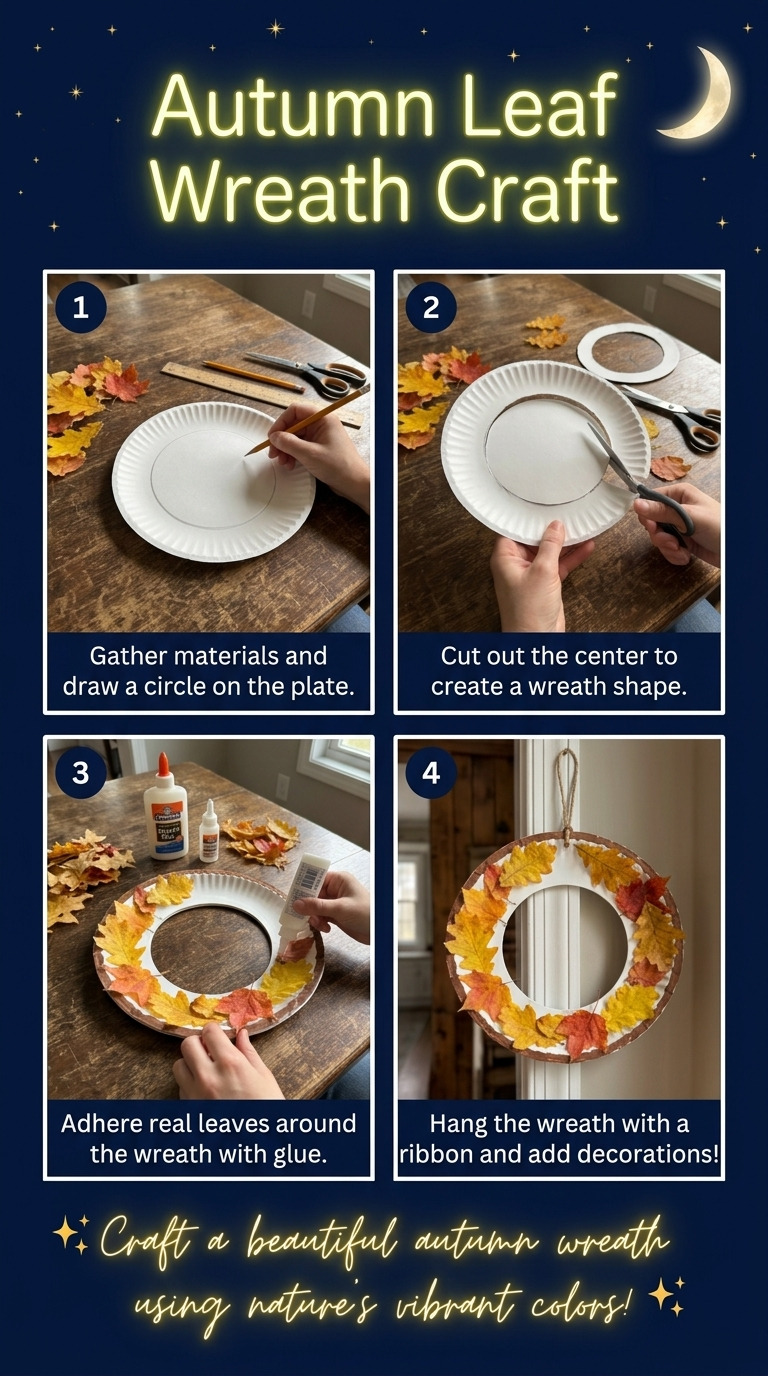
- Cut a circle out of the center of both plates to create a ring shape, using a smaller plate as a template if necessary (aim for an inner diameter of approximately 5 inches).
Step 2: Paint the Base
- Using a 1-inch paintbrush, paint the outer edge of the paper plate rings with brown acrylic paint. Ensure complete coverage of the outer area while keeping the inner section white.
- Allow the painted plates to dry completely for approximately 20 minutes.
Step 3: Select and Arrange Leaves
- While the paint is drying, gather your autumn leaves. Choose approximately 15-20 leaves with vibrant colors like yellow, orange, and red.
- Lay out the leaves around the paper plate ring to visualize your arrangement before adhering them, adjusting quantity and positioning until satisfied.
Step 4: Glue the Leaves
- Begin by placing a leaf at the top of the wreath. Apply a small amount of glue to the leaf and press it gently onto the painted paper plate ring to secure it.
- Continue gluing leaves in a circular pattern around the ring, ensuring they overlap slightly for a fuller appearance. Aim for a natural, varied arrangement.
- Use clothespins to hold leaves in place while the glue dries. Allow a drying time of about 15-20 minutes, checking to ensure leaves remain secure.
Step 5: Attach the Hanging String
- After the leaves are secure, cut a piece of string or yarn about 12 inches long.
- Puncture a small hole in the top center of the wreath using scissors, being careful not to damage the plate excessively.
- Thread the string through this hole, tying a secure knot to create a loop for hanging.
Step 6: Final Touches
- Optionally, glue small pinecones, acorns, or other decorative elements in gaps between the leaves for added texture and visual interest.
- If desired, sprinkle a small amount of glitter on the leaves for added sparkle. Allow everything to set for an additional 10 minutes.
Assembly & Finishing
- Ensure leaves are properly joined to the plate using school glue, with each leaf slightly overlapping adjacent ones to enhance stability and aesthetics.
- Let the entire wreath dry for at least 30 minutes after all decorations are applied.
- While not necessary, consider applying a light spray of clear sealant to preserve the leaves, especially if displayed in an environment subject to moisture.
Measurements & Dimensions
- Finished dimensions: Approximately 12 inches in diameter.
- Paper plate ring dimensions: Original plates measure 9 inches in diameter; the inner cut circle should be around 5 inches in diameter.
Timing Information
- Estimated active working time: 1 hour
- Drying/curing time: 1 hour
- Total time: Approximately 2 hours (including setup and drying)
Troubleshooting and FAQ
Troubleshooting
The leaves do not stick to the plate.
- This may be due to excess moisture on the leaves. Ensure leaves are dry before gluing and use a sufficient amount of glue.
The wreath does not hang straight.
- Adjust the position of the string or knot to ensure it is centered at the top of the wreath.
The paint is peeling off the plate after drying.
- Ensure the paint is completely dry before applying the leaves. Consider using a flexible paint specifically designed for paper.
Too much glue is visible around the leaves.
- Use less glue for future projects to prevent a messy appearance. Excess glue can be removed gently with a damp cloth before it dries.
Frequently Asked Questions
Can I use leaves other than real fall leaves?
- Yes, you can create similar wreaths using cut-out shapes from colored construction paper for a child-friendly option.
How can I store the wreath once completed?
- Store the wreath indoors in a cool, dry place away from direct sunlight to maintain the color vibrancy of the leaves.
What other embellishments work well with this wreath?
- Additional natural items such as dried flowers, berries, or fabric ribbons can enhance the wreath's decoration.
How long will the real leaves last on the wreath?
- Real leaves may last several weeks, but their appearance may degrade over time. Applying a light sealant helps to preserve them longer.
Save This Guide
Save or pin this guide to Pinterest for easy access while you build, including the cut list, measurements, drying times, and troubleshooting tips. Contributions of corrections or substitutions that worked well in your project are welcome to keep the guide accurate and useful.
Leave a Reply