
Project Overview
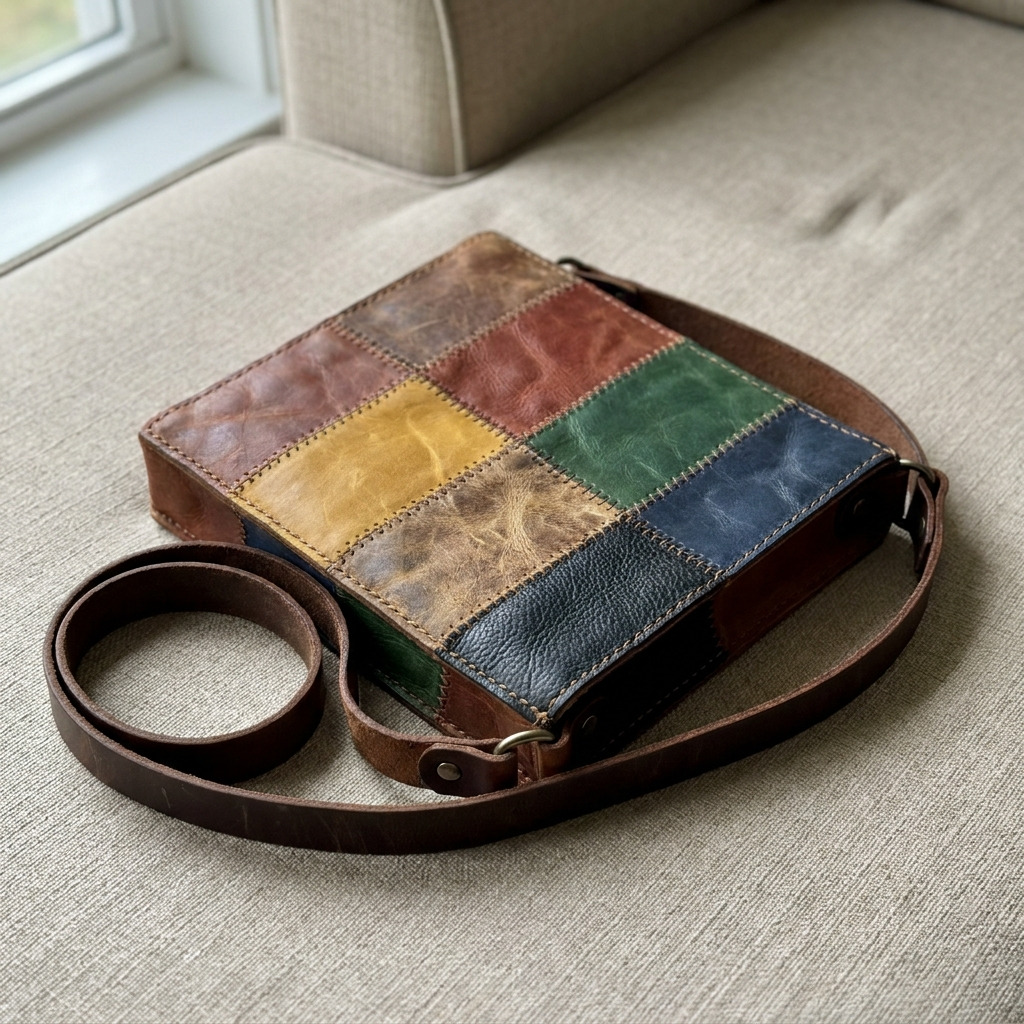
This project involves creating a stylish patchwork crossbody bag from scrap leather pieces, ideal for everyday use and showcasing creativity through leather patchwork.
Project at a Glance
- Time required: 3 hours active working time; approximately 4 hours total elapsed time
- Difficulty level: Intermediate, requires sewing skills for leather
- Estimated cost: $50 to $80, depending on the quality of leather and whether tools are already owned
- Finished dimensions: 10 inches wide x 8 inches tall x 2 inches deep
- Yield: One crossbody bag
HERO IMAGE PLACEHOLDER
[Descriptive image caption of the finished project]
Materials and Tools
Materials
- Leather scraps:
- 12 pieces of various colors and textures (each approximately 3 inches x 5 inches)
- Leather for the bag lining:
- 1 piece (10 inches x 8 inches) of durable fabric
- Leather strap:
- 1 piece of leather (1 inch wide x 50 inches long)
- Sewing thread:
- 1 spool of heavy-duty nylon thread (color to match leather)
- Leather glue:
- 4 oz of strong leather adhesive
- Magnetic snap closure:
- 1 set (male and female parts)
Tools
- Sewing tools:
- Sewing machine with a walking foot (to handle thick leather)
- Leather needle (size 90/14)
- Scissors
- Rotary cutter and cutting mat
- Ruler (12 inches)
- Marking tools:
- Tailor's chalk or fabric marker
- Safety equipment:
- Safety goggles (if cutting leather with a rotary cutter)
- Work gloves (optional for handling leather)
Preparation & Setup
- Workspace setup: Choose a flat, clean surface and spread out a cutting mat to protect the area. Ensure good lighting is available.
- Cutting list: – 12 leather pieces, each measuring 3 inches x 5 inches – 1 lining piece of 10 inches x 8 inches – 1 strap measuring 1 inch wide x 50 inches long
- Pre-treatment of materials: Ensure all leather scraps are clean and free of dirt. If needed, wipe them down with a soft damp cloth and allow to dry completely before cutting.
Step-by-Step Instructions
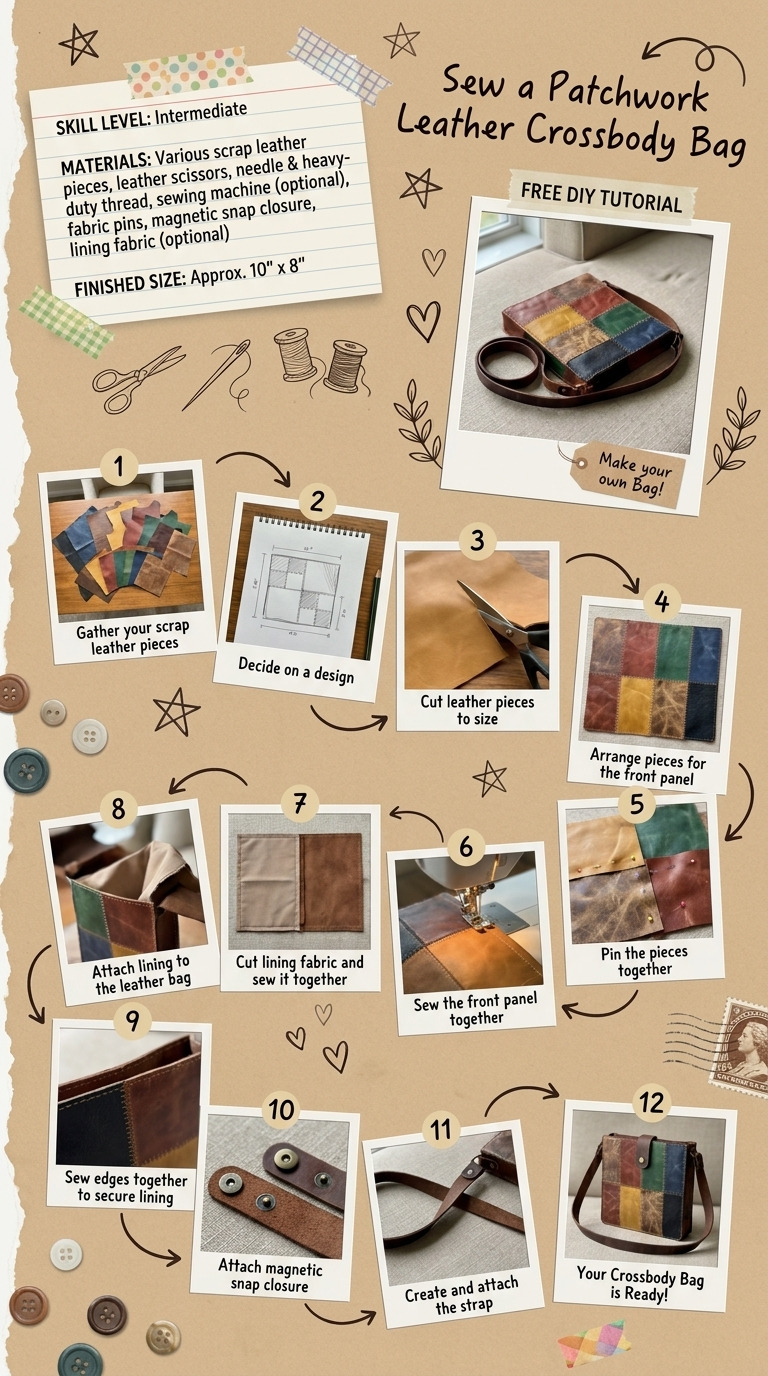
Step 1: Cut the leather scraps
- Using a rotary cutter, cut the 12 leather pieces into desired patchwork shapes while maintaining dimensions of approximately 3 inches x 5 inches. The shapes can be rectangles, squares, or other geometric shapes.
Step 2: Create the patchwork panel
- Begin laying out the leather pieces in a visually appealing patchwork pattern, for example, arranging them in 4 rows of 3 pieces horizontally. Adjust placement until satisfied with the look.
Step 3: Bond leather pieces
- Apply a thin layer of leather glue to the back side of each leather piece and adhere them together according to the layout. Press them firmly and allow to set for 30 minutes.
Step 4: Sew the patchwork panel
- Using the sewing machine with a walking foot, sew along the edges of the patchwork, using a 1/4 inch seam allowance. Backstitch at the beginning and end of each seam for durability. Trim any excess leather from the edges for a clean finish.
Step 5: Sew the lining
- If not cut beforehand, cut the lining fabric to 10 inches x 8 inches. Place it right side up on a flat surface.
Step 6: Attach the lining to the patchwork
- Place the patchwork panel (right side down) onto the lining piece, ensuring the edges align. Pin around the perimeter, leaving a 2-inch gap on one side for turning. Sew around the edges with a 1/4 inch seam allowance, except for the gap.
Step 7: Turn the bag right side out
- Carefully pull the bag through the 2-inch gap to turn it right side out. Poke out corners gently with a blunt object to ensure they are defined.
Step 8: Attach the magnetic snap
- Mark the center point of the top opening. Follow the installation instructions for the magnetic snap closure, carefully cutting slits as needed in both the patchwork panel and lining.
Step 9: Prepare and attach the strap
- Fold the leather strap in half for a secure feel. Sew along the edges for reinforcement, ensuring to use a heavy-duty sewing machine needle and thread. Attach the strap to both sides of the bag, securing it with strong thread and ensuring equal lengths on both sides.
Step 10: Finish and close the gap
- Tuck in the raw edges of the gap where the bag was turned. Pin them together and sew closed to finish the inner seam neatly.
Assembly & Finishing
- Ensure all edges are sewn firmly, especially where the strap attaches, and check for any loose threads or uneven edges. Finish the bag with a light leather conditioner to give it shine and protect the texture.
Measurements & Dimensions
- Final dimensions of the finished item: 10 inches wide x 8 inches tall x 2 inches deep
- Cut sizes:
- Leather scraps: 12 pieces of 3 inches x 5 inches
- Lining: 1 piece of 10 inches x 8 inches
- Strap: 1 piece of 1 inch wide x 50 inches long
Timing Information
- Estimated active working time: 3 hours
- Drying/curing time: 30 minutes for glue, plus 1 hour for the adhesive to set if needed before sewing.
- Total time: Approximately 4 hours
Variations & Notes
- Tips for getting a clean result: Use sharp tools to prevent tearing of the leather. Practice sewing on scrap pieces of leather first to ensure settings are correct.
- Common mistakes to avoid: Ensure alignment of pieces when gluing and sewing the patchwork; do not skip the gap in the lining for turning.
- Simple size, color or material variations: Adjust the size of the bag to create a mini version or mix different textures and colors for a more eclectic look.
- Care, cleaning, and storage instructions: Clean the leather bag with a damp cloth; avoid soaking. Store the bag in a cool, dry place away from direct sunlight to maintain its integrity.
Troubleshooting and FAQ
Troubleshooting
The patchwork pieces are misaligned. Ensure proper alignment during the gluing phase by pressing pieces together firmly before applying glue. Adjust and secure before sewing.
The leather is tearing during cutting. Use a sharp rotary cutter and ensure you are applying even pressure. If necessary, replace the blade to achieve cleaner cuts.
The lining is visible when turned out. Check that the lining and patchwork were aligned correctly before sewing. A 1/4 inch seam allowance should be maintained throughout for uniformity.
The bag won't turn right side out easily. Make sure the gap left for turning is sufficiently large (at least 2 inches) so that the leather can be pulled through without excessive force.
Frequently Asked Questions
Can I use other types of material for the bag? Yes, other materials such as canvas or denim can be used, but keep in mind this may affect the structure and durability of the bag compared to leather.
How do I maintain the bag’s shape? To maintain the bag's shape, store it with proper support and use a leather conditioning product to keep the leather supple.
What happens if the leather glue doesn’t hold? If the leather glue fails, reapply a thin layer of glue and allow it to cure fully. Ensure precise alignment during reattachment.
Can I use a sewing machine without a walking foot? While a standard sewing foot can work for lighter leather, a walking foot is recommended for thicker layers to prevent slippage and uneven seams.
Save This Guide
Save this guide to Pinterest to reference the cut list, measurements, and troubleshooting tips while building your patchwork leather crossbody bag. Please share any corrections, measured results, or substitutions you found effective so this guide remains accurate.
Leave a Reply