
Project Overview
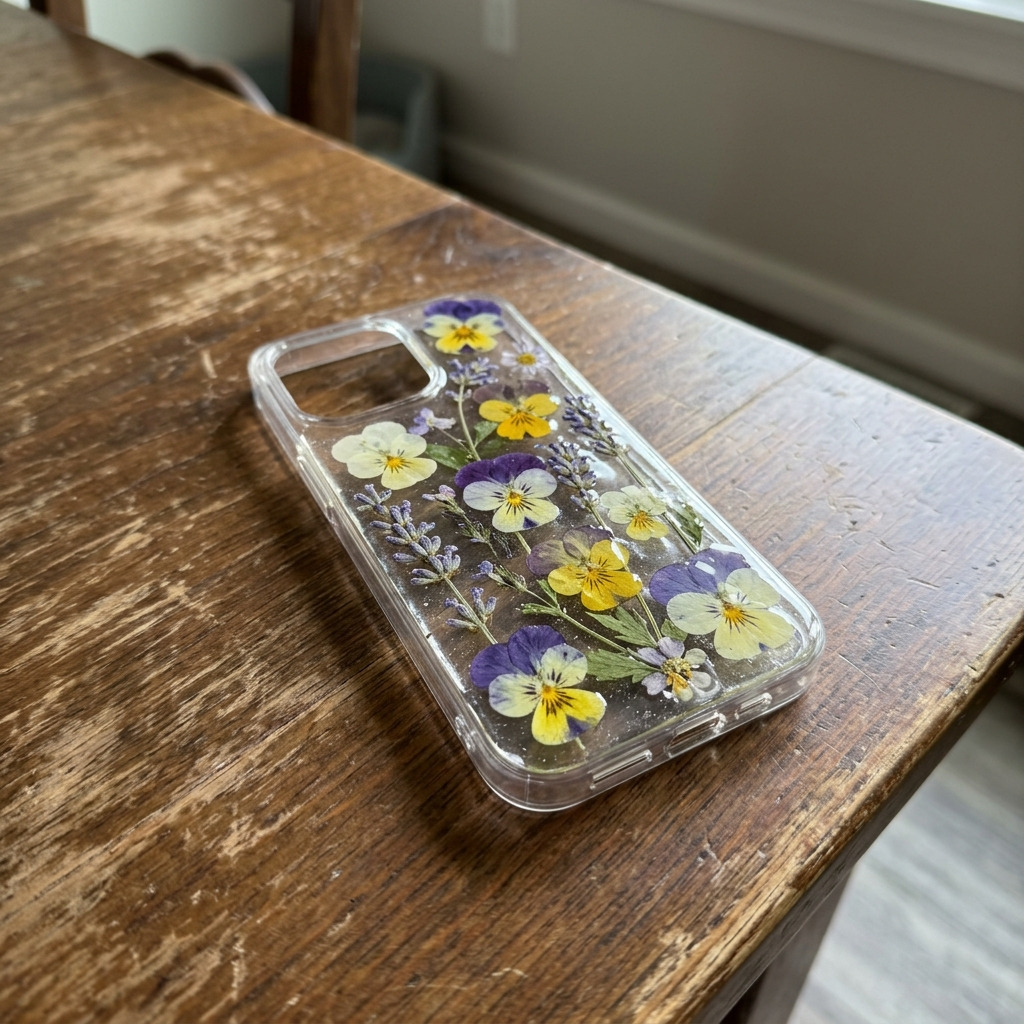
This project entails creating a beautiful and unique phone case using real pressed flowers embedded in a clear resin for protection and aesthetic appeal. The finished product not only showcases nature's beauty but also adds individual style to your phone.
Project at a Glance
- Time required: 1.5 hours active working time; 25 hours total elapsed time (including curing)
- Difficulty level: Intermediate; requires precise mixing of resin and arrangement of delicate materials
- Estimated cost: $30 to $60 (depending on the choice of flowers, resin kit quality, and if tools are already owned)
- Finished dimensions: Approximately 6" x 3" x 0.5"
- Yield: One completed phone case
HERO IMAGE PLACEHOLDER
[Descriptive image caption of the finished project]
Materials and Tools
Materials
- Phone Case Blank: 1 standard clear plastic or silicone phone case (size according to your phone model)
- Pressed Flowers: A selection of small dried flowers (e.g., pansies, daisies, or lavender, approximately 10 to 15 flowers depending on size)
- Epoxy Resin Kit: 1 kit (includes equal parts resin and hardener, enough for about 8 oz total)
- Pigment Powder (optional): 1 small jar of clear or iridescent pigment for added shimmer (e.g., Diamond Dust, approximately 5 grams)
- Clear Nail Polish: 1 small bottle (approximately 15 ml for sealing pressed flowers)
- Sandpaper: 1 sheet of 400 grit (for smoothing edges of the phone case if required)
Tools
- Mixing Container: 1 small plastic cup or silicone mold for mixing resin (minimum 4 oz capacity)
- Stirring Stick: 1 wooden or plastic stick for mixing resin
- Syringe or Droppers: 1 for applying resin (small size, 10 ml recommended)
- Craft Knife: Utility knife for trimming flowers
- Protective Gloves: 1 pair to safeguard hands when working with resin
- Safety Goggles: 1 pair for eye protection while working
- Drop Cloth: 1 to protect your workspace
Instructions
Step 1: Prepare Workspace
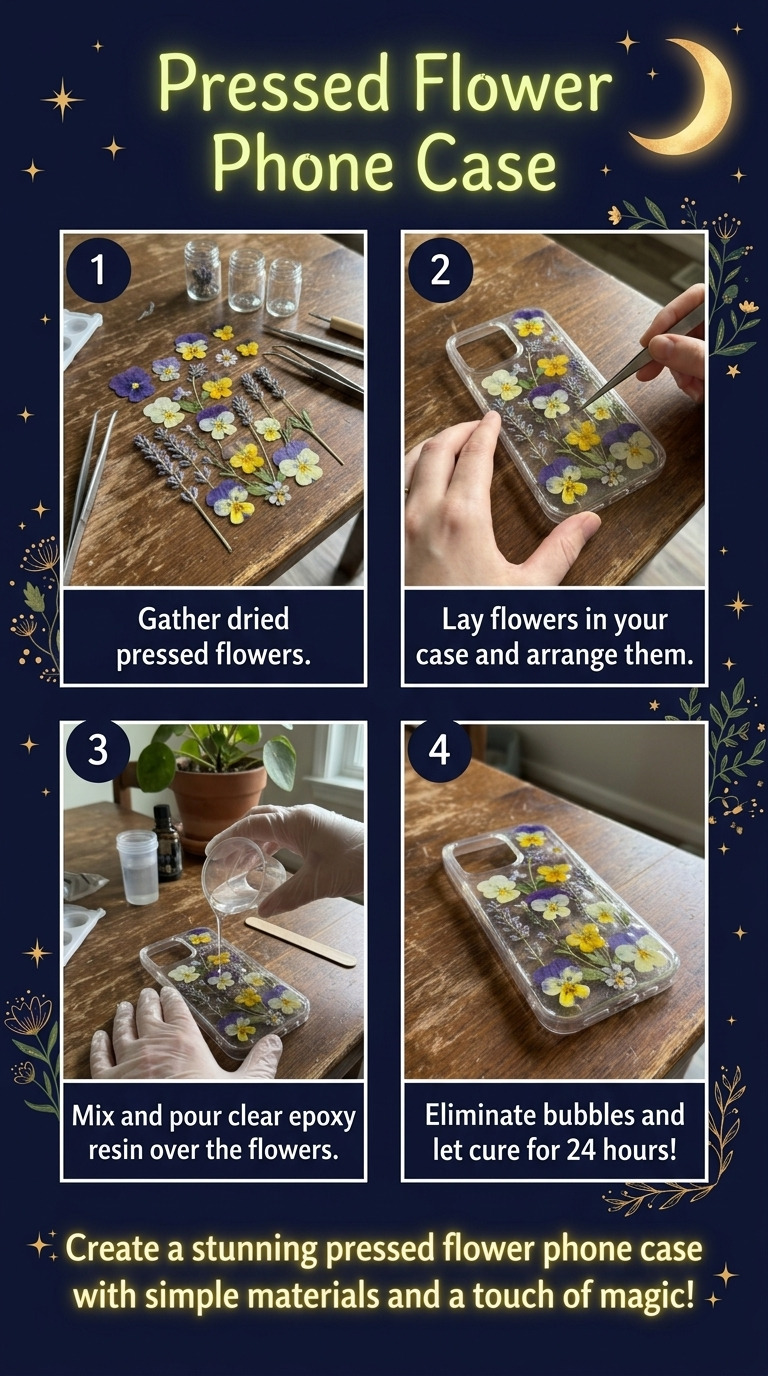
Set up a well-ventilated area and lay down a drop cloth to protect surfaces from resin spills.
Step 2: Seal Pressed Flowers
Using clear nail polish, lightly coat each pressed flower to seal and protect it from moisture and color changes. Let the polish dry for 30 minutes.
Step 3: Prepare the Epoxy Resin
In the well-ventilated area, put on gloves and goggles. Measure equal parts resin and hardener according to the instructions on the epoxy kit (usually 2 oz resin and 2 oz hardener recommended for this case).
Step 4: Mix Resin
Pour the resin and hardener into the mixing container and stir thoroughly for about 3-5 minutes until fully combined. Look for a uniform, clear consistency.
Step 5: Pour a Base Layer
Carefully pour 1 oz of mixed resin into the bottom of the phone case. Use the syringe or dropper for precision. The resin should evenly cover the bottom surface.
Step 6: Cure the Base Layer
Let the base layer of resin cure for 30 minutes until it becomes slightly tacky but not fully cured.
Step 7: Arrange Pressed Flowers
Place the sealed pressed flowers onto the base layer of resin as desired. Ensure they are arranged creatively and that they do not overlap excessively. Press the flowers gently to eliminate air bubbles underneath.
Step 8: Pour Additional Resin
Mix another batch of resin (2 oz total; 1 oz resin and 1 oz hardener) and pour it over the arranged flowers to fully cover them. Ensure all flowers are encapsulated.
Step 9: Remove Air Bubbles
Use a heat gun or a small torch to pass lightly over the surface of the resin for about 15 seconds to stimulate and remove any air bubbles.
Step 10: Cure the Resin
Leave the phone case in a dust-free location to cure for 24 hours. Follow the manufacturer’s guidelines regarding curing time for best results.
Step 11: Final Touches
After the resin has fully cured, use sandpaper to smooth out any sharp edges around the phone case, if necessary.
Step 12: Check Fit
Once cured, test fit the phone into the case to ensure a proper fit, making adjustments as needed.
Step 13: Polish Surface
If desired, wipe the surface with a soft cloth to enhance the shine of the resin.
Step 14: Optional Decoration
Apply a layer of clear nail polish to the outside edges of the resin for additional shine. Allow the polish to dry for 30 minutes.
Troubleshooting and FAQ
Troubleshooting
- The joint will not close flush. This may be caused by uneven layers of resin or overlapping flowers. Ensure that the base layer is smooth and that flowers are placed evenly.
- Air bubbles are present in the resin. If bubbles appear during curing, lightly reheat the surface using a heat gun to encourage bubble escape.
- Flowers have discolored in resin. Wet or damp flowers can lead to discoloration. Always ensure flowers are thoroughly dried before sealing.
- Resin is sticky or fails to cure fully. Insufficient mixing of the resin and hardener will prevent proper curing. Mix thoroughly as instructed before application.
Frequently Asked Questions
- Can I use any type of flower? While most small flowers will work, avoid flowers with high moisture content. Dried flowers, such as pansies, daisies, and lavender, work best.
- Can I use colored resin? Yes, you can add pigment powder to the resin for additional color. Ensure you only apply a small amount to avoid overly muddy colors.
- How do I clean the phone case? Use a soft, dry cloth to clean the case. Avoid harsh chemicals, which could damage the resin surface.
- What if I want to make multiple phone cases? You can scale the project by increasing the amounts of resin and flowers used, adjusting quantities based on the number of cases you desire to create.
Save This Guide
Save or pin this guide to Pinterest for easy access while building your pressed flower phone case, particularly for the cut list, exact measurements, and curing times. Feel free to share corrections, measured results, or substitutions that worked well, so the guide remains accurate.
Leave a Reply