
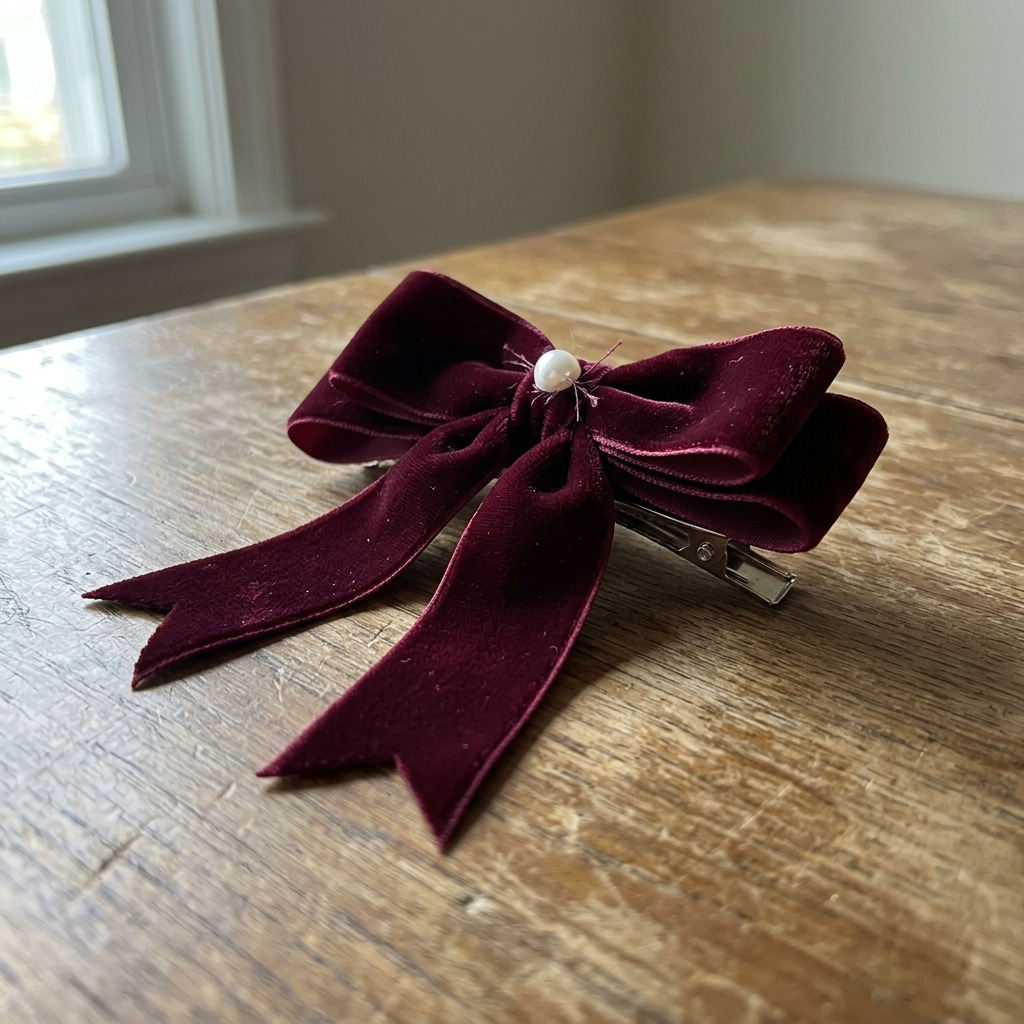
Project Overview
This project will guide you to create a charming velvet ribbon bow hair clip that adds a touch of elegance to any hairstyle. Ideal for both casual and formal occasions, this fun accessory can be made quickly.
Project at a Glance
- Time required: active working time 15-20 minutes; total elapsed time approximately 30-35 minutes, including drying time
- Difficulty level: Beginner; basic sewing and hot glue application
- Estimated cost: $5 to $15, depending on ribbon quality and embellishments used
- Finished dimensions: Bow approximately 4 inches wide and 2.5 inches tall; hair clip about 3 inches long
- Yield: 1 hair clip
HERO IMAGE PLACEHOLDER
[Descriptive image caption of the finished project]
Materials and Tools
Materials
- Velvet Ribbon: 1 yard (2.5 cm wide, color of your choice, e.g., deep burgundy or royal blue)
- Hair Clip: 1 metal alligator clip (3 inches long)
- Hot Glue Sticks: 1 pack (standard size)
- Scissors: 1 pair (sharp)
- Needle and Thread: 1 spool (matching color with ribbon)
- Felt Fabric: 1 sheet (4×4 inches, optional for backing)
- Embellishments: Optional (small faux pearl, rhinestone, or decorative button for center)
Tools
- Hot Glue Gun: Standard size
- Scissors: For cutting ribbon and felt
- Needle: Small sharp hand needle
- Thread: Matching the velvet ribbon color
- Ruler: For measuring ribbon length
- Workspace: Clean surface to work on
- Safety Equipment: Eye protection (recommended) if using the hot glue gun
Instructions
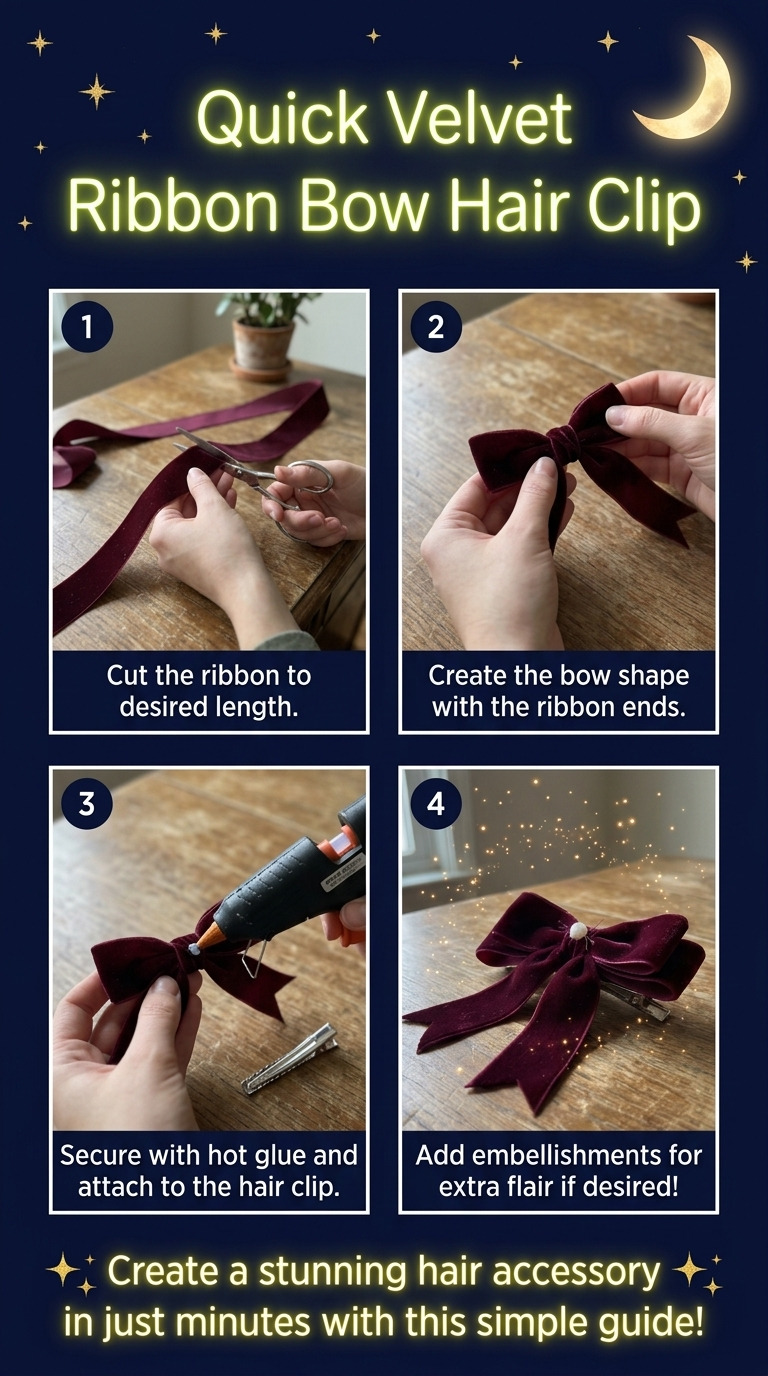
- Prepare Your Workspace: – Set up a clean, flat workspace and place a cutting mat or cardboard underneath to protect your surface from glue spills.
- Cut the Velvet Ribbon: – Cut one piece of shiny velvet ribbon to 18 inches for the bow. – Cut another piece of velvet ribbon to 6 inches for the bow tail. – (Optional) Cut a square of felt to 2 inches for bow backing, if desired.
- Create the Bow: – Take the 18-inch velvet ribbon. Form a loop by bringing both ends together and overlapping them by approximately 1 inch. – Using the needle and thread, sew a few small stitches (around 3 to 5) in the center of the overlapped area to hold the shape. – Pull the thread snugly and tie a knot to secure it, ensuring the center of the bow is gathered tightly. The bow should now include two loops.
- Add the Bow Tail: – Take the 6-inch ribbon piece. Fold it in half lengthwise and cut the ends into a “V” shape, creating a tail length of about 2 to 3 inches. – Center this ribbon tail behind the bow and use either stitching or hot glue to secure it in place.
- Attach the Bow to the Hair Clip: – Apply a small amount of hot glue (approximately 1-2 ml) to the metal alligator clip at its top center. – Position the assembled bow so that it fully covers the glued portion. Hold it in place for about 30 seconds until the glue sets.
- (Optional) Add Backing with Felt: – If you are using felt, apply a small amount of hot glue (around 2 ml) to the felt square. – Position the felt underneath the bow where it attaches to the clip. This will secure the bow and provide a finished appearance.
- Embellish: – If desired, add an embellishment (like a faux pearl or rhinestone) to the center of the bow by placing a small dot of hot glue (approximately 1 ml) in that area. Hold until the glue sets, about 10-15 seconds.
- Assembly & Finishing Touches: – Ensure that all parts are firmly glued or stitched together. – Check that any embellishments are securely attached. – Allow all glued elements to cure completely for about 10-15 minutes before handling. – Use scissors to trim any stray threads for a polished look.
Measurements and Dimensions
- Final dimensions: Bow approximately 4 inches wide, 2.5 inches tall; clip about 3 inches long.
- Cut sizes:
- Bow: 18 inches
- Tail: 6 inches
- Optional felt backing: 2 inches square.
Timing Information
- Estimated active working time: 15-20 minutes
- Drying/curing time: 10-15 minutes
- Total time: Approximately 30-35 minutes.
Troubleshooting and FAQ
Troubleshooting
- The bow shape is not holding. Cause: Insufficient stitching in the center or tightly gathered thread. Correction: Reseam the center with additional stitches and ensure the thread is pulled snug and tied securely.
- Hot glue is visible and messy. Cause: Excessive hot glue used during assembly. Correction: Use less glue next time, only applying small dots where needed, and remove any excess while warm with a craft knife.
- The tail is uneven. Cause: Cutting mistake during the “V” shape process. Correction: Remeasure and trim to ensure both sides of the tail are equal.
- Embellishments are falling off. Cause: Insufficient glue on the embellishment. Correction: Reapply glue under the embellishment and hold for the recommended setting time.
Frequently Asked Questions
- Can I use other types of ribbon? Yes, other ribbon types such as satin or grosgrain can be used, though they may not have the same luxurious appearance as velvet.
- Can I make a larger bow? Yes, to make a larger bow, simply increase the measurements of the velvet ribbon accordingly, ideally keeping the proportions similar.
- How should I store the hair clip? Store hair clips in a cool, dry place, preferably in a fabric pouch or box, to protect them from dust and damage.
- How do I clean the velvet ribbon? Gently spot clean with a damp cloth. For deep cleaning, a professional dry cleaning service is recommended due to the delicate nature of the fabric.
Save This Guide
Save or pin this guide to Pinterest so you have the exact measurements, cut list, and step-by-step instructions on hand while you build your velvet ribbon bow hair clip. Please submit any corrections, measured results, or substitutions that worked, to help keep this guide accurate.
Leave a Reply