
Project Overview
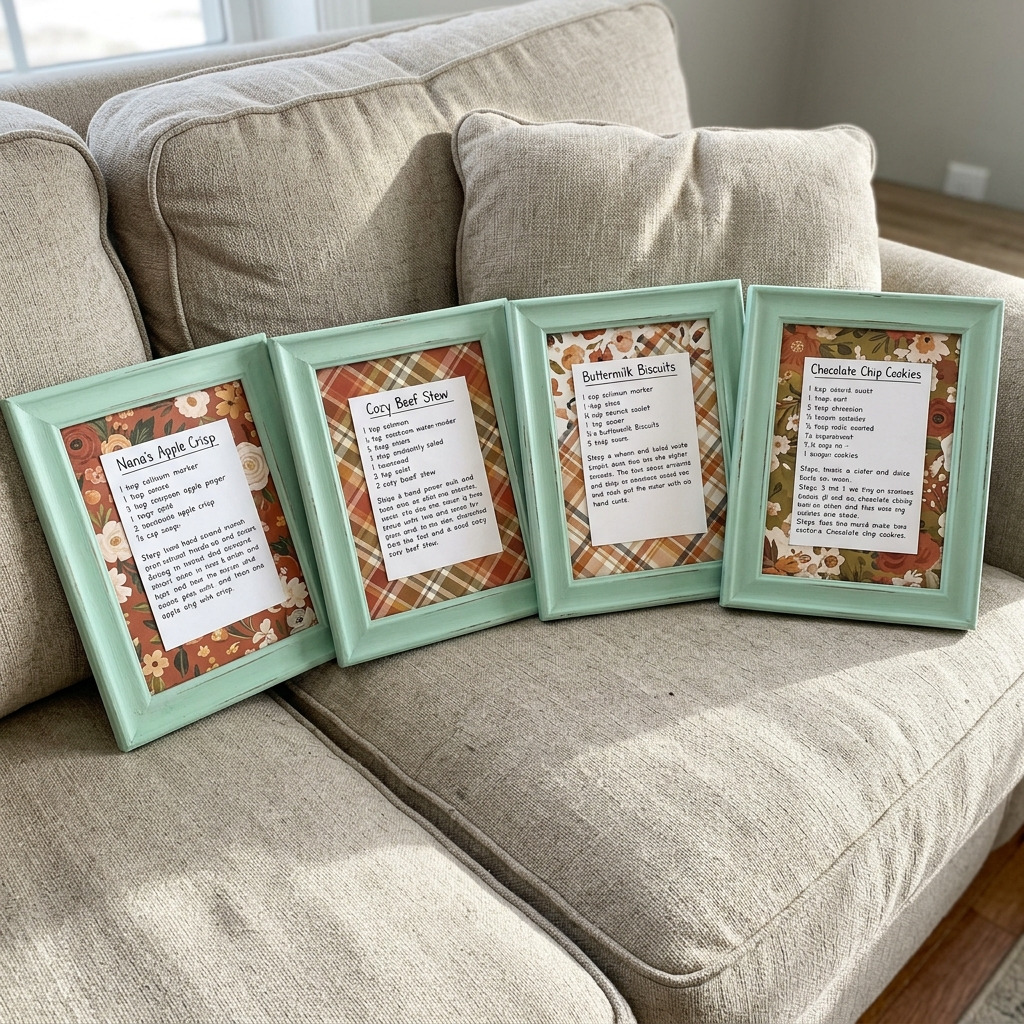
This project involves creating charming framed recipe cards that you can display in your kitchen, adding a cozy touch while showcasing your favorite recipes. This guide is designed for beginners and will result in delightful and functional decor pieces that enhance your home.
Project at a Glance
- Time required: Active working time: 1 hour; Total elapsed time: 1 hour and 5 minutes
- Difficulty level: Beginner; requires basic cutting and assembling skills
- Estimated cost: $15 to $30, depending on choice of frames and decorative paper
- Finished dimensions: Each framed card measures 6 inches by 8 inches
- Yield: 4 framed recipe cards
HERO IMAGE PLACEHOLDER
[Descriptive image caption of the finished project]
Materials and Tools
Materials
- Recipe Cards: 4 cards, 4" x 6", white cardstock (#110 weight recommended)
- Frames: 4 picture frames, 6" x 8", with a simple wooden design; options include natural wood or pastel-colored finishes (e.g., soft mint, pale yellow)
- Marker or Pen: 1 permanent black fine-tip marker
- Decorative Paper: 4 sheets of scrapbook paper, 12" x 12", in warm colors and cozy designs (e.g., floral, plaid)
- Adhesive: 1 roll of double-sided tape
- Optional: Washi tape in coordinating colors for embellishing the cards
Tools
- Scissors: Standard cutting scissors
- Ruler: 12-inch ruler for measurement
- Pencil: Standard pencil for marking measurements
- Craft Knife & Cutting Mat: (optional for more precise cuts)
- Safety Gear: Use safety glasses when cutting with a craft knife to protect your eyes
Instructions
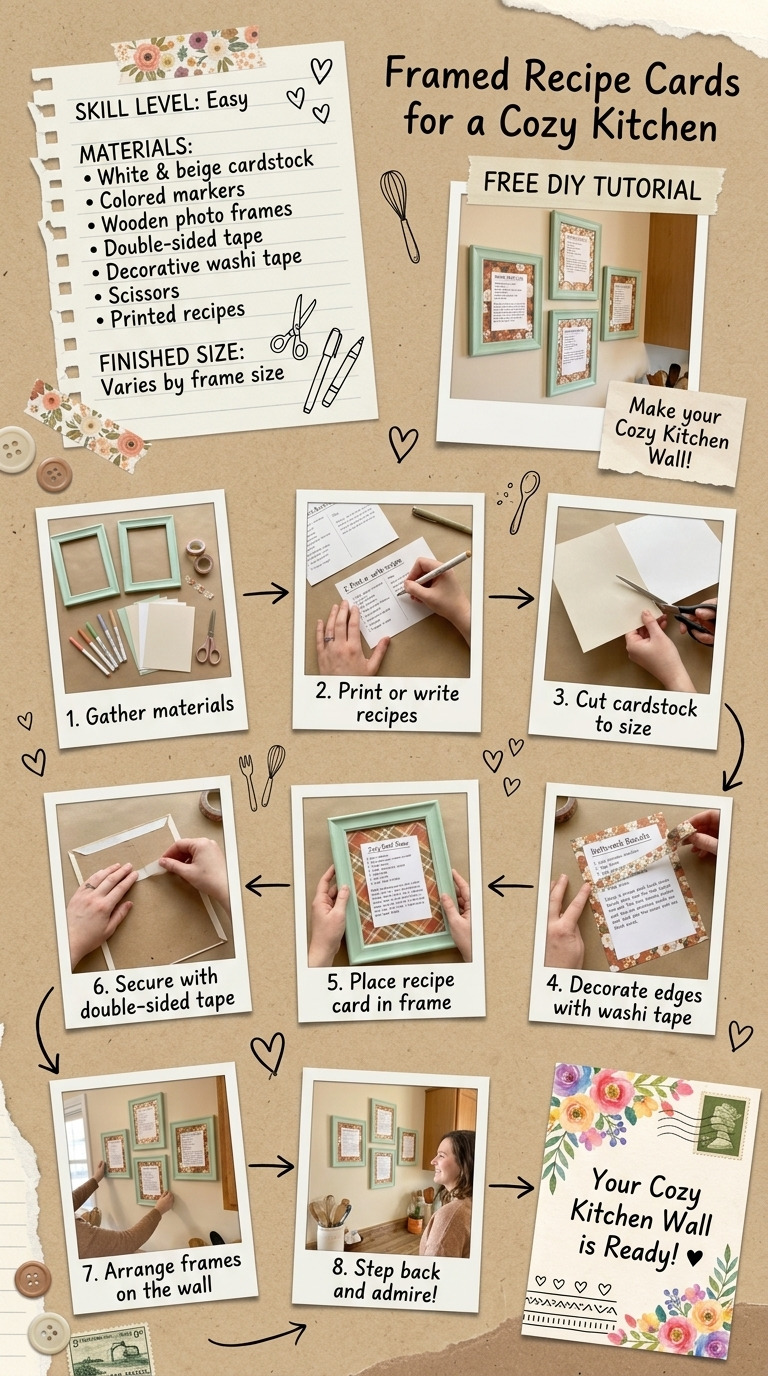
- Step 1: Setup Workspace – Clear a large flat workspace to allow for cutting and assembly. Use a cutting mat underneath to protect your surface. – Ensure all materials are clean and ready for use, pressing scrapbook paper flat if needed.
- Step 2: Cutting Scrapbook Paper – Cut 4 pieces of scrapbook paper to measure 6" x 8" for the backgrounds of each recipe card. The total cut should be 4 pieces. – Ensure edges are straight and free of any curling.
- Step 3: Design the Recipe Cards – Using the black fine-tip marker, handwrite or print your favorite recipes onto each recipe card, ensuring to leave a margin around the text for decoration. – Allow the ink to dry completely for approximately 5 minutes.
- Step 4: Prepare Backgrounds – Position each scrapbook paper piece, already cut to 6" x 8", as the decorative background for each recipe card. – Optionally, apply washi tape along the edges of each scrapbook paper for an additional decorative touch.
- Step 5: Assemble the Cards – Position one recipe card in the center of each scrapbook paper piece, ensuring it’s evenly spaced. – Use double-sided tape to adhere the recipe card to the scrapbook paper. Ensure it is firmly pressed to secure it in place. Repeat this procedure for all 4 cards.
- Step 6: Frame Each Card – Open each picture frame and insert the scrapbook paper with the attached recipe card into the frame. Ensure all edges of the scrapbook paper and recipe card are aligned. – Close the backing of the frame securely to hold everything in place. Repeat for the remaining frames.
- Step 7: Final Adjustments – Use a soft cloth to clean the glass of each frame, removing any fingerprints or dust. – Arrange all four frames aesthetically on your kitchen wall or surfaces. Hang frames at eye level for the best display.
- Step 8: Cleaning Up – Dispose of any scrap materials and clean your workspace, ensuring all tools are properly stored.
Troubleshooting and FAQ
Troubleshooting
- The text on the recipe cards smudges. This can happen if the ink is not completely dry. Allow more time for the ink to dry before handling.
- Scrapbook paper curls after cutting. This can occur due to moisture. Ensure the scrapbook paper is stored flat in a dry area before using.
- The frames do not sit flat against the wall. Ensure the backing is properly secured and that all clips or fasteners are in place.
Frequently Asked Questions
- Can I use different sized cards? Yes, using smaller frames (e.g., 4" x 6") will require the scrapbook paper to be cut to 4" x 6" as well.
- What is the best way to clean the frames? Wipe frames with a damp cloth; do not immerse them in water to avoid damage.
- Can I use a different type of adhesive? Yes, liquid glue can work but may require longer drying time and may not provide an immediate bond like double-sided tape.
- How can I maintain the cards to prevent damage? Store the cards in a dry place and avoid exposing them to direct sunlight to prevent fading.
Save This Guide
Save or pin this guide to Pinterest for easy access while building your charming framed recipe cards, particularly for the cut list, exact measurements, and troubleshooting entries. Corrections, measured results, or substitutions that have worked for you are appreciated for keeping this guide accurate.
Leave a Reply