
Project Overview
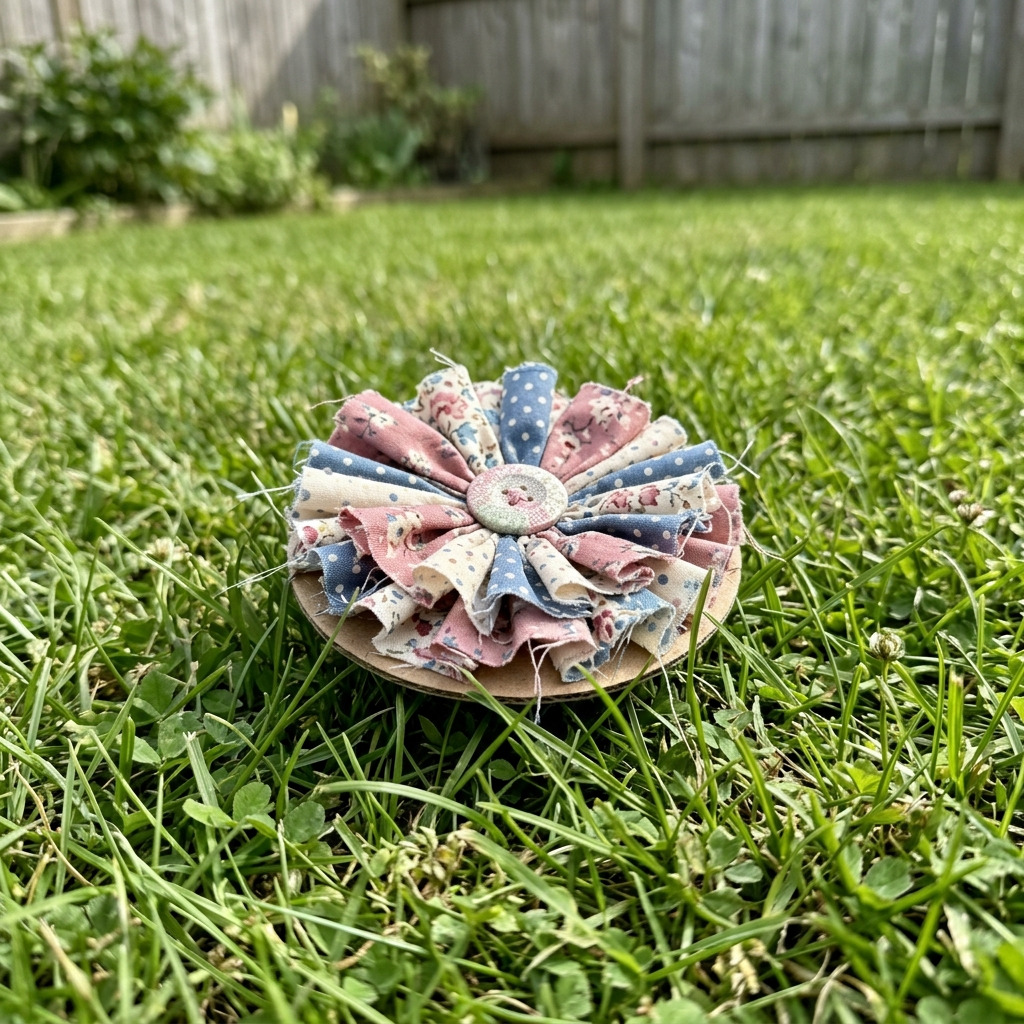
This project will guide you in creating a decorative rosette ribbon using fabric scraps and cardboard. The finished rosette can embellish gifts, be used as a hair accessory, or serve as a charming decor piece.
Project at a Glance
- Time required: 1 hour (active working time), 1 hour 10 minutes (total elapsed time)
- Difficulty level: Beginner; requires basic sewing and gluing skills
- Estimated cost: $5 to $15, depending on fabric choice and availability of tools
- Finished dimensions: Approximately 4 inches in diameter and 1 to 1.5 inches in height
- Yield: One rosette ribbon
HERO IMAGE PLACEHOLDER
[Descriptive image caption of the finished project]
Materials and Tools
Materials
- Fabric scraps: 1/4 yard of cotton fabric in your choice of colors and patterns (e.g., floral, polka dot)
- Cardboard: 1 piece, 6 x 6 inches
- Hot glue sticks: 5–6 sticks (for use with hot glue gun)
- Scissors: 1 pair
- Needle and thread: Color-matching thread for fabric
- Button or embellishment: 1 decorative button (1 inch in diameter) or other embellishments, such as beads or rhinestones
- Optional: Fabric stiffener (for added durability)
Tools
- Hot glue gun
- Scissors
- Needle and thread
- Ruler: 12-inch for measuring
- Pencil: For marking
- Safety equipment: None required, but consider wearing eye protection when using scissors
Instructions
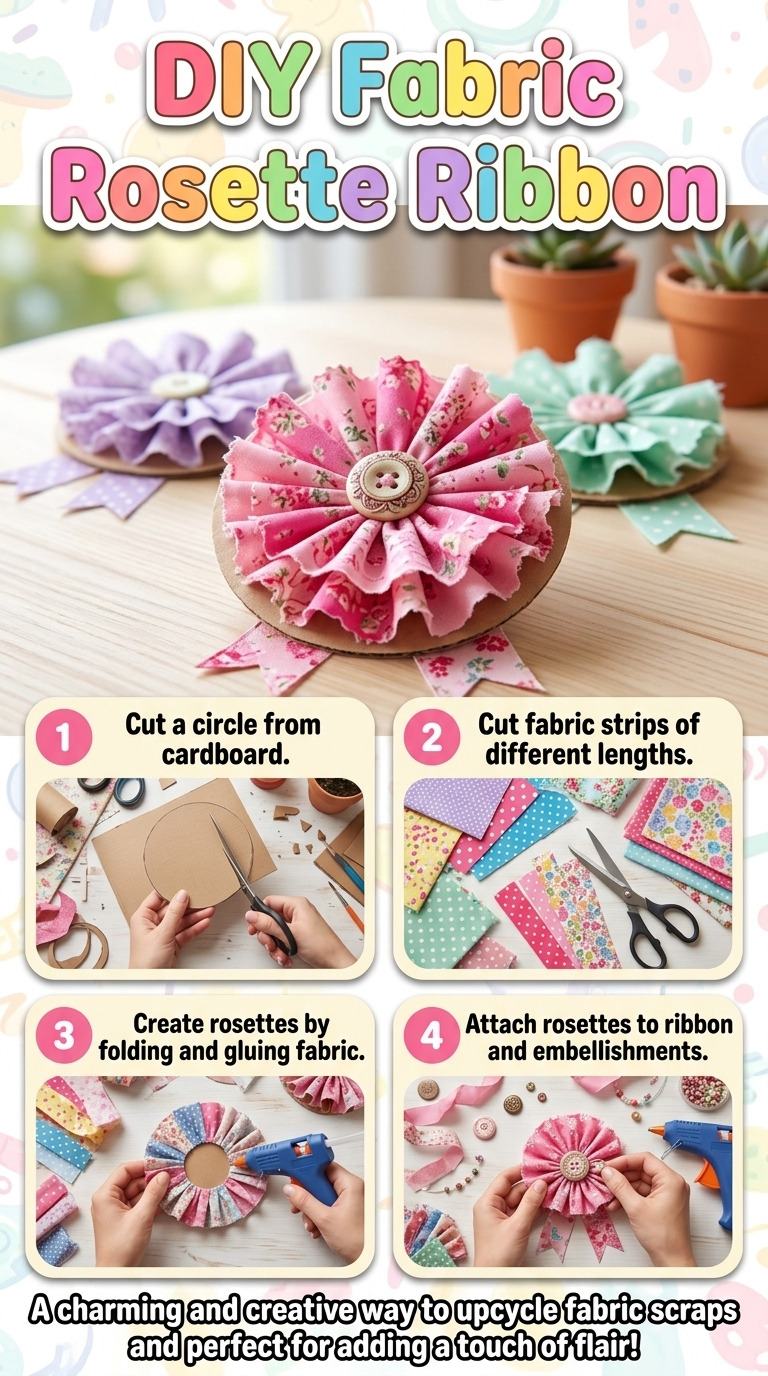
- Prepare Cardboard Base: – Using the ruler and pencil, mark a 4-inch circle on your cardboard. Cut out the circle with scissors and set it aside. The circle should be smooth and free from rough edges.
- Prepare Fabric Strips: – Cut 8 to 10 strips of fabric, each measuring 2 inches wide and at least 12 inches long. For a more dynamic rosette, consider using different fabric patterns and colors.
- Pinch and Fold Fabric Strips: – Take one fabric strip, fold it in half lengthwise with wrong sides together. Use the needle and thread to make a basting stitch (a simple running stitch) along the open edge. – Gather the fabric by pulling the thread tight and secure it with a knot. This will create a loop of fabric that will form part of the rosette.
- Attach Strips to Cardboard Base: – Begin hot gluing the gathered fabric strips to the edge of the cardboard circle. Arrange them in a circular manner, overlapping slightly for a fuller effect. – Repeat this step until the entire cardboard base is covered with fabric ruffles. Allow the glue to set for about 10 minutes so that the fabric adheres properly.
- Add Center Embellishment: – Choose a decorative button or other embellishment. Apply a generous amount of hot glue to the center of the rosette and press the button into place. Hold it for a few seconds to allow it to adhere properly.
- Final Assembly: – If desired, apply fabric stiffener lightly to the finished rosette to maintain its shape. Follow the manufacturer's instructions on the stiffener and allow it to dry completely.
- Trim Excess Fabric (If Needed): – If any fabric strands extend significantly longer than the rosette, carefully trim them with scissors, ensuring a clean and finished look.
Measurements & Dimensions
- Final dimensions of the finished item: Approximately 4 inches in diameter and 1 to 1.5 inches in height.
- Cardboard circle: 4 inches in diameter.
- Fabric strips: 2 inches wide by 12 inches long.
Timing Information
- Estimated active working time: 1 hour.
- Drying/setting time: 10 minutes for gluing, optional drying time for fabric stiffener is based on product instructions.
- Total time: 1 hour 10 minutes.
Variations & Notes
- Consider pinking the (cutting technique that creates a zigzag edge) edges of your fabric strips to prevent fraying and create a decorative edge.
- Common mistakes to avoid include over-gathering the fabric strips, as this can result in a bulky rosette that loses its form.
- Experiment with various sizes of fabric strips or different types of embellishments, such as felt flowers or sequins, for unique designs.
- Care instructions: Spot clean only; keep away from direct sunlight to prevent fading. Store in a cool, dry place.
Troubleshooting and FAQ
Troubleshooting
- The fabric strips are not adhering to the cardboard. Cause: The hot glue may not have been heated sufficiently. Correction: Ensure the hot glue gun is adequately heated before use, and apply a sufficient amount of glue.
- The rosette appears flat instead of fluffy. Cause: Not enough fabric strips were used, or they were not gathered correctly. Correction: Add additional fabric strips or adjust the gathering technique to create more ruffles.
- Fabric strips are fraying. Cause: The edges of the fabric strips were not finished. Correction: Pinking or sealing the edges before assembly can help prevent fraying.
- The embellishment is not staying in place. Cause: Not enough glue was applied or the embellishment is too heavy. Correction: Remove the embellishment, apply more glue, and hold it in place longer.
Frequently Asked Questions
- Can I use other types of fabric? Yes, but cotton fabric is preferred for its ease of handling. Heavier fabrics may require stronger glue or adjustments to the technique.
- How can I scale the rosette to a different size? To scale the rosette up or down, adjust the diameter of the cardboard base and the width and length of the fabric strips proportionately.
- What type of glue is best? Hot glue is recommended for its quick setting time and strong bond. Other craft adhesives may also work but may require longer drying times.
- How do I store the finished rosette? Keep the rosette in a cool, dry place, ideally in a box or drawer to avoid crushing it.
Save This Guide
Save or pin this guide to Pinterest for easy reference while you build. It includes the cut list, exact measurements, curing times, and troubleshooting entries. Corrections, measured results, or substitutions that worked for you are welcome to help keep the guide accurate.
Leave a Reply