
Project Overview
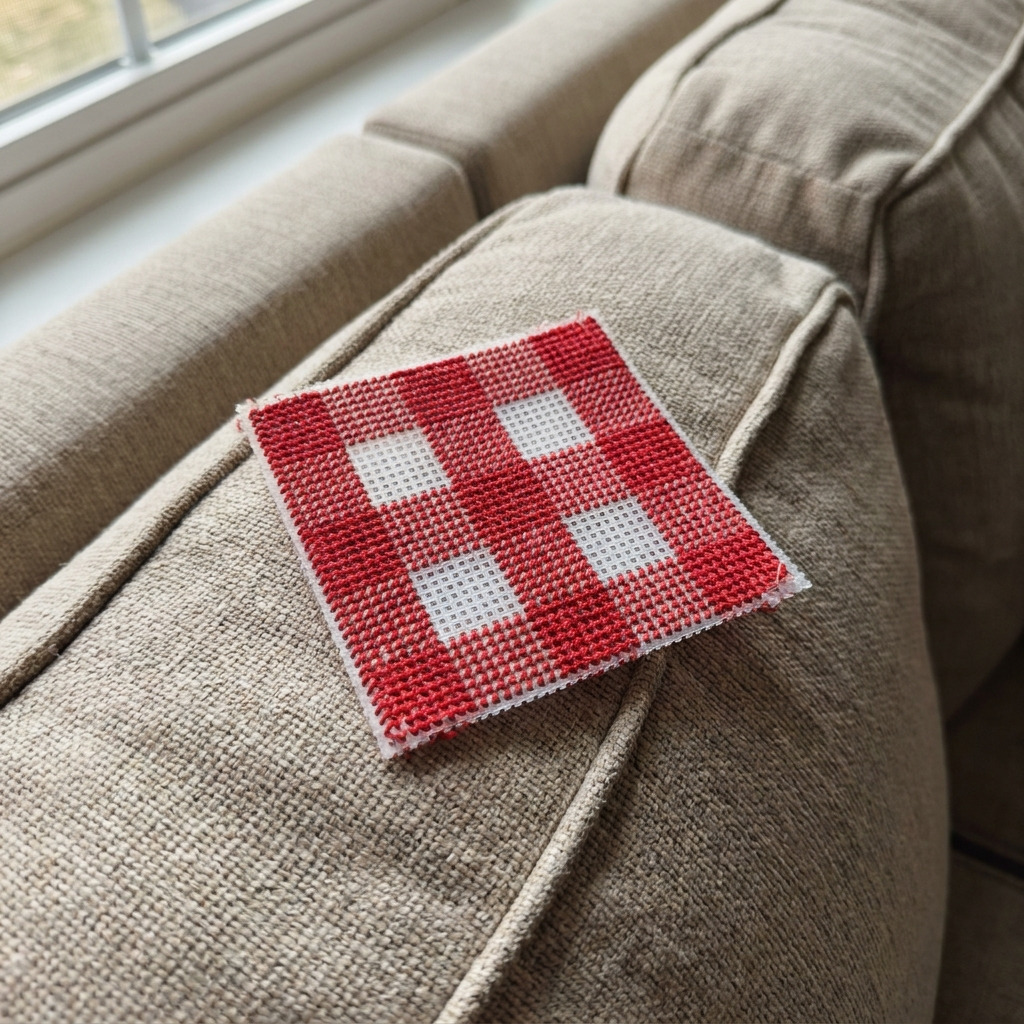
This project involves creating a gingham-patterned coaster using needlepoint techniques on plastic canvas. The finished item is a colorful, durable coaster perfect for protecting surfaces from hot and cold beverages.
Project at a Glance
- Time required: 2-3 hours active working time; approximately 3-5 hours total elapsed time
- Difficulty level: Beginner, specifically focused on basic needlepoint techniques
- Estimated cost: $10 to $20, depending on material choices and existing tool availability
- Finished dimensions: 4 inches x 4 inches (10 cm x 10 cm)
- Yield: One coaster per project
HERO IMAGE PLACEHOLDER
[Descriptive image caption of the finished gingham coaster]
Materials and Tools
Materials
- Plastic Canvas: 7-count, one sheet measuring 10 inches x 10 inches, clear or white
- Embroidery Floss: 4 colors (red, white, green, and blue), 2 skeins of each color (approximately 8 meters per skein)
- Needle: Tapestry needle, size 18
- Scissors: Sharp fabric scissors
- Finishing Guide: Fabric stiffener or thin fabric for backing (optional for finishing)
- Optional Materials:
- Felt fabric for backing: 4 inches x 4 inches
- Fray check: to prevent unraveling of edges
Tools
- Workspace Setup: Flat, clean table or desk
- Surface Protection: Craft mat, cardboard, or cloth to protect the surface
- Cutting Tools: Sharp scissors for trimming the plastic canvas
- Safety Equipment: Safety glasses (optional)
Instructions
Preparing the Plastic Canvas
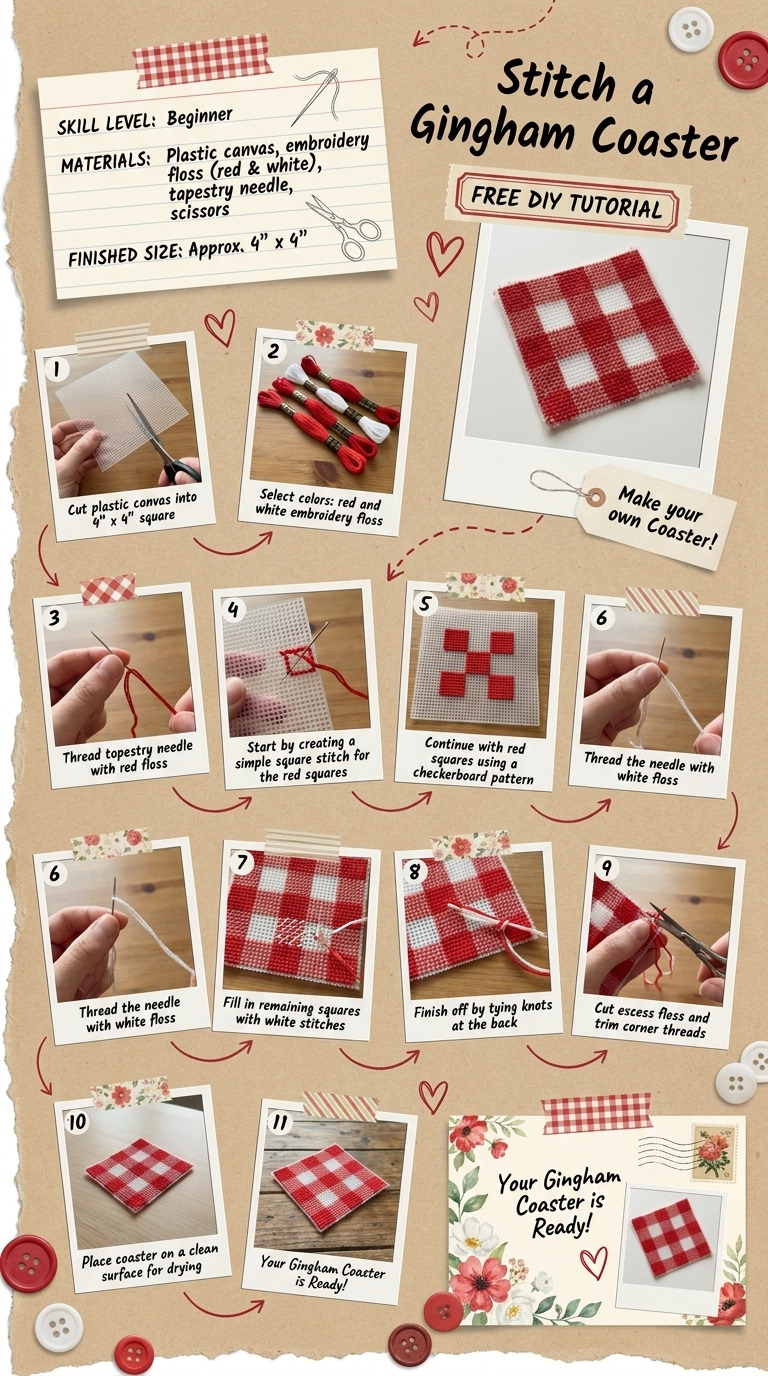
Step 1: Cut the Canvas
Cut a 4-inch x 4-inch square from the plastic canvas. Use scissors to cut cleanly along the mesh to avoid fraying. The coaster should be completely square and symmetrical.
Designing the Gingham Pattern
Step 2: Plan Your Pattern
On a piece of paper, sketch a simple gingham pattern: a checkerboard of alternating squares in red and white, creating a grid of 4 rows and 4 columns. Each square should measure 1 inch x 1 inch.
Stitching the Coaster
Step 3: Thread the Needle
Cut a length of embroidery floss about 24 inches long. Separate 2 strands of the floss from the 6-strand skein and thread it through the tapestry needle. Knot the end securely.
Step 4: Begin Stitching
Start in one corner of the plastic canvas. Insert the needle from the back of the canvas to the front at the first hole. Pull through completely.
Step 5: Stitching the First Color
For the first square (top left), use the red floss.
- Insert the needle into adjacent holes to form a half-cross stitch (a stitch made by going down one hole and up the adjacent hole in the checkerboard):
- Top left hole to bottom right hole, back down into bottom left hole, and back up into top right hole. Repeat until the first square is filled. (Total of 2 stitches).
Step 6: Continue Filling Colors
Follow the pattern on your sketch:
- Alternate between red and white for the first row. Use white for the second square.
- For the second row, start with white, then red, and continue this pattern for all rows.
- Repeat this process until all 16 squares are filled in the gingham design.
Finishing
Step 7: Securing the Threads
When a square is complete, pull the needle to the back and tie off with a small knot. Ensure there are no loose ends and everything is secure.
Step 8: Backing (optional)
Cut a piece of felt fabric to cover the back of the coaster (4 inches x 4 inches). Use fabric glue to adhere the felt to the back, pressing it down gently. Allow to dry based on glue instructions (usually around 30 minutes).
Step 9: Sealing Edges with Fray Check (optional)
Apply fray check to the edges of the plastic canvas to prevent any fraying. Allow it to dry according to the instructions (about 5-10 minutes).
Assembly & Finishing
The coaster is complete once all stitching is done and, if used, the felt backing is secure. If desired, cover the entire surface with a coat of fabric stiffener to add rigidity, allowing it to dry completely (approximately 1-2 hours).
Measurements & Dimensions
- Finished Dimensions of Coaster: 4 inches x 4 inches
- Each square size: 1 inch x 1 inch
Timing Information
- Estimated Active Working Time: 2-3 hours
- Drying/Curing Time (if using backing or stiffener): 1-2 hours (per instructions)
- Total Time: Approximately 3-5 hours (includes stitching and drying)
Troubleshooting and FAQ
Troubleshooting
The stitches appear uneven. Cause: Inconsistent tension when pulling the thread. Correction: Maintain even tension while stitching and adjust your grip as needed.
There are gaps between the stitches. Cause: Skipped holes or inconsistent stitch placement. Correction: Double-check the design and fill in any gaps, ensuring to position the needle accurately.
The edges of the plastic canvas fray. Cause: Lack of edge treatment. Correction: Apply fray check to the edges before starting to avoid fraying during work.
Frequently Asked Questions
Can I use different colors in the gingham pattern? Yes, you can substitute any colors; just ensure you maintain the alternating color pattern.
What if I don't have embroidery floss? You can use standard sewing thread instead, though it may change the overall look and texture slightly.
How do I wash the coaster? Gently hand wash in cold water and air dry. Do not machine wash to avoid damage.
Save This Guide
Save this guide to Pinterest for easy access during your build, especially the cut list and exact measurements. Share corrections or substitutions that worked for you to help keep this guide accurate.
Leave a Reply