
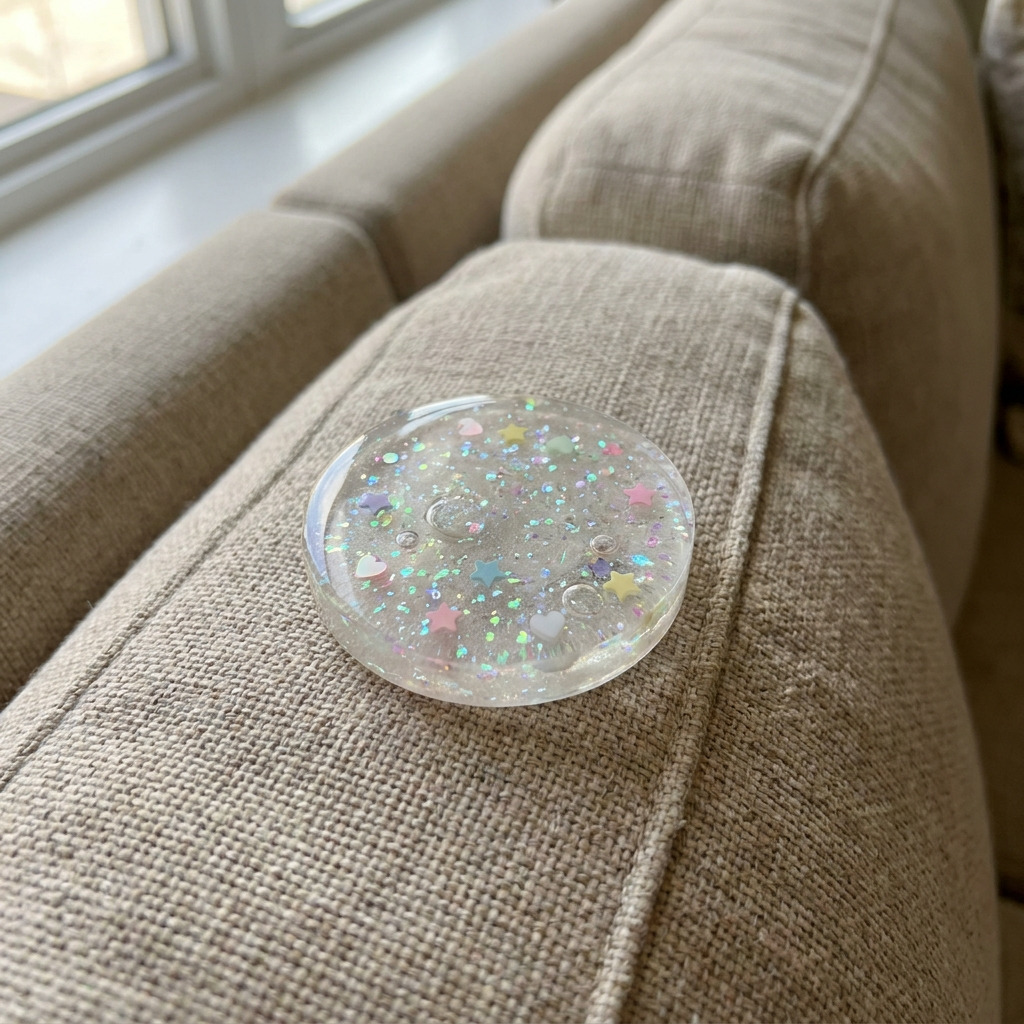
Project Overview
This project guides you through making a custom resin phone grip embedded with glitter and tiny charms, perfect for personalizing your device. The finished product is not only functional but also visually appealing.
Project at a Glance
- Time required:
- Active working time: 30 to 45 minutes
- Total elapsed time: 24 to 48.5 hours
- Difficulty level: Intermediate, as precise mixing and curing of resin are required
- Estimated cost: $20 to $40, depending on the selection of materials and whether tools are already owned
- Finished dimensions: Approximately 3 inches in diameter and 0.25 inches thick
- Yield: One resin phone grip
HERO IMAGE PLACEHOLDER
[Descriptive image caption of the finished project]
Materials and Tools
Materials
- Epoxy Resin: 8 oz clear epoxy resin kit, commonly a 1:1 mix ratio
- Glitter: 1 oz of fine iridescent glitter, suitable for resin
- Tiny Charms: 5-10 small charms (stars, hearts, mini figurines; material should be resin-safe)
- Silicone Mold: One round mold, 3-inch diameter
- Mixing Cups: 2 disposable 8 oz cups, clear or translucent
- Stir Sticks: 4 craft sticks, for mixing resin
- Alcohol Inks (optional): 2-3 drops, in colors like pink, blue, or purple for tinting
- Base Plate: 3-inch diameter, made from thick cardboard or 1/4 inch acrylic
- Sandpaper: 220 grit, for smoothing edges after demolding
- Sealer: Clear acrylic spray sealer, for protective finishing
Tools
- Safety Equipment: Nitrile gloves, safety goggles, and a mask to avoid inhaling fumes
- Digital Scale: For accurately measuring resin components
- Heat Gun: For eliminating bubbles in poured resin
- Craft Knife: For trimming any excess resin if necessary
- Ruler: For measuring diameters
- Disposable Plastic Table Cover: To protect your work surface from resin spills
Instructions
Step 1: Prepare Your Workspace
Cover your work surface with a disposable plastic table cover and ensure it is well-ventilated to disperse any fumes generated during mixing.
Step 2: Cut the Base Plate
Using a ruler and craft knife, cut the base plate from thick cardboard or acrylic into a 3-inch diameter circle. Ensure the edges are smooth for a seamless finish with the grip.
Step 3: Clean the Mold
Pre-treat the silicone mold by cleaning it thoroughly with rubbing alcohol to remove any dust or residues. This ensures a clean release of the cured resin.
Step 4: Measure and Mix Resin
While wearing nitrile gloves, measure out 4 oz of epoxy resin and 4 oz of hardener using the digital scale. Ensure the volume is accurate.
Step 5: Stir the Resin
Pour both components of epoxy resin into one of the mixing cups. Stir the mixture slowly with a craft stick for about 3 to 5 minutes until it is clear and uniform, ensuring to avoid trapping bubbles.
Step 6: Add Glitter
Add approximately 1 oz of fine iridescent glitter to the resin mixture. Stir well to ensure an even distribution of the glitter throughout the resin.
Step 7: Incorporate Color (Optional)
If desired, add 2 to 3 drops of alcohol ink to your resin mixture. Use a craft stick to stir gently, ensuring not to overmix; the visibility of the glitter should not be obscured.
Step 8: Pour the Resin
Carefully pour the mixed resin into the silicone mold, stopping just below the rim to allow for expansion. Confirm that the mixture fills the mold to avoid any overflow.
Step 9: Add Tiny Charms
While the resin is still wet, gently place the tiny charms into the mold, ensuring an even distribution. Adjust their positioning with the craft stick if necessary, ensuring they are adequately submerged in the resin.
Step 10: Eliminate Bubbles
Utilize the heat gun on a low setting to pass over the resin surface, effectively dispersing any bubbles that have formed. Maintain a consistent distance of 6 inches from the surface, moving the gun continuously to prevent overheating any specific area.
Step 11: Cure the Resin
Set the mold in a safe, undisturbed environment and allow the resin to cure for 24 to 48 hours as per resin kit instructions. The end result should be solid and not tacky.
Step 12: Demold the Phone Grip
Once fully cured, carefully flex the silicone mold to release the resin piece. The completed phone grip should display a smooth surface with visible glitter and charms embedded.
Step 13: Sand Edges (if necessary)
If there are any sharp or uneven edges, gently sand them using 220 grit sandpaper. Ensure you wear safety goggles and a mask while sanding to avoid inhalation of dust.
Step 14: Seal the Surface (Optional)
To improve durability and shine, spray the surface of the finished phone grip with a clear acrylic spray sealer. Allow it to dry for at least 30 minutes in a well-ventilated area.
Step 15: Attach the Grip
Use a strong double-sided adhesive tape or suitable glue for plastic to attach your new phone grip onto the back of your phone. Position it securely and press firmly for proper adhesion.
Troubleshooting and FAQ
Troubleshooting
- The resin is cloudy after curing.
- This could be due to insufficient mixing or moisture in the mold. Always mix thoroughly for 3 to 5 minutes and ensure the mold is dry before pouring.
- Tiny charms have floated to the surface.
- This is usually due to pouring too quickly or using too much resin. Allow the resin to partially set before inserting charms, or ensure you distribute them evenly right after pouring.
- Bubbles are present in the cured resin.
- Insufficient stirring or pouring too quickly can cause bubbles. Use the heat gun effectively, and ensure to stir slowly when mixing.
- The grip is tacky to the touch.
- Insufficient curing time can lead to a tacky finish. Ensure to adhere to the full curing time recommended on your resin kit.
Frequently Asked Questions
- Can I use different types of resin?
- Yes, but ensure it is specifically designed for casting applications. Different resins may have varying cure times and mixing ratios.
- Can I make larger or multiple grips at once?
- Yes, simply scale up the measurements based on the size of the molds you are using. Adjust the resin quantities according to the new mold sizes.
- What if I don’t have alcohol inks?
- Other colorants like resin dyes or even certain food colorings can be used, but ensure they are compatible with epoxy resin to avoid adverse effects on curing.
- How do I clean my resin tools?
- Use rubbing alcohol to clean resin from tools while still wet. Once cured, scraping with a craft knife is usually required to remove any hardened resin.
Save This Guide
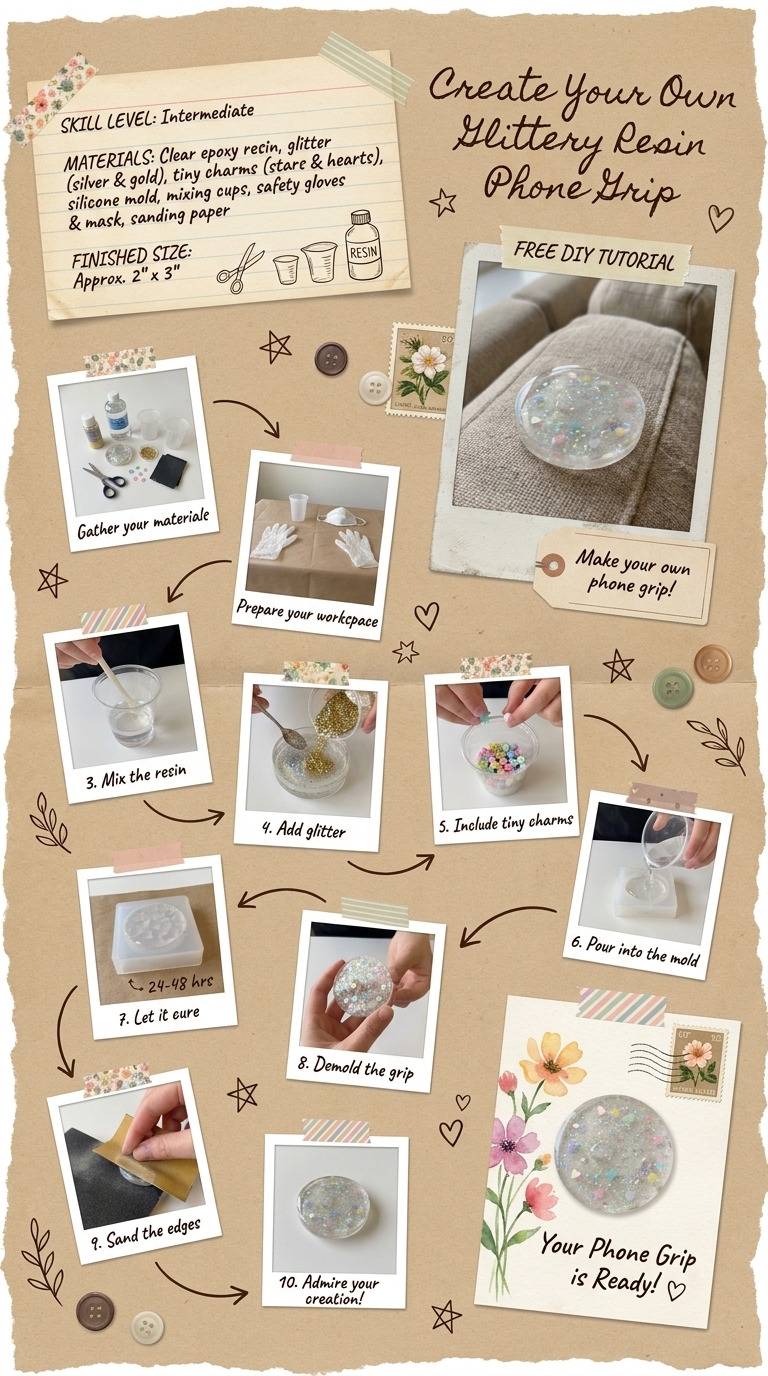
Save or pin this guide to Pinterest to easily access the exact measurements and timing required for this resin phone grip project while you build. Your direct feedback for corrections or additional tips based on your experience can help keep this guide accurate.
Leave a Reply