
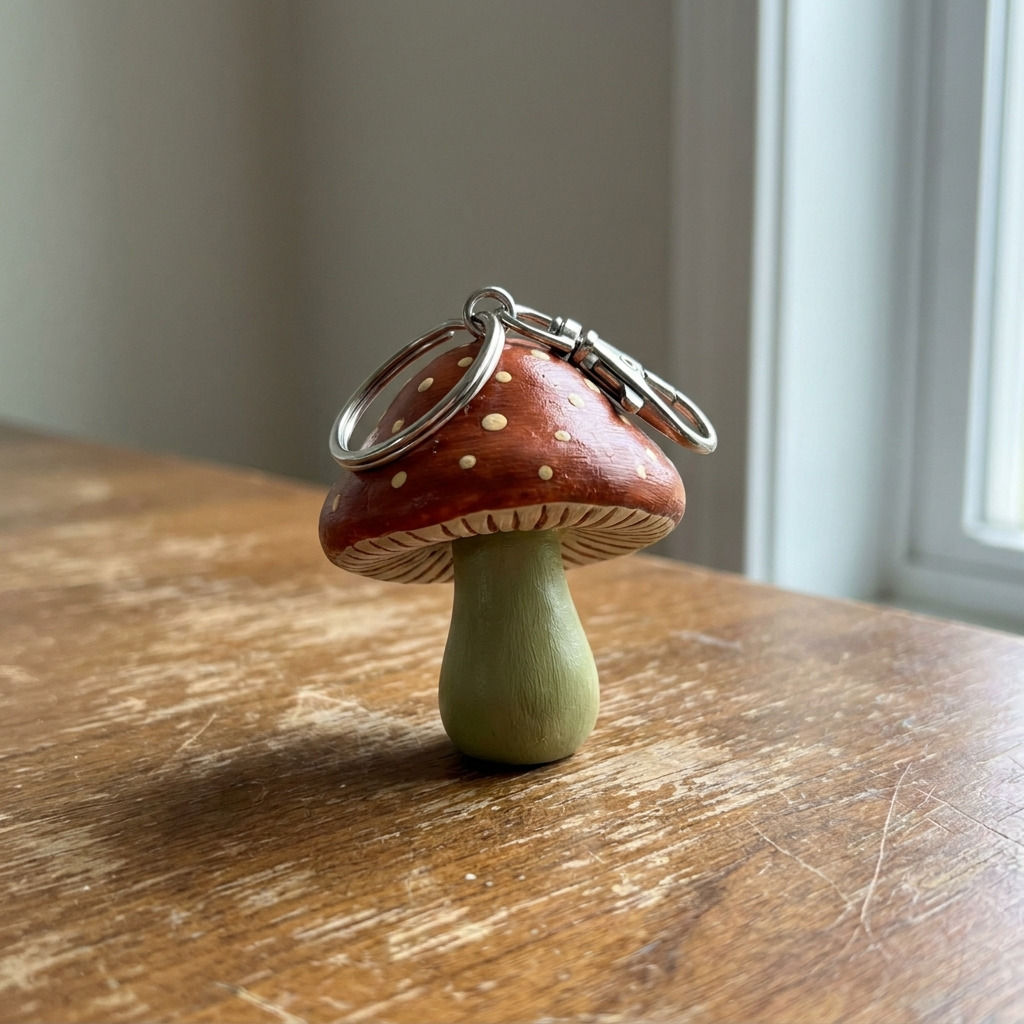
This project involves creating a charming mushroom keychain out of air dry clay, painted in earthy tones for a natural and whimsical look. The finished item will be both functional and decorative, serving as a great accessory for bags or keys.
Project at a Glance
- Time required:
- Active working time: 1.5 hours
- Total elapsed time: 26 to 49 hours (includes drying time)
- Difficulty level: Beginner, requiring basic sculpting and painting skills
- Estimated cost: $10 to $20, depending on material choices and whether tools are already owned
- Finished dimensions: Approximately 3 inches tall and 2 inches wide
- Yield: 1 mushroom keychain charm
HERO IMAGE PLACEHOLDER
[A charming mushroom keychain charm made from air dry clay, painted in earthy colors.]
Materials and Tools
Materials
- Air dry clay: 1 pack (approximately 1 lb, white or terracotta)
- Acrylic paint:
- Burnt sienna (brown) – 1 small bottle (2 oz)
- Olive green – 1 small bottle (2 oz)
- Cream – 1 small bottle (2 oz)
- Keychain hardware: 1 keychain ring (1 inch diameter) and 1 lobster clasp (1 inch)
- Super glue or strong craft adhesive: 1 small tube
- Satin varnish (optional): 1 small bottle for finishing
Tools
- Rolling pin: Standard size, for flattening clay
- Craft knife: For cutting and shaping the clay
- Small paintbrushes: 1 fine tip for details and 1 flat for larger surfaces
- Toothpick: For detailing
- Clay sculpting tools (optional): For finer shaping
- Cutting mat: To protect your work surface
- Pencil or pen: For sketching shapes on clay
- Safety equipment: Eye protection when cutting clay (if using a craft knife)
Instructions
Stage 1: Prepare the Clay
- Condition the clay: Take a portion of air dry clay (about 4 oz) and knead it in your hands until it is soft and pliable. The clay should feel smooth without cracks and easily hold shape.
- Roll into a ball: Shape the kneaded clay into a small ball roughly 2 inches in diameter for the mushroom cap.
Stage 2: Shape the Mushroom Cap
- Flatten the cap: Use a rolling pin to flatten the ball to about ½ inch in height. Ensure that the edges are rounded to create a smooth mushroom cap shape. The cap should be wider than it is tall.
- Create the gills: Use a toothpick to draw small lines underneath the cap to mimic mushroom gills. Space the lines approximately 1/8 inch apart, creating them around the entire perimeter of the cap.
Stage 3: Shape the Mushroom Stem
- Form the stem: Take another piece of clay (approximately 2 oz), roll it into a cylinder roughly 1 inch tall and ¾ inch wide. The stem should have a smooth surface.
- Attach the stem: Gently press the stem onto the center underside of the cap, ensuring it is well secured. Blend the clay with your fingers to create a seamless join. The bond should feel firm to the touch.
Stage 4: Add Details
- Add texture to the stem: Use the toothpick or a clay sculpting tool to create vertical lines along the stem for added texture. The lines should be evenly spaced and cover the full length of the stem.
- Create any additional features: If desired, use any leftover clay to create small dots or shapes to decorate the cap, ensuring they adhere well to the surface.
Stage 5: Dry the Mushroom
- Let it dry: Place the mushroom charm on a piece of parchment paper to dry for 24-48 hours at room temperature. Ensure it is fully dry before proceeding to painting.
Stage 6: Paint the Charm
- Base coat: Once the mushroom is thoroughly dry, apply a coat of burnt sienna to the cap and olive green to the stem using a paintbrush. Allow it to dry for approximately 30 minutes.
- Add highlights: After the base coat has dried completely, carefully apply cream paint to the gills and any decorative features on the cap. Allow it to dry completely, at least an additional 30 minutes.
Stage 7: Assemble the Keychain
- Attach keychain hardware: Once the paint is dry, use super glue to attach the lobster clasp to the top of the mushroom cap. Ensure the clasp is secure and allow the glue to dry for at least 30 minutes.
- Finish with varnish (optional): If desired, apply a layer of satin varnish to the entire mushroom for added durability and glossiness. Let it dry for an hour before using.
Troubleshooting and FAQ
Troubleshooting
The clay is too sticky or soft. The air dry clay may not have been sufficiently conditioned. Add small amounts of cornstarch to help firm up the clay before shaping.
The mushroom does not hold its shape. Ensure that the clay is not overworked during the shaping process. Consider allowing it to rest for a few minutes before continuing.
The paint is getting smudged after applying. Make sure each layer of paint is completely dry before adding additional coats. If smudging occurs, carefully wipe the area with a damp cloth and allow to dry before repainting.
The mushroom cap has cracks after drying. The clay may have dried too quickly in a warm area. To avoid this, store the clay projects in a humid environment. For cracks, apply a small amount of wet clay to fill in and smooth over.
The keychain clasp is loose. Ensure ample super glue was applied when securing the clasp. If not secure, remove and reapply more glue, allowing it to cure thoroughly at room temperature.
Frequently Asked Questions
Can I use other colors of paint? Yes, you can use any acrylic paint colors you prefer. Just ensure that the paint is compatible with air dry clay for best results.
How do I store the air dry clay when not using? Keep air dry clay airtight by wrapping it in plastic wrap and placing it in a sealable plastic bag. Store in a cool, dry place to prevent it from drying out.
Can I make multiple mushrooms at once? Yes, simply scale up the amount of clay used to create as many mushrooms as desired, adjusting the shaping process accordingly.
What if I don’t have a rolling pin? You can use any flat, cylindrical object, like a bottle, to flatten the clay. Ensure the surface is clean to avoid contamination.
Save This Guide
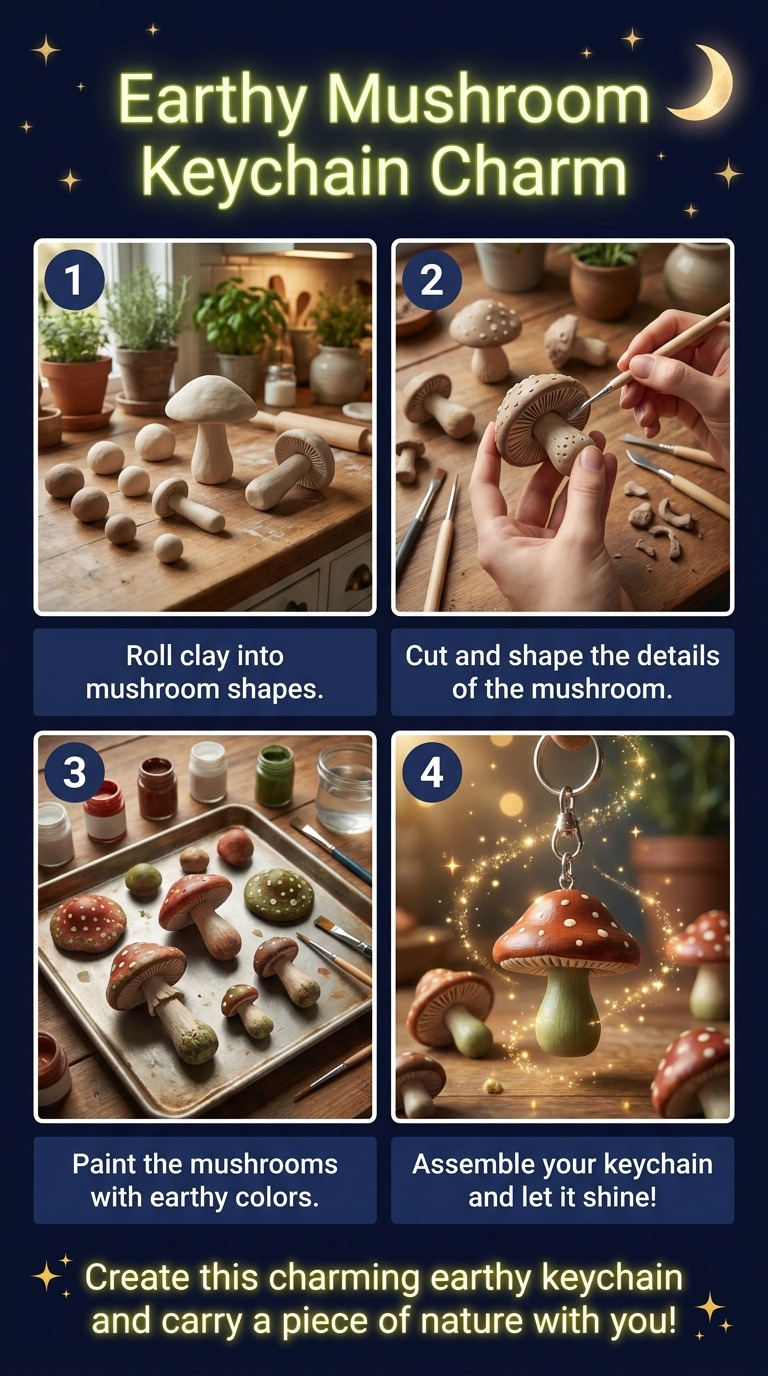
Save or pin this guide to Pinterest for easy reference while you create your air dry clay mushroom keychain charm. It contains all the essential measurements, drying times, and troubleshooting tips to make your crafting process smooth. Please share any corrections, measured results, or successful substitutions to improve the accuracy of this guide.
Leave a Reply