
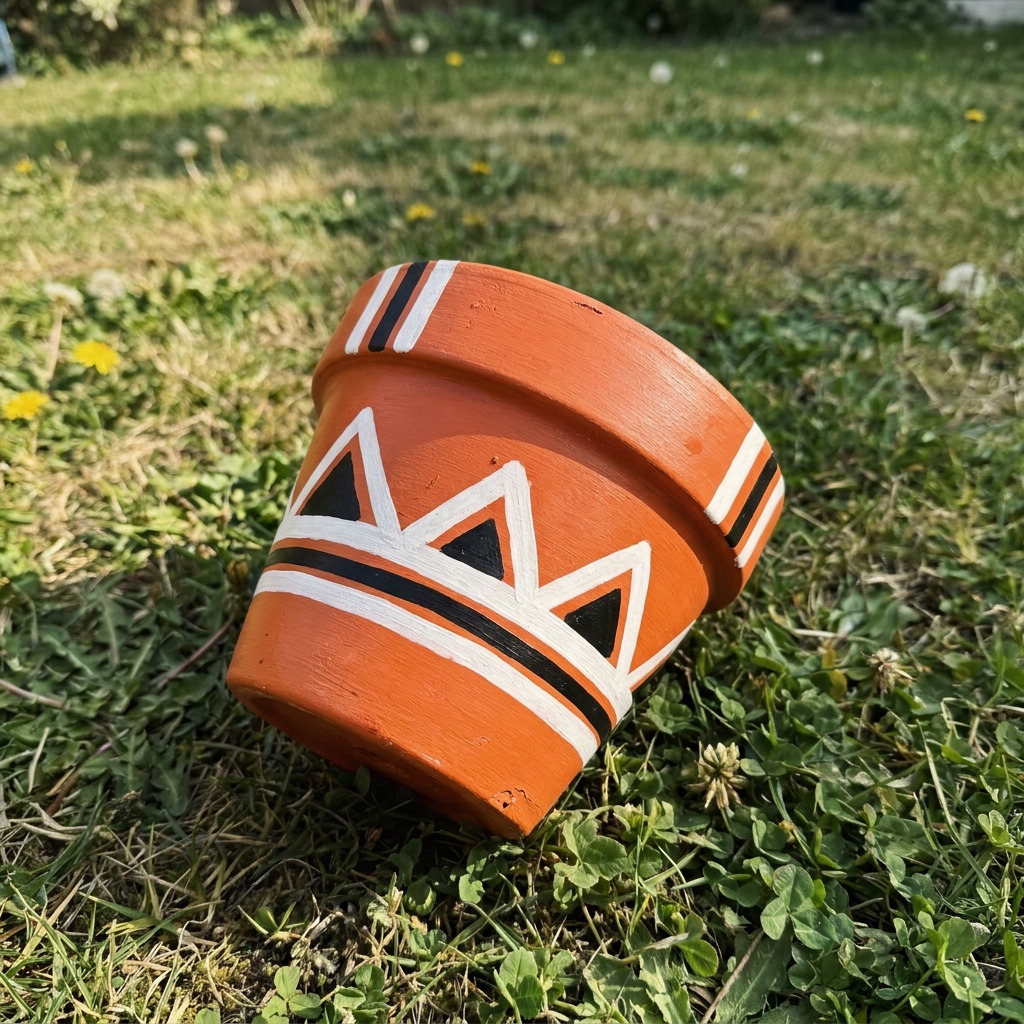
Project Overview
This project provides detailed instructions for painting a terracotta plant pot with a distinctive Berber geometric pattern, enhancing its aesthetic appeal while serving as a practical plant container.
Project at a Glance
- Time required:
- Active working time: 2–3 hours
- Total elapsed time: Approximately 26 hours (including all drying and curing)
- Difficulty level: Easy; ability to create geometric shapes with painter's tape
- Estimated cost: $15 to $30, depending on the choice of colors and whether tools are already owned
- Finished dimensions: 6 inches diameter, 5.5 inches height
- Yield: 1 painted terracotta plant pot
[Descriptive image caption of the finished project]
Materials and Tools
Materials
- Terracotta plant pot: 1 x 6-inch diameter (unglazed)
- Acrylic paint:
- White (1 fl oz)
- Black (1 fl oz)
- Bright terracotta/orange color of your choice (1 fl oz)
- Paintbrushes:
- Flat brush (1-inch wide)
- Fine-tip brush (1/4-inch wide)
- Painter's tape: 1 roll (0.5 inches wide)
- Water container: 1 (for cleaning brushes)
- Paper towels: 2 sheets (for drying brushes and hands)
- Sealant: Clear acrylic sealer spray (matte finish)
Tools
- Paint palette: 1 (for mixing paint)
- Ruler or measuring tape: 1 (for measuring spaces)
- Pencil: 1 (for sketching design)
- Craft knife: 1 (optional, for trimming tape edges)
- Gloves: 1 pair (optional, for paint handling)
- Drop cloth/newspaper: 1 (for protecting workspace)
Instructions
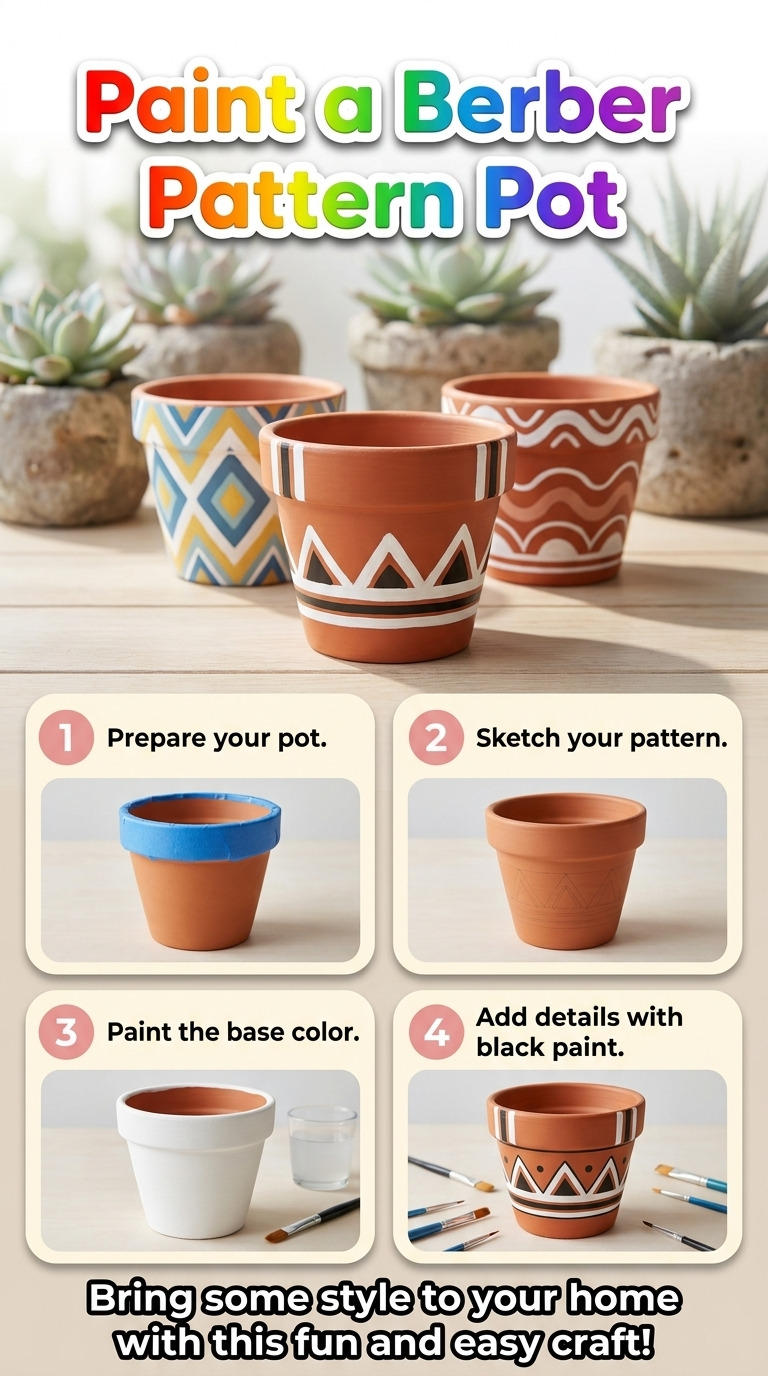
Step 1: Workspace Setup
Choose a well-ventilated area and cover your work surface with a drop cloth or newspaper to prevent paint spills. The workspace should be clean and free of any debris.
Step 2: Clean the Pot
Wipe down the terracotta pot with a damp cloth to ensure it is free of dust and debris. The pot should feel smooth and clean to the touch.
Step 3: Design Template
Sketch a simple Berber pattern on paper, featuring geometric shapes like zigzags and diamonds. Determine specific dimensions for your shapes, as they should fit within a range of 1 inch to 2 inches for visual balance.
Step 4: Base Color Application
Using the flat brush, paint the entire pot with your chosen bright terracotta color. Apply a thicker coat for even coverage, ensuring that the entire surface is covered uniformly.
- Drying time: Let it dry for 1 hour.
Step 5: Taping for the Pattern
Once the base color is dry, use painter's tape to create the geometric Berber pattern. Press the tape down firmly to prevent paint from seeping underneath. Design your tape layout according to your drawn design.
Step 6: Painting the Pattern
With the fine-tip brush, carefully paint the sections created by the tape using white paint. Apply the paint using even strokes for a clean result.
- Let the white paint dry for 30 minutes.
- After drying, apply black paint to the remaining taped areas, creating additional contrast in the design.
Step 7: Removing Tape
Carefully peel off the painter's tape while the paint is still slightly tacky to avoid chipping. This should be done within 1 hour of painting the last color to achieve clean edges.
Step 8: Final Touches
If any areas of the background color need touch-ups, use the flat brush to correct these edges. Ensure there are no visible inconsistencies in the design.
- Let the entire painted pot dry for at least 2 hours.
Step 9: Sealing the Pot
After the paint is completely dry, take the clear acrylic sealer and spray 2 to 3 light coats over the pot to protect the design. Allow for a 15-minute drying time between each coat.
- Final cure time for the sealer: Recommended to be 24 hours.
Assembly & Finishing
The painted pot is a single completed piece, with no structural assembly required. Keep the pot upright during drying to avoid smudging.
Measurements & Dimensions
- Final dimensions of the finished pot: 6 inches in diameter and 5.5 inches in height.
- Geometric shapes created: Each shape should fit within a maximum dimension of 1 inch to 2 inches for visual balance.
Timing Information
- Estimated active working time: 2–3 hours (includes painting and drying).
- Drying/curing time: 24 hours for the sealer to cure completely.
- Total time: Approximately 26 hours including all construction and drying processes.
Variations & Notes
- For intricate patterns, consider incorporating more colors or layering of designs.
- Avoid applying excessive paint at once to prevent drips and runs in the design.
- Store the finished pot in a shaded area when outdoors or keep indoors to preserve the paint quality.
- To clean the inside of the pot, wipe with a damp cloth; avoid soaking as it may weaken the paint.
Troubleshooting and FAQ
Troubleshooting
The paint is peeling off. This is likely due to not allowing ample drying time. Ensure each layer of paint is fully dry before applying the next.
The edges of the pattern are not crisp. This may happen if the tape was not pressed down firmly. Ensure tape edges are secure before painting to prevent bleeding.
The pot has drips or runs. This indicates too much paint was applied. Use lighter, even strokes and multiple thin coats instead of a single thick coat.
The color is uneven. This may result from varied paint application. Use consistent brush pressure and coverage while painting.
The design looks smudged. This often occurs if the tape is removed too late. Remove the tape while the paint is still slightly tacky for the best results.
The sealer is not drying properly. Humidity can affect drying times. Check the environment to ensure it is well-ventilated and at room temperature.
Frequently Asked Questions
Can I use different paint types? While acrylic paint is recommended for its adhesion and durability, other types may be used, but results may vary. Always test a small area first.
What if I want to paint a bigger pot? You can apply this process to larger pots by scaling up the amount of paint and adjusting the design accordingly.
Will the plant pot be waterproof? The pot becomes water-resistant but is not fully waterproof. Ensure proper drainage for real plants to avoid damage.
What maintenance is needed for the painted pot? Wipe the exterior with a damp cloth for cleaning. Avoid soaking to preserve the paint's integrity.
How do I store leftover paint? Seal the paint containers tightly and store them in a cool, dry place away from direct sunlight. Use within six months for best results.
Save This Guide
Save or pin this guide to Pinterest so you can easily reference the cut list, exact measurements, and troubleshooting entries while you build. Share any corrections, measured results, or substitutions that worked for you so the guide can be kept accurate.
Leave a Reply