
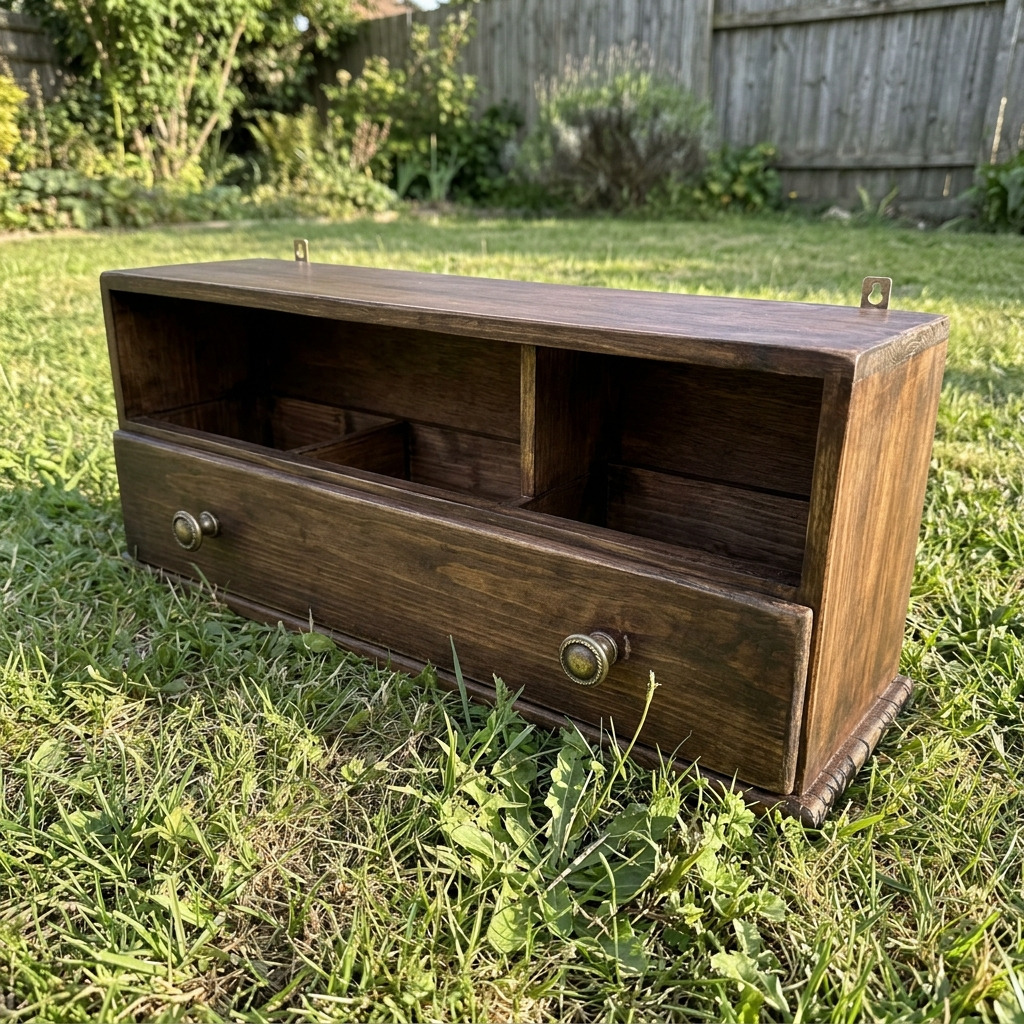
Project Overview
This project guides you through transforming an old wooden drawer into a vintage trinket shelf. The finished item is ideal for showcasing small items, keepsakes, or decorative pieces, enhancing any room's charm and character.
Project at a Glance
- Time required: 3 to 4 hours active working time; approximately 1 day total elapsed time (including drying periods)
- Difficulty level: Intermediate; requires skills in drilling and basic woodworking
- Estimated cost: $30 to $60, depending on material choice and existing tools
- Finished dimensions: 24 inches wide x 8 inches deep x 12 inches high
- Yield: One trinket shelf
HERO IMAGE PLACEHOLDER
[Descriptive image caption of the finished vintage trinket shelf]
Materials and Tools
Materials
- Old wooden drawer: 1 piece, approximately 24" x 8" x 4"
- Sandpaper: Medium grit (120) and fine grit (220), 1 sheet each
- Wood screws: 1.25 inches long, 16 pieces
- Wood glue: PVA, 1 small bottle (approximately 30 ml)
- Wood stain: Dark walnut, 1 small can (approximately 1 pint)
- Wood sealer: Clear matte finish, 1 small can (approximately 1 pint)
- Picture hanging brackets: 2 sets (for wall mounting)
- Brass or decorative drawer knobs: 2 pieces for aesthetic embellishing
Optional materials and easy substitutions
- Paint: Use any desired color instead of stain for a solid finish.
- Decorative mural or wallpaper: Use to line the back of the drawer for a unique appearance.
Tools
- Drill: Cordless or electric, equipped with a 1/8 inch drill bit
- Screwdriver: Standard size
- Paintbrush: 1 inch wide for applying stains and sealers
- Clamps: 2 medium size for securing pieces during assembly
- Ruler: 12-inches for accurate measurements
- Cutting mat: For protecting surfaces when cutting or drilling
- Utility knife: For precise cuts if needed
- Dust mask: To prevent inhaling dust during sanding
- Safety goggles: To protect eyes while drilling
Instructions
Step 1: Prepare the Workspace
- Select a well-ventilated area for the project and cover the surface with a drop cloth to prevent damage. Organize tools for easy access.
Step 2: Inspect and Clean the Drawer
- Ensure the old wooden drawer is clean. Sand the entire exterior surface of the drawer first using 120 grit sandpaper, and then finish with 220 grit sandpaper until smooth. Focus on edges and corners to prevent splinters. The drawer should feel smooth to the touch with no rough areas.
Step 3: Add a Backing (Optional)
- If desired, cut a piece of thin plywood to a size of 24 inches wide by 12 inches high. Attach this piece to the back of the drawer using wood glue and screws. Pre-drill holes to avoid splintering the wood.
Step 4: Mount the Shelf Supports
- Measure and mark locations for the shelf supports inside the drawer at 4 inches from the bottom. Pre-drill holes at the marked locations and attach the supports using 1.25 inch wood screws. Use two pieces of wood or L-brackets as supports on each side of the drawer to ensure stability. The supports should be level and securely fastened.
Step 5: Stain the Drawer
- Using a paintbrush, apply a coat of dark walnut wood stain evenly to all exterior surfaces of the drawer. Allow the stain to penetrate for 5 to 10 minutes, and then wipe off excess stain with a clean cloth. The surface should appear rich and consistent in color. Let the stain dry for at least 2 hours.
Step 6: Apply Wood Sealer
- After the stain has dried, apply a clear matte finish wood sealer using a clean brush. Inspect for area saturation and ensure even coverage. Allow this to dry according to the manufacturer's instructions, typically requiring 2 to 4 hours. The finish should appear smooth and protective.
Step 7: Attach Drawer Knobs
- Mark the positions for two drawer knobs on the front of the drawer, ensuring equal spacing. Drill holes for the knobs and secure them according to the manufacturer's instructions. The knobs should be firmly in place and aligned.
Step 8: Install Picture Hanging Brackets
- Using a drill, attach the picture hanging brackets on the back of the drawer, positioning them about 2 inches from the top. Ensure these brackets are level to facilitate proper mounting on the wall.
Step 9: Final Assembly and Finishing
- Inspect that all knobs are affixed, and the supports are secure. If desired, apply a final coat of wood sealer for a protective finish. Ensure the wood surface is fully covered.
Step 10: Personalize the Shelf
- Add decorative items to the shelf to showcase small keepsakes or to personalize it. Items should be stable and evenly distributed.
Troubleshooting and FAQ
Troubleshooting
- The joint will not close flush: This may be due to uneven sanding or misaligned holes. Re-sand the edges and ensure all pre-drilled holes are aligned properly before reassembling.
- Stain color is uneven: This could result from improper application. Ensure the stain is applied evenly, and consider sanding down areas that appear darker before reapplying.
- Knobs are loose after installation: This typically happens if the holes drilled are too large. Use washers to tighten the fit, or fill the holes with wood glue and allow to dry before re-drilling.
- The shelf feels unstable: Ensure that all screws are tightened and that the mounting brackets are securely fastened. Check for any loose supports inside the drawer.
Frequently Asked Questions
- Can I use different materials for the knobs? Yes, using different materials can add character; however, ensure they are compatible with the drawer's overall design to maintain aesthetic appeal.
- What if I want a different finish? You can use paint instead of stain for a different look. Make sure to allow sufficient drying time between coats to achieve an even finish.
- How much weight can the shelf hold? A properly mounted shelf in good condition with supports can safely hold up to 15 pounds. Exceeding this may cause it to become unstable.
- How should I maintain the shelf? Regularly dust the shelf and avoid exposure to moisture. If cleaning is needed, lightly dampen a cloth, avoiding excess water to protect the finish.
Save This Guide
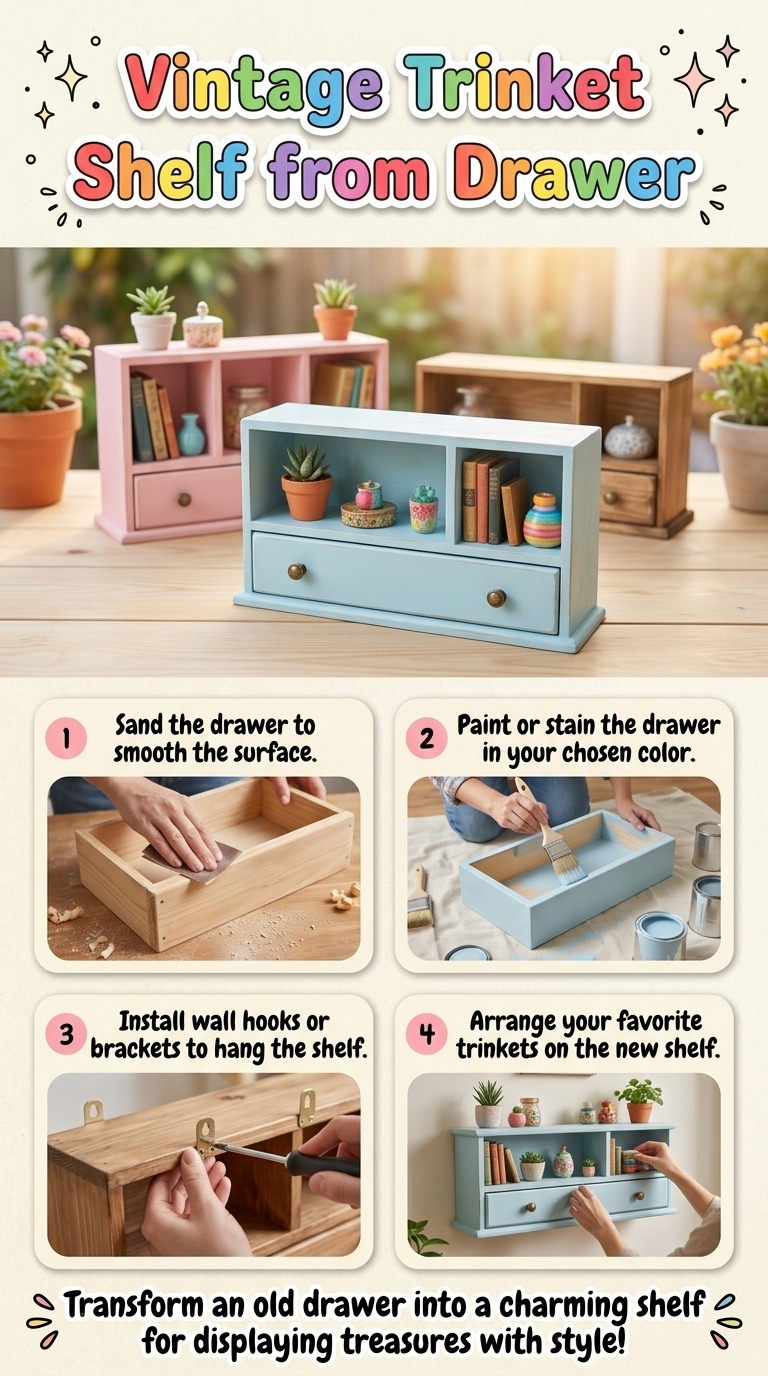
Save or pin this guide to Pinterest so you have easy access to the cut list, exact measurements, drying times, and troubleshooting steps while you build your vintage trinket shelf. Please share corrections, measured results, or successful substitutions to keep this guide accurate.
Leave a Reply