
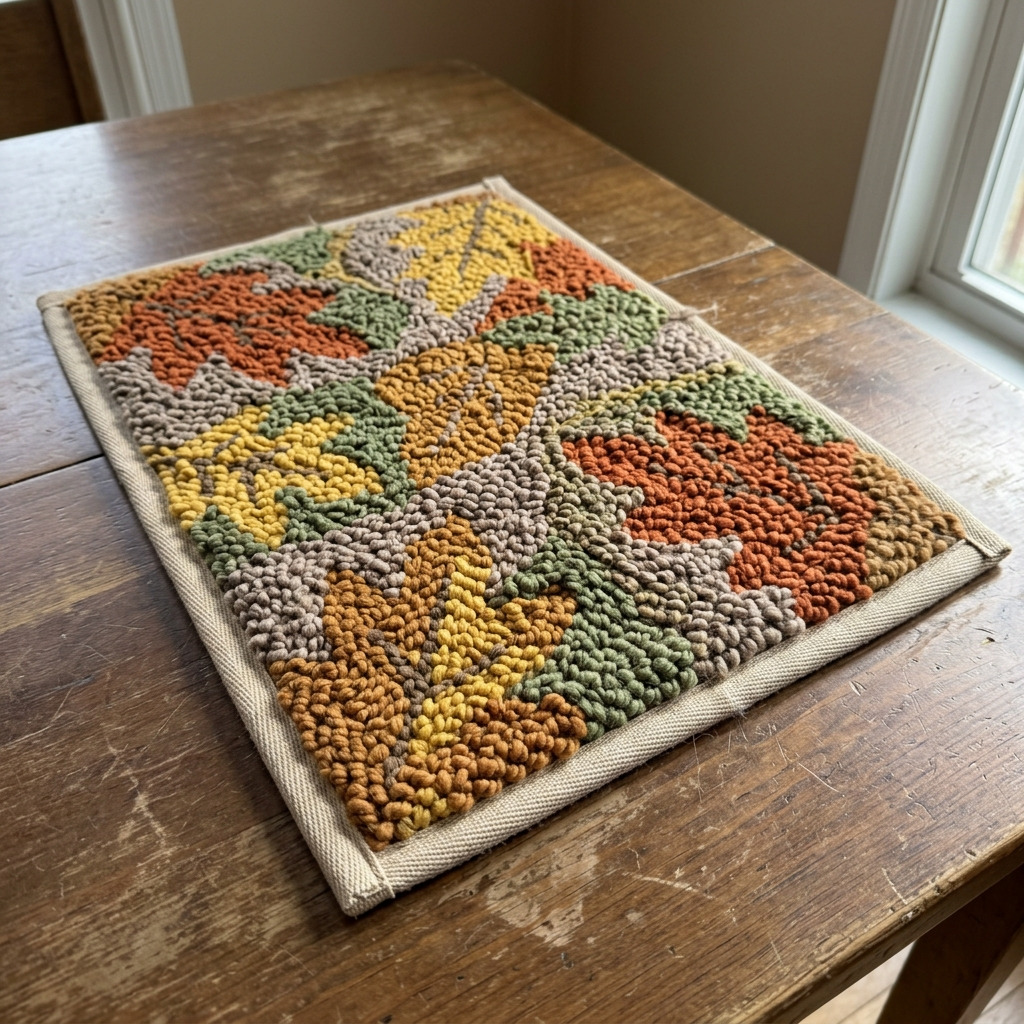
Project Overview
This project involves creating a small punch needle rug featuring earthy fall colors, perfect as a decorative accent for your home. The finished mini rug measures approximately 18 inches by 24 inches.
Project at a Glance
- Time required: 2 to 3 hours active working time; total elapsed time of approximately 3 to 4 hours
- Difficulty level: Beginner, requiring basic sewing and crafting skills
- Estimated cost: $30 to $50 depending on material choices and if tools are already owned
- Finished dimensions: 18 inches x 24 inches
- Yield: 1 mini rug
HERO IMAGE PLACEHOLDER
[Descriptive image caption of the finished project]
Materials and Tools
Materials
- Punch needle: 1 size 10 (or 8) punch needle, suitable for yarn
- Burlap fabric: 1 piece measuring 20 inches x 26 inches, in a natural color
- Cotton yarn:
- 1 skein in burnt orange (approximately 120 yards)
- 1 skein in mustard yellow (approximately 120 yards)
- 1 skein in moss green (approximately 120 yards)
- 1 skein in taupe (approximately 120 yards)
- Fabric backing: 1 piece of cotton or linen fabric, measuring 18 inches x 24 inches
- Tacky fabric glue: 1 bottle (approximately 4 oz)
- Rug binding tape: 3 yards, in a coordinating color (optional)
- Scissors: 1 pair, for cutting yarn and fabric
- Embroidery scissors: 1 pair for detailing
Tools
- Punch needle tool: size adjustable for yarn thickness
- Hoop frame: 18 inches x 24 inches or larger, to hold fabric taut (optional but recommended)
- Ruler: 12 inches for measuring
- Fabric marker or chalk: for marking design
- Cutting mat: to protect surfaces while cutting
- Iron: for smoothing fabric
- Spray bottle with water: for dampening fabric if necessary
- Safety equipment: None required, but always use appropriate safety measures when necessary.
Instructions
Step 1: Secure the Fabric
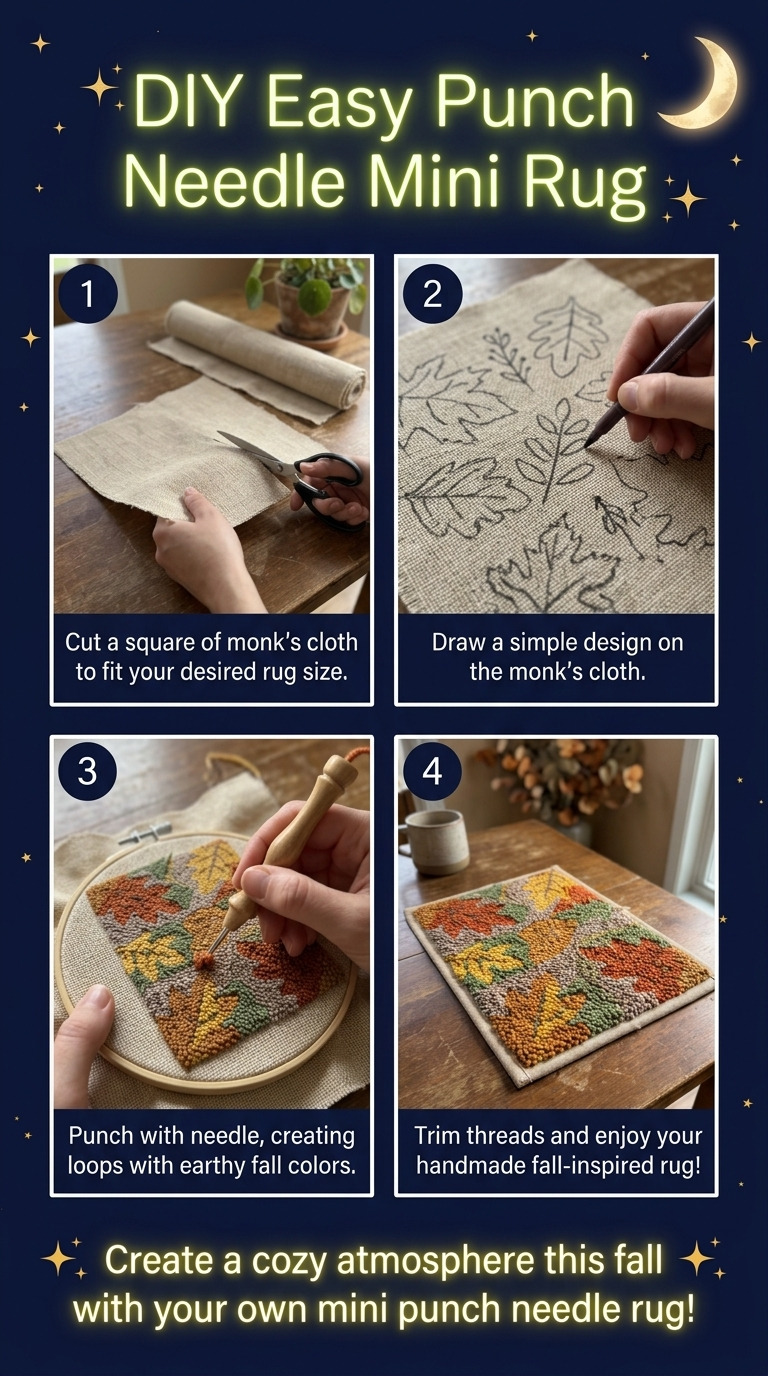
If using a hoop frame, place the burlap in the hoop, ensuring it is secured tightly. If not using a hoop, ensure the burlap is flat and taut over a work surface.
Step 2: Start Punching
Using the punch needle, thread your preferred yarn color (begin with burnt orange). The yarn should be placed in the needle’s chamber. Push the needle through the burlap, pulling it back, leaving about 1 to 2 inches of yarn on top to create a loop.
Step 3: Create the Design
Follow your drawn design, alternating between burnt orange, mustard yellow, moss green, and taupe yarns. Spend about 3 to 5 minutes per section. Repeat the punching process until the entire design is filled in.
Step 4: Check Your Work
After finishing the punching, turn the burlap over to ensure all punched loops are even and securely in place. The back should have a fluffy, textured look.
Step 5: Secure the Yarn
To prevent the loops from unpicking, add a light dab of tacky fabric glue to the back of each section as needed. Allow the glue to dry for about 30 minutes.
Step 6: Attach Backing
Lay the punched burlap face down. Place the fabric backing (cotton or linen) over the burlap. Trim excess burlap edges to align with the backing. Use tacky fabric glue to attach the backing around the edges and press flat. Allow to dry for at least 1 hour.
Step 7: Trim Edges
Once the glue is dry, trim any excess backing fabric, leaving a small border of about 1/4 inch.
Step 8: Finish Edges
If using rug binding tape, sew or glue it along the edges for a clean finish. If you prefer, you can leave the edges raw to retain a rustic look.
Step 9: Final Touch
If desired, lightly spray the finished rug with water and press it with an iron set on low to remove wrinkles and set loops.
Troubleshooting and FAQ
Troubleshooting
The punch needle doesn’t seem to pull the yarn properly. Ensure the yarn is properly threaded in the punch needle’s chamber. Adjust the tension if necessary.
The yarn loops are uneven or too tight. Avoid pulling the yarn too tightly while punching. Ensure your hands are relaxed, and the punch needle is held firmly but not overly tight.
Glue is not holding well on the yarn. Check if you are using tacky fabric glue as specified. Allow adequate drying time after applying glue to ensure a good bond.
The edges of the rug are fraying. Ensure that the rug binding tape is securely attached. If not using binding tape, consider sewing around the edges to prevent fraying.
Frequently Asked Questions
Can I use different fabric instead of burlap? Yes, other fabrics like monk's cloth can be used. However, they might change the overall look and texture of the finished rug.
Is it necessary to use a hoop frame? While a hoop frame is not required, it is highly recommended to maintain tension on the burlap, making the punching process easier and more effective.
What is the best way to care for the rug? Care for the rug by cleaning it gently with a damp cloth. Avoid machine washing and store it flat or rolled to maintain its shape.
Can I use acrylic yarn instead of cotton? Yes, acrylic yarn can be used; however, it may alter the texture and appearance of the finished product.
Save This Guide
Save this guide on Pinterest to reference the cut list, exact measurements, and troubleshooting entries while you build your mini rug. Feel free to share any corrections, measured results, or substitutions that worked for you to keep this guide accurate.
Leave a Reply