
Project Overview
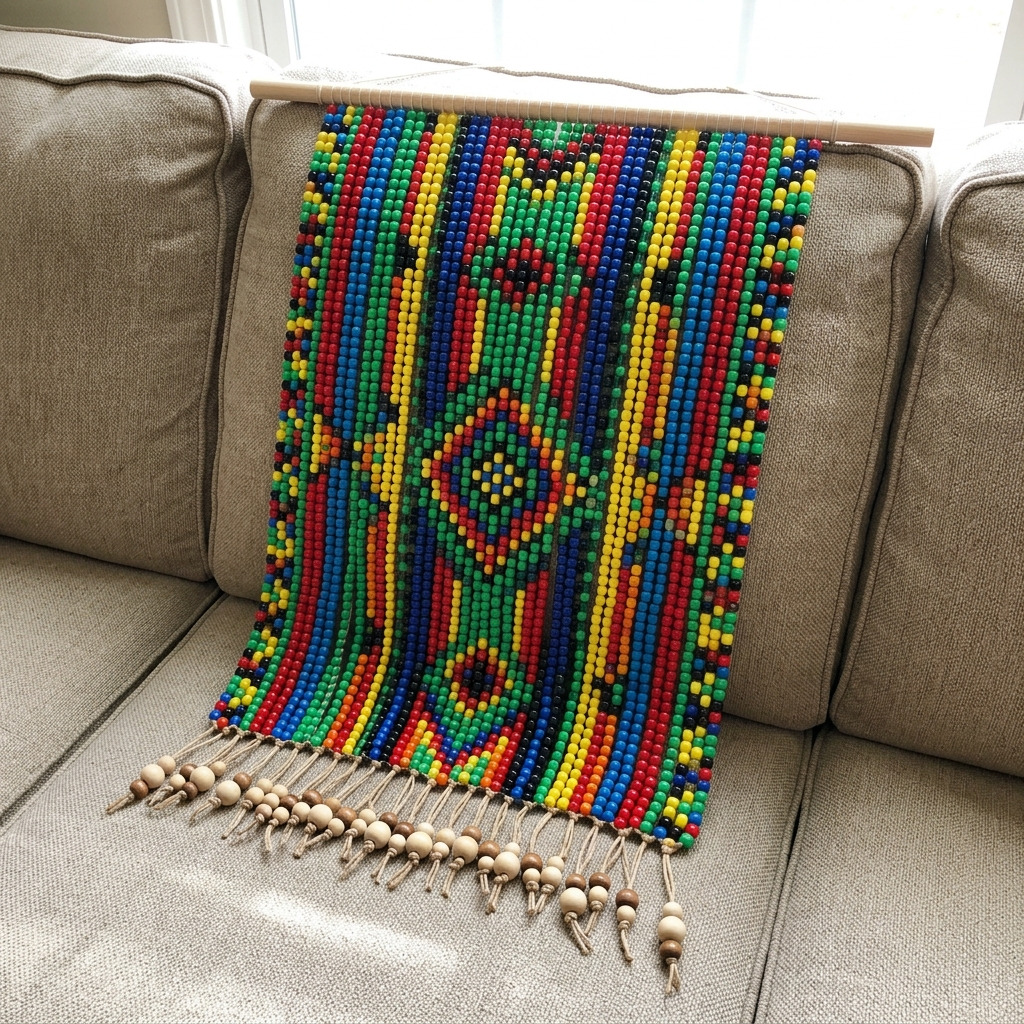
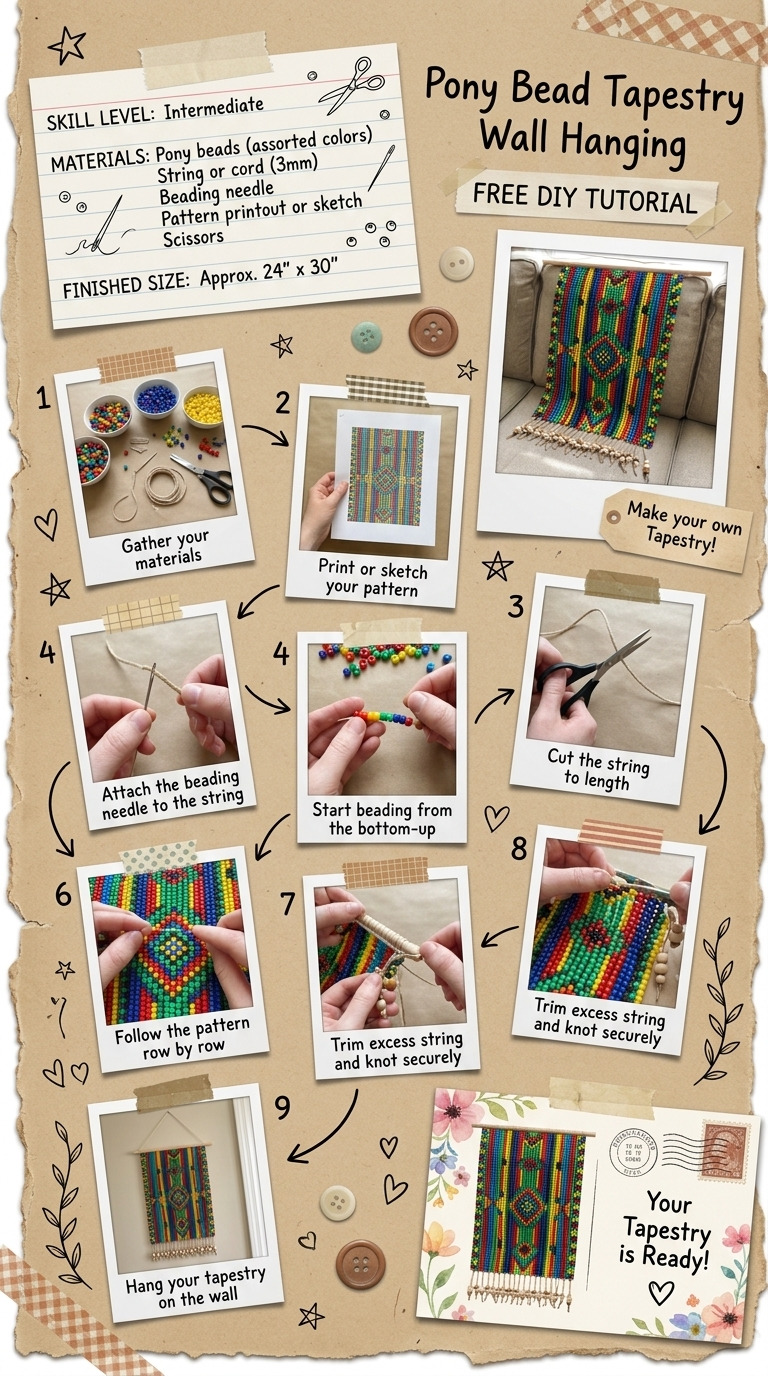
This DIY project guides you through creating a vibrant pony bead tapestry wall hanging, perfect for adding colorful decor to your living space. The finished tapestry will feature a geometric design created from pony beads strung onto a cord that hangs from a wooden dowel.
Project at a Glance
- Time required: 3 to 5 hours of active working time; approximately 6 hours total elapsed time, including drying time
- Difficulty level: Easy, requiring basic knot tying skills
- Estimated cost: $30 to $50, depending on the choice of beads and fabric
- Finished dimensions: Approximately 24 inches (60 cm) wide by 30 inches (76 cm) long
- Yield: One completed tapestry wall hanging
HERO IMAGE PLACEHOLDER
[Descriptive image caption of the finished project]
Materials and Tools
Materials
- Pony beads: 400 assorted beads in colors: red, blue, yellow, green, and black (80 beads of each color)
- Nylon cord: 1 roll, 1 mm thickness, 100 yards long
- Wooden dowel: 1 piece, 24 inches long (1/2 inch in diameter)
- Quilting fabric (for backing): 1 piece measuring 24 inches by 30 inches, any color or pattern
- Hot glue stick: 1 standard-size stick for use with the hot glue gun
- Wooden or plastic beads (for embellishments): Optional, assorted sizes
- Embellishing supplies (e.g., feathers, charms): Optional for decorative touches
Tools
- Hot glue gun: Standard size
- Scissors: Sharp fabric and craft scissors
- Ruler or measuring tape: For measuring cord and fabric
- Cutting mat: To protect surfaces while cutting
- Safety equipment: Safety goggles (if using hot glue)
Instructions
Step 1: Prepare Your Workspace
Clear a flat surface to work on. Lay down a cutting mat to protect the desk from hot glue and cuts.
Step 2: Cut Materials
- Cut the nylon cord into 20 pieces, each 48 inches long.
- Cut the quilting fabric to 24 inches by 30 inches.
Step 3: Pre-treat Materials
- Ensure the wooden dowel is clean and sand down any rough edges if necessary.
- Prepare the pony beads by sorting them into separate containers by color.
Step 4: Create a Pattern
Design a simple geometric pattern on paper. Represent each bead's position on a graph; each square represents one bead. For example, use a repeating sequence such as red, blue, yellow in rows.
Step 5: Set Up the Cords
- Take one piece of the nylon cord and tie a knot about 2 inches from one end. This knot serves as a stop for the beads.
- Thread beads onto the cord according to your design, ensuring you fit 20 beads on each cord.
- Repeat this process for all 20 pieces of cord.
Step 6: Secure the Beads
- After adding the beads, tie another knot above the last bead to secure them in place.
- Use a hot glue gun to apply a small dot of glue at each knot to provide extra hold and prevent slipping.
Step 7: Attach Cords to the Dowel
- Place the wooden dowel horizontally on your workspace.
- Arrange the cords evenly on the dowel, spacing them about 1 inch apart.
- Tie each cord around the dowel using a simple knot, alternating the direction of the knots for a textured look.
- Trim excess cord below the knots if necessary.
Step 8: Prepare the Backing
- Lay the quilting fabric flat, right side facing down.
- Center the wooden dowel with attached cords on the fabric and fold the top edge down over the dowel (about 1 inch) to create a channel.
- Pin the fabric in place and sew or use a hot glue gun to secure the edges.
Step 9: Finish Assembly
- Once the glue has dried, hang the wall hanging by attaching the top dowel to a wall hook or nail.
- Add optional embellishments like wooden or plastic beads along the bottom edges using hot glue.
Step 10: Final Checks
Ensure all knots are tight. Secure the wooden dowel by gluing or sewing it into place on the fabric. Choose additional embellishments, such as feathers or charms, to add visual interest, attaching them to the cords using glue or threading.
Troubleshooting and FAQ
Troubleshooting
The beads are sliding on the cord. Ensure that the knots are tight. If they are loose, apply more hot glue to the knots to secure them better.
The tapestry hangs unevenly. Check the spacing of the cords on the dowel. Adjust any cords that are too tight or too loose to ensure even tension.
The fabric is not holding the dowel securely. If the fabric channel is loose, reinforce it with additional glue or consider sewing it to secure it before attaching the dowel.
The pattern is off once assembled. Review the pattern dimensions before assembly to ensure that every piece was laid out correctly. Disassemble sections if necessary to correct the arrangement.
Frequently Asked Questions
Can I use different size beads? Yes, but varying sizes may change the overall aesthetic and proportion of the tapestry. Consider adjusting the number of total beads used accordingly.
How do I clean the tapestry? Keep the wall hanging in a dust-free area. Clean gently using a soft cloth. Avoid exposure to moisture to maintain the integrity of the beads and fabric.
Can this project be made larger or smaller? Yes, you can adjust the number of cords or beads to create a larger or smaller tapestry. Ensure the backing fabric is cut accordingly.
What can I use if I don't have a hot glue gun? While hot glue is ideal for this project due to its quick-drying properties, you can use fabric adhesive or a strong craft glue as substitutes, though they may require longer drying times.
Save This Guide
Save or pin this guide to Pinterest for easy access while you build, as it includes the cut list, exact measurements, cure and drying times, and troubleshooting entries. Corrections, measured results, or substitutions that worked are welcome so this guide can remain accurate.
Leave a Reply