
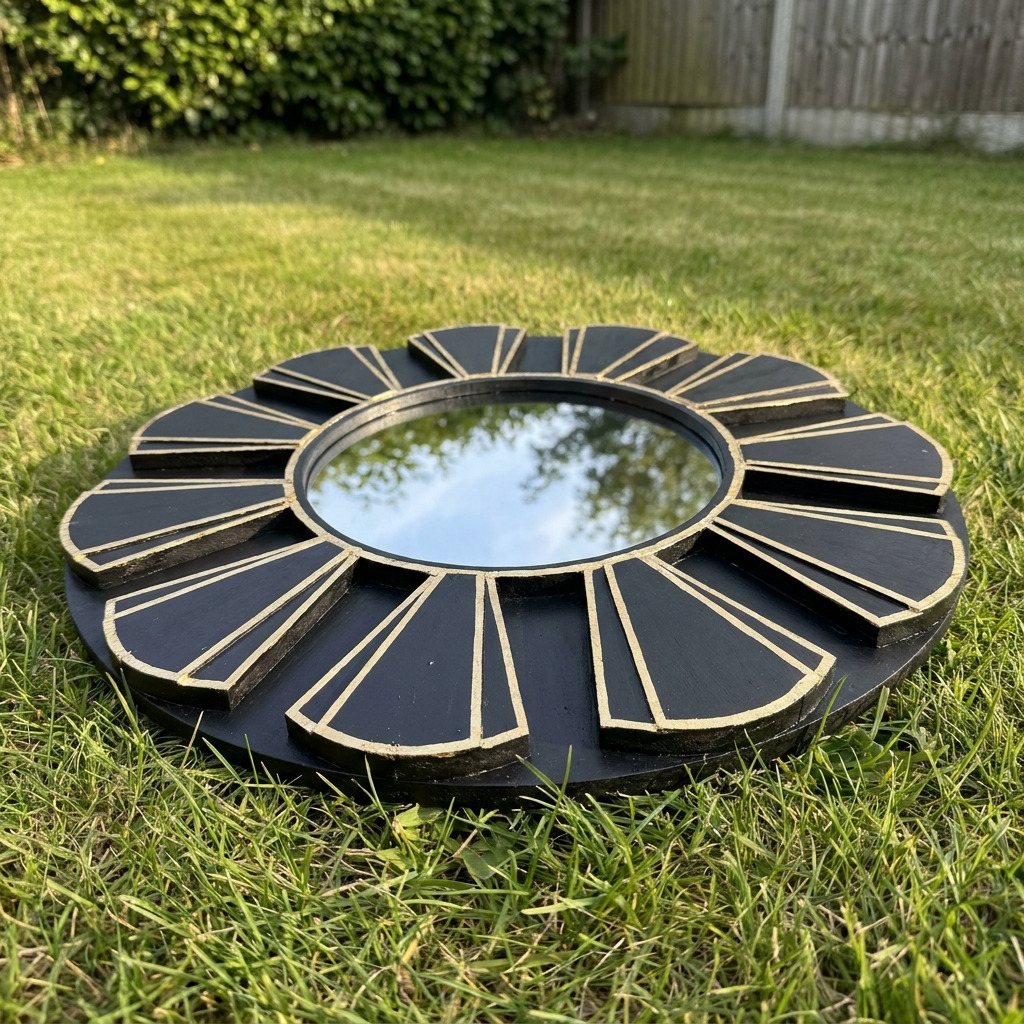
Project Overview
This project involves creating a stunning Art Deco style fan mirror featuring a decorative frame adorned with gold leaf detailing. The finished item serves as a chic wall decoration that enhances any interior space.
Project at a Glance
- Time required: 4 hours active working time; approximately 10 hours total elapsed time (including drying times)
- Difficulty level: Intermediate; requires precise cutting and gluing techniques
- Estimated cost: $50 to $100, depending on material choices and whether tools are already owned
- Finished dimensions: 24 inches in diameter
- Yield: 1 Art Deco fan mirror
HERO IMAGE PLACEHOLDER
[Descriptive image caption of the finished project]
Materials and Tools
Materials
- Mirror: 1 round mirror, 16 inches in diameter
- MDF (medium-density fiberboard): 1 sheet, 1/2 inch thick, cut into various shapes (see cutting list below)
- Gold leaf sheets: 2 sheets (5 inches x 5 inches)
- Gold leaf adhesive (size): 1 small jar (2 oz)
- Wood glue: 1 bottle (4 oz)
- Wood sealer: 1 small can (8 oz), clear matte finish
- Paint: Black acrylic paint, 1 small bottle (8 oz)
- Gold spray paint: 1 can (12 oz)
- Sandpaper: 220 grit
- Cloth: Soft lint-free cloth for polishing
- Masking tape: 1 roll
- Wood dowels (optional): 2 pieces, 1/4 inch diameter, 6 inches long (for added frame structure)
Tools
- Jigsaw or scroll saw: for cutting MDF
- Drill with drill bits: for creating holes in the MDF
- Paintbrushes: 1 flat brush (1 inch) and 1 fine brush (1/4 inch) for applying paint and glue
- Ruler: for measuring
- Pencil: for marking cuts
- Clamps: for securing pieces during assembly
- Safety equipment: Eye protection (goggles), dust mask when cutting MDF, and gloves when handling gold leaf and adhesive
Preparation & Setup
- Workspace Setup: Clear a large, flat surface to work on, and cover it with a drop cloth to protect against paint and adhesive spills. Ensure good ventilation if using spray paint indoors.
- Cutting List: – 1 circle: 18 inches diameter (to serve as backing for mirror) – 12 fan-shaped pieces: each piece 3.5 inches wide at the widest point and 8 inches tall
- Pre-treatment: – Sand down MDF sheets with 220 grit sandpaper to smooth edges and surfaces. – Clean the mirror with a soft cloth to remove any dust or fingerprints.
Step-by-Step Instructions
- Cutting the MDF: – Using a jigsaw, cut the 18-inch-diameter circle from the MDF for the backing. The circle should be smooth and free of splintered edges. – Mark and cut out 12 fan shapes from the remaining MDF, each fan shape measuring 3.5 inches wide and 8 inches tall. Use a ruler and pencil for accurate measurements. – Check that all pieces are cut accurately and smooth out any rough edges with sandpaper.
- Creating the Frame: – Mark the positioning for the fan shapes all around the circumference of the circle, leaving equal spacing of approximately 1.5 inches apart. A compass can help achieve precise arcs for placement. – Begin attaching the fan pieces to the circle using wood glue. Apply glue on the base of each fan and press firmly to the circle. Hold in place with clamps for at least 15 minutes for the glue to set. Ensure the fan pieces are aligned correctly before the glue sets.
- Painting the Frame: – Once the fan pieces are secured, paint the entire frame using black acrylic paint with a flat brush. Ensure even coverage over all surfaces. Allow the paint to dry for 1 hour. – Apply a second coat of paint if necessary, ensuring complete coverage. Check for any missed spots before it dries.
- Applying Gold Leaf: – After the black paint has dried, use masking tape to create a border around the base of the mirror where the gold leaf will be applied, leaving the areas of the fan shapes exposed. – Using a fine brush, apply gold leaf adhesive to the exposed areas of the fan shapes. Wait for the adhesive to become tacky; this typically takes about 15-20 minutes. – Carefully apply the gold leaf sheets, pressing down gently with your fingers or a soft brush to adhere them. Trim any excess gold leaf with a craft knife or scissors.
- Sealing the Frame: – Once the gold leaf is set, approximately 1 hour later, carefully apply a sealer over the gold leaf using a small brush to ensure it’s protected and to reduce tarnishing. Follow the manufacturer's instructions for drying time.
- Final Assembly: – Fix the mirror to the center of the circular frame using wood glue and clamps. Position the mirror centrally, ensuring it is straight. Let it sit for at least 4 hours to ensure a strong bond. – If additional support is desired, attach the optional wood dowels to the back using glue, positioned perpendicularly to aid in stability.
Assembly & Finishing
- The pieces are joined using wood glue, which is applied when attaching the fan shapes to the circle and when securing the mirror to the center.
- Final touches include ensuring all surfaces are smooth, cleaning any excess glue with a damp cloth, and allowing all layers to dry fully.
- The total finished mirror will measure 24 inches in diameter with an intricate fan motif surrounding the mirror.
Measurements & Dimensions
- Finished mirror size: 24 inches in diameter
- Cut MDF circle: 18 inches in diameter
- Each fan shape: 3.5 inches wide by 8 inches tall
- Gold leaf sheet size: 5 inches x 5 inches
Timing Information
- Estimated active working time: 4 hours
- Drying/curing time: 6 hours (including painting and glue setting)
- Total time: Approximately 10 hours (including drying time overnight if needed)
Variations & Notes
- For a less glossy finish, consider using a matte gold spray paint or gold paint instead of gold leaf.
- To create a contrasting color scheme, try using different colors for the base paint or fan shapes, such as deep blue or rich green.
- Avoid common mistakes by ensuring proper glue setting times; for best results, allow each layer to cure fully before proceeding.
- The mirror can be cleaned with a gentle glass cleaner and a soft cloth; avoid abrasive materials that might scratch the gold leaf finish. Store in a dry, cool place to maintain integrity.
Troubleshooting and FAQ
Troubleshooting
- The joint will not close flush. This may be due to misalignment during assembly. Re-adjust the fan pieces while the glue is still wet to ensure a tight fit.
- Gold leaf is peeling off. This can happen if the adhesive was not tacky enough when applying the gold leaf. Ensure the adhesive is properly dried and tacky before placement.
- Mirror is not centered. If the mirror appears off-center, carefully remove it and reapply with more attention to alignment. Use a ruler to measure equal distances from the edge around the mirror.
- Paint is not adhering well. This may indicate that the MDF was not adequately prepped or sanded. Ensure the surface is smooth and clean before painting.
Frequently Asked Questions
- Can I substitute MDF with another material? Yes, you can use plywood or a similar material, but be aware that the weight and cutting process may differ, possibly affecting the overall durability and finish.
- What if I don't have wood dowels? The dowels are optional for added support; the mirror and frame can function adequately without them but may not be as stable in hanging situations.
- How can I ensure a smooth paint finish? Thin coats of paint with fine brushes and sufficient drying time between each coat will help achieve a smoother finish.
- Is there a way to enhance durability for outdoor use? A stronger sealant such as marine varnish can be used instead of standard wood sealer to provide extra weather resistance.
Save This Guide
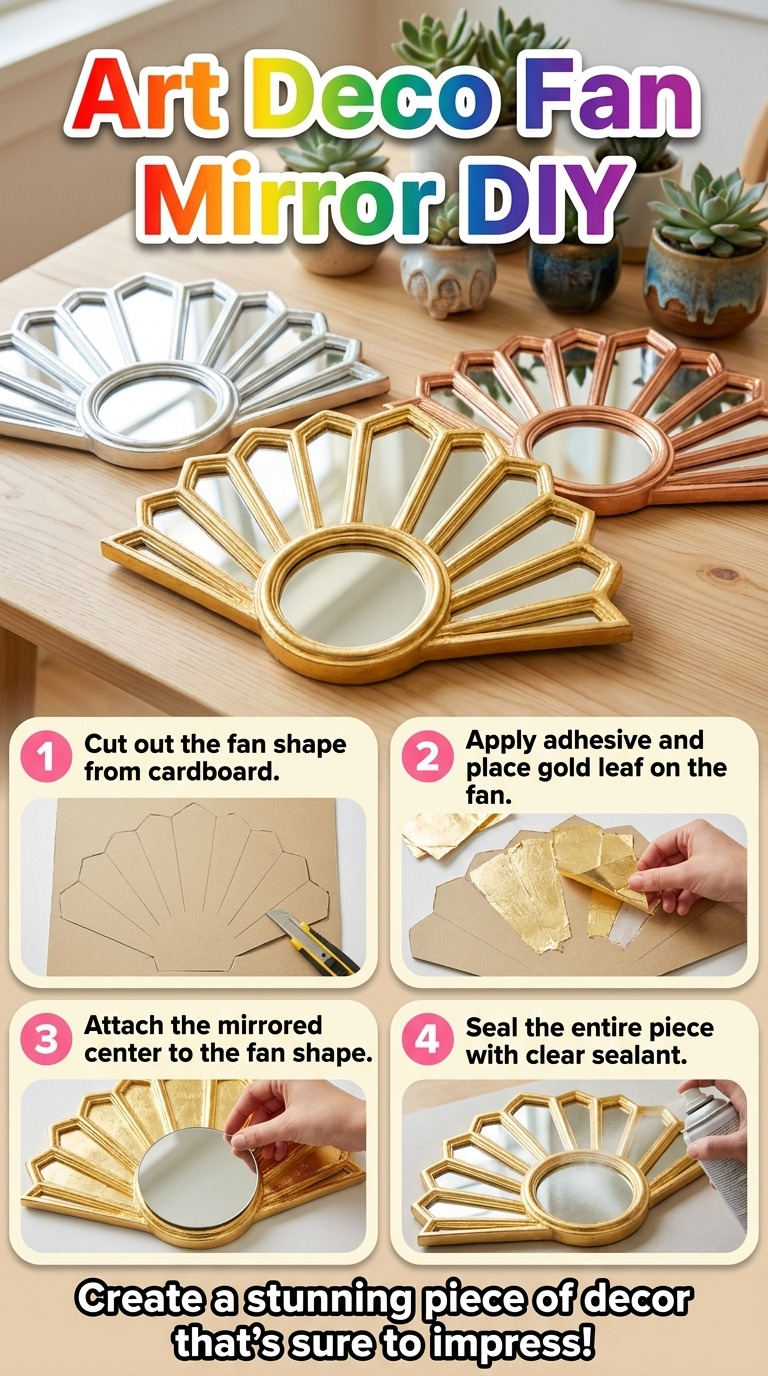
Save or pin this guide to Pinterest for quick access while building your Art Deco fan mirror. Keep it handy for the cut list, exact measurements, drying times, and troubleshooting entries. Share corrections or substitutions that worked, so the guide can be kept accurate.
Leave a Reply