
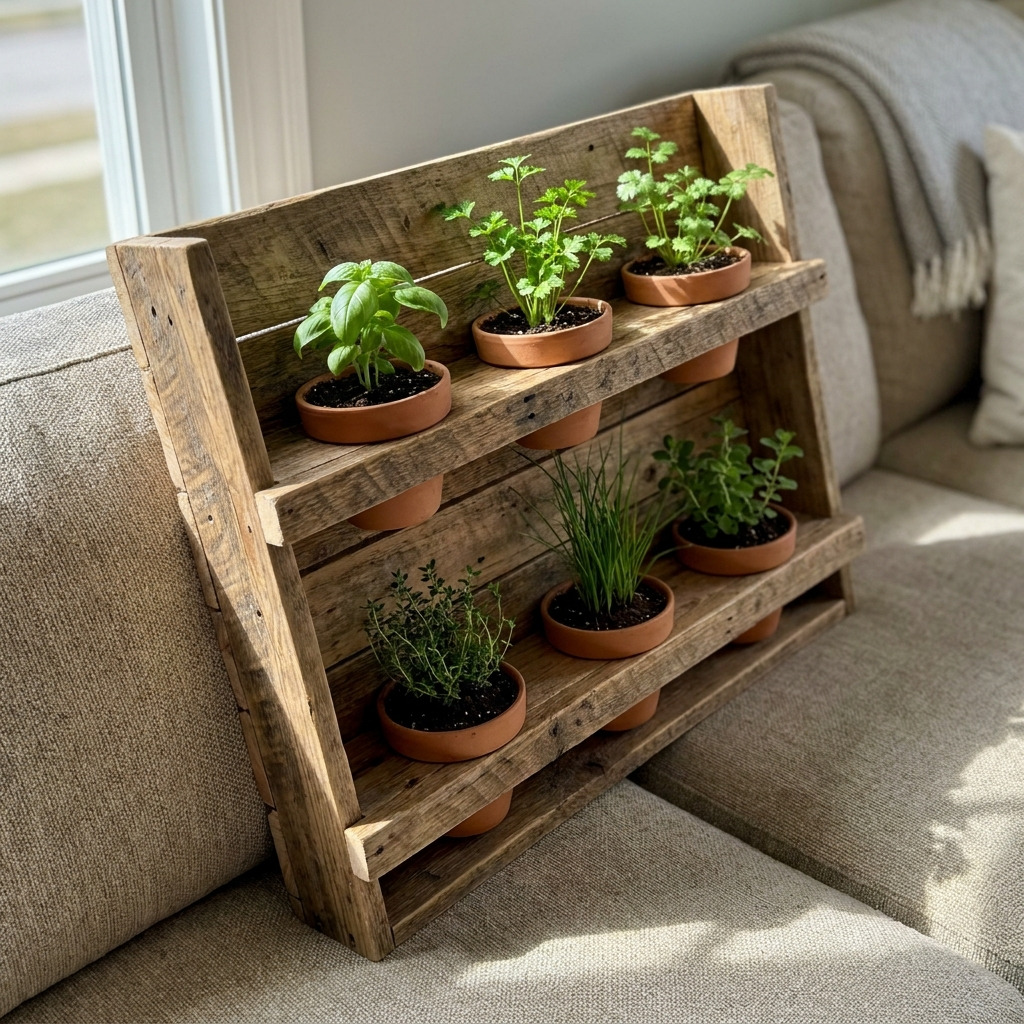
Project Overview
This project creates a functional indoor herb garden planter mounted on a wall, made from a reclaimed wood pallet. The finished result provides a rustic aesthetic while allowing for easy access to fresh herbs.
Project at a Glance
- Time required: Active working time: 3 hours; Total elapsed time: approximately 5 hours
- Difficulty level: Intermediate (requires basic woodworking skills)
- Estimated cost: $40 to $100 (cost varies based on the choice of materials and tools owned)
- Finished dimensions: 36 inches wide x 24 inches tall x 6 inches deep
- Yield: One wall-mounted herb garden planter
HERO IMAGE PLACEHOLDER
[Descriptive image caption of the finished project]
Materials and Tools
Materials
- Reclaimed wood pallet (1) – fully intact, approximately 40 inches x 48 inches
- 6 small terracotta pots (2.5 inches in diameter)
- Potting soil (1 bag, 1 cubic foot)
- Herb seeds or starter plants (6 types: basil, parsley, cilantro, thyme, chives, oregano)
- Wood screws (1.5 inches, 12 pieces)
- Wood exterior varnish or sealant (non-toxic, 1 quart)
- Landscape fabric (1 yard)
- Paint or wood stain (optional, 1 quart)
- Wire or twine (natural fiber, 1 roll)
Tools
- Circular saw (or hand saw)
- Drill with drill bits (1/8 inch for pilot holes)
- Screwdriver
- Measuring tape
- Sandpaper (medium and fine grit)
- Paintbrush or roller
- Staple gun and staples (1/4 inch)
- Level
- Safety goggles
- Dust mask (when sanding)
Instructions
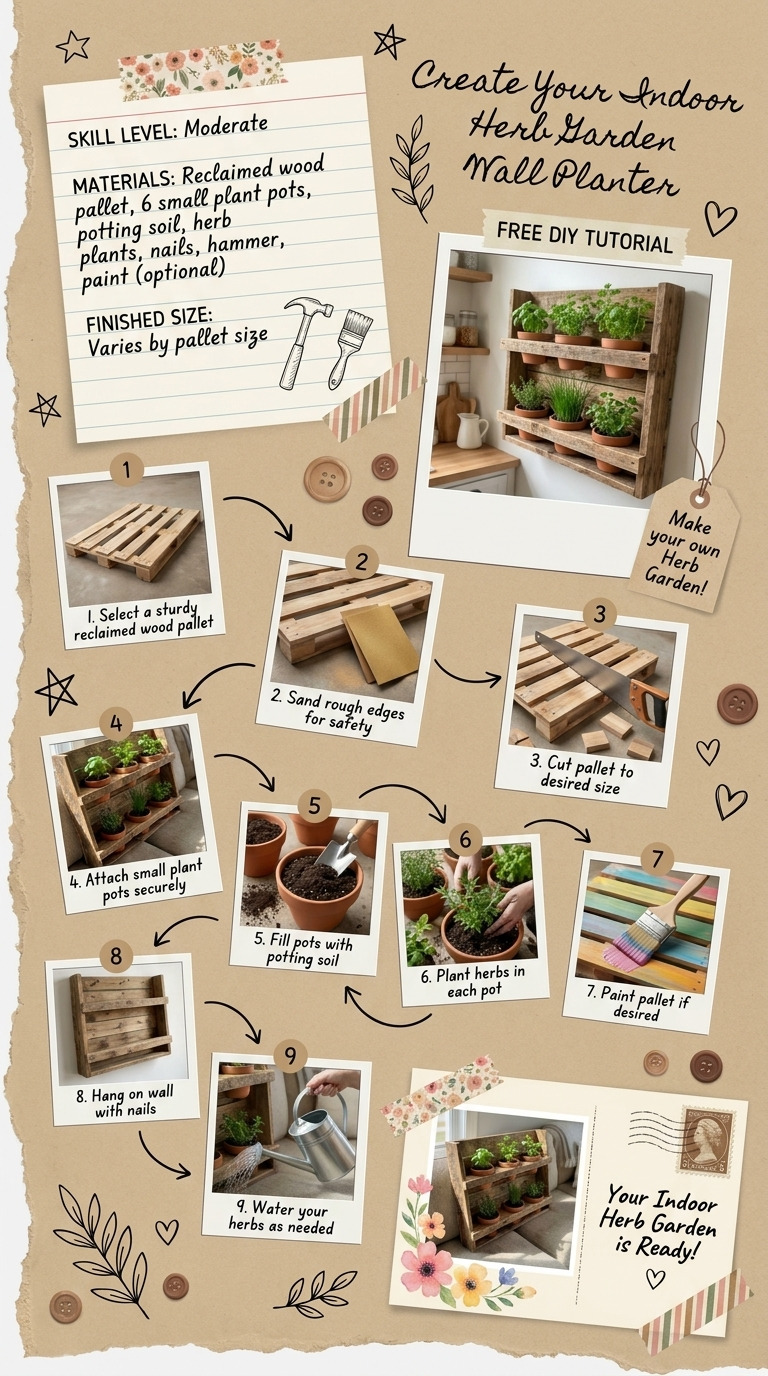
- Dismantle the Pallet: – Use a pry bar to carefully dismantle the pallet into individual boards. Aim for 6 to 8 sturdy boards for the planter, ensuring they don’t break.
- Cut and Sand the Boards: – Using a circular saw, cut boards to the desired lengths for the planter. Aim for 30 inches on each piece for the planter shelves. – Sand all edges and surfaces with medium-grit sandpaper followed by fine-grit paper for a smooth finish.
- Create the Planter Bases: – Take 6 pallet boards and place them side by side while maintaining a slight gap for drainage. Attach them together using wood screws, with 3 screws for each board connection to form the base.
- Attach Landscape Fabric: – Cut the landscape fabric to size (about 30 x 6 inches for each side) and staple it to the inside bottom of each planter base to hold the soil. Leave extra fabric available for the sides to line the edges.
- Assemble the Planters: – Establish the tiered design by stacking the planter bases on top of each other. Space them evenly and secure with screws to the backing. – Make pilot holes with the drill to prevent the wood from splitting. Use 2 screws in each corner per base.
- Prepare the Backing Support: – Cut the backing support from the pallet wood to dimension 36 inches wide x 24 inches tall. – Attach the backing securely to the planter bases using screws, ensuring it is level.
- Plant the Herbs: – Fill each terracotta pot with potting soil, leaving about an inch from the top. – Plant one herb seed or starter plant per pot and label each if desired.
- Mount the Planter: – With a partner, hold the planter against the wall. Use a level to ensure it's straight. Mark the wall at the top corners of the backing support. – Screw in wall anchors and your mounting screws through the backing support into the wall, ensuring it is secure.
- Finishing Touches: – If desired, apply a coat of non-toxic exterior varnish or sealant to the entire planter for protection. Allow to dry completely for at least 2 hours. – Optionally, tie some twine or wire across the front for decoration or to support climbing herbs.
Assembly & Finishing
The parts are joined through wood screws securing the planter base to each other and attaching the backing to the planter. After assembly, apply a wood stain or sealant for a finished appearance, ensuring each side is covered evenly. Let cure for 24 hours or as per the manufacturer's instructions.
Measurements & Dimensions
- Final dimensions of the finished planter: 36 inches wide x 24 inches tall x 6 inches deep.
- Each planter base piece dimensions: approximately 30 inches x 6 inches (depth).
- Each pot: 2.5 inches in diameter.
Timing Information
- Estimated active working time: 3 hours
- Drying/curing time (for varnish/sealant): 2 hours
- Total time: Approximately 5 hours
Variations & Notes
- For a cleaner result, ensure screws are placed correctly to avoid misalignment.
- Common mistakes include not ensuring the planter is level; always double-check before securing it to the wall.
- Consider using different finishes (e.g., brighter colors or darker stains) to match your home decor.
- Store the indoor herb garden in a well-lit area, ensuring consistent watering without waterlogging the pots.
Troubleshooting and FAQ
Troubleshooting
- The joints are not flush. This may be caused by misaligned boards. Ensure all boards are measured and cut evenly, adjusting as necessary.
- The planter is sagging. Ensure enough screws are used to secure the bases and that they are adequately spaced. Adjust or add screws as needed.
- The fabric is not secured. If the landscape fabric comes loose, reattach with the staple gun, ensuring staples are evenly spaced and secure.
- Herbs are wilting. This could be due to under or overwatering. Check soil moisture levels and adjust watering frequency to ensure proper drainage.
Frequently Asked Questions
- Can I use regular wood instead of a pallet? Yes, but using reclaimed pallet wood adds character and is eco-friendly. Ensure the wood is untreated to avoid chemicals leaching into soil.
- Can I use larger pots? Yes, but larger pots will increase the overall weight and size of the planter, which may affect wall mounting.
- How often should I water the herbs? Generally, herbs require watering every 2 to 3 days, depending on humidity and light conditions. Check the soil moisture before watering.
- What types of herbs grow best in pots? Compact herbs like basil, chives, thyme, parsley, oregano, and cilantro thrive well in pots and can be easily accessed in a wall planter.
Save This Guide
Save or pin this guide to Pinterest for easy access while building your indoor herb garden wall planter, as it includes the essential cut list, exact measurements, curing times, and troubleshooting entries. Please provide any corrections or results from your build so this guide can remain accurate and helpful.
Leave a Reply