
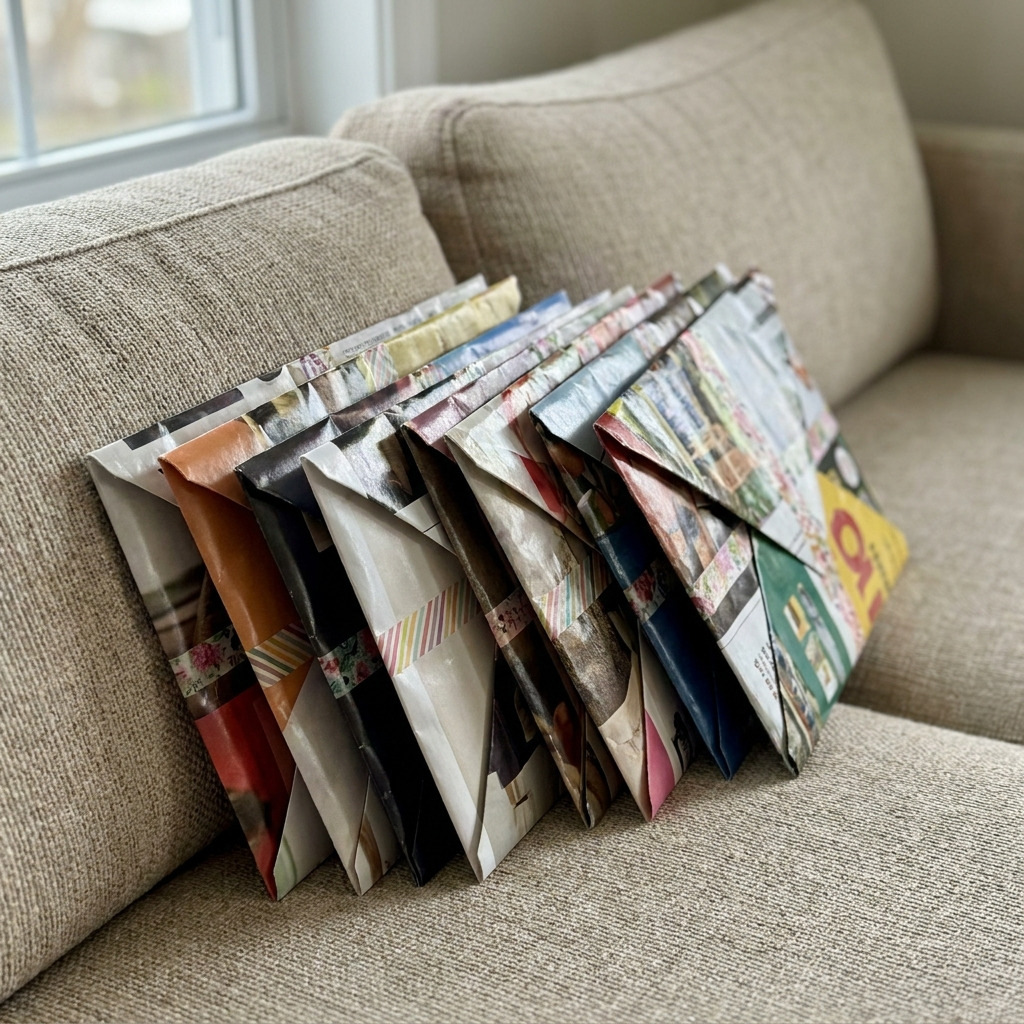
Project Overview
This project involves creating unique and eco-friendly envelopes from old magazine pages, perfect for sending letters, notes, or cards to friends and family. The finished envelopes provide a creative way to add a personal touch to your correspondence while recycling materials.
Project at a Glance
- Time required: 30 minutes active working time; approximately 1 hour total elapsed time
- Difficulty level: Beginner, requiring basic cutting and folding skills
- Estimated cost: $5 to $15, depending on the availability of materials and whether you already have tools
- Finished dimensions: Approximately 4.25" x 5.5" (A2) envelope
- Yield: 1 envelope per magazine page used, yielding approximately 5 to 6 envelopes from 5 to 6 pages
![Descriptive image caption of the finished project]
Materials and Tools
Materials
- Old magazines: 5-6 pages (preferably glossy pages for a vibrant look)
- Envelope template: A pre-made template or printed pattern (available online)
- Adhesive: Craft glue (or a glue stick, approximately 30 ml)
- Optional: Decorative tape (washi tape) or stickers for embellishment
Tools
- Scissors: Standard size
- Ruler: 12-inch ruler
- Bone folder or credit card: For creasing folds
- Optional: Cutting mat (to protect the surface while cutting)
Instructions
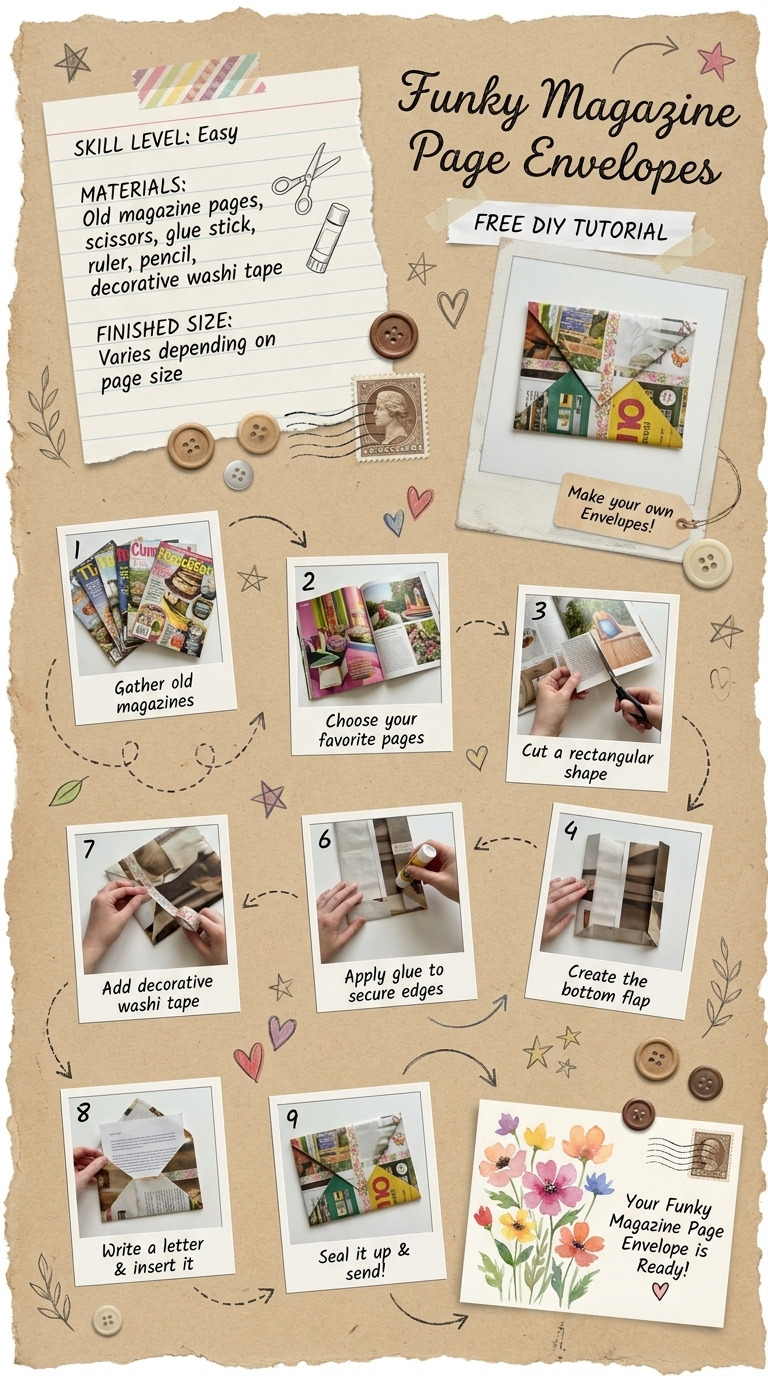
Step 1: Select Magazine Pages
Choose 5-6 pages with vibrant colors or interesting patterns. Avoid pages with heavy text that might detract from the envelope's aesthetics. The pages should ideally have a glossy finish for a better look.
Step 2: Cutting the Magazine Pages
Use the ruler to measure and cut out rectangles of 8" x 10" from each magazine page. Each envelope requires one rectangle. You can combine multiple pages to create envelopes with collaged patterns. The cutting process should take approximately 10 minutes.
Step 3: Fold the Envelope
Take one 8" x 10" rectangle and place it pattern side down. Fold the top edge down about 2.5 inches toward the center. Crease the fold with a bone folder or credit card to create a crisp edge. Fold the left edge and the right edge toward the center, making sure they overlap slightly. Ensure a tight and clean fold and crease again. The bottom edge should remain unsealed for inserting a letter.
Step 4: Adhere the Flaps
Lift the left and right side flaps and apply a thin line of craft glue along the edges where they meet the center fold. Press the flaps down firmly and hold for a few seconds to ensure a good bond. Allow the glue to dry completely, approximately 15 to 20 minutes. Verify that the flaps are securely glued before proceeding.
Step 5: Finalizing the Envelope
Once the glue is dry, you may add decorative tape along the edges of the folds for a finished touch, enhancing both durability and aesthetics. Optional: Use stickers, stamps, or additional embellishments on the envelope front for personalization. Your envelope should now display unique magazine patterns, with the inside pocket fully functional for holding letters or cards.
Assembly & Finishing
To complete assembly, ensure the left and right folds are glued securely for a durable construction. If you have applied decorative tape along the folds, check that they align properly. After finalization, open the envelope flaps to confirm they move smoothly and are functional.
Measurements & Dimensions
- Final envelope dimensions: Approximately 4.25" x 5.5" when folded, suitable for A2 cards or letters.
- Cut size of each page: 8" x 10" for each envelope to achieve the desired size.
Timing Information
- Estimated active working time: 30 minutes (includes cutting and folding times)
- Drying/curing time: 15 to 20 minutes for the glue to dry completely
- Total time: Approximately 1 hour from start to finish
Troubleshooting and FAQ
Troubleshooting
The envelope does not seal properly. Cause: Insufficient glue application or uneven folds. Correction: Ensure a thin line of glue is applied evenly along the edges and double-check that folds are crisply creased.
The magazine patterns are not aligned well. Cause: Inaccurate cutting or misalignment during folding. Correction: Take time to measure precisely when cutting and ensure all sides are evenly folded before adhering.
The envelope is too bulky to close. Cause: Overlapping folds or too much embellishment. Correction: Trim excess paper if necessary and ensure light use of decorations to maintain a flat envelope.
Frequently Asked Questions
Can I use non-glossy magazine pages? Non-glossy pages can be used; however, they may not provide the same vibrancy and texture as glossy pages, resulting in a less visually appealing envelope.
What if I want to make larger envelopes? To create larger envelopes, simply adjust the cut sizes of the magazine pages, for example, 9" x 11" will give you a larger envelope that suits bigger cards or letters.
How should I store my envelopes once made? Store these envelopes flat in a dry environment to prevent bending or curling. Adding a small weight on top can help maintain their shape.
Are these envelopes durable for mailing? These envelopes are suitable for standard mail but may not hold up extremely well to rigorous handling or rough postal conditions. Use for letters that require low wear.
Save This Guide
Save or pin this guide to Pinterest so you can reference the exact measurements, cutting list, and curing times while you build the envelopes. Share any corrections or measured results that could help improve this guide’s accuracy.
Leave a Reply