
Project Overview
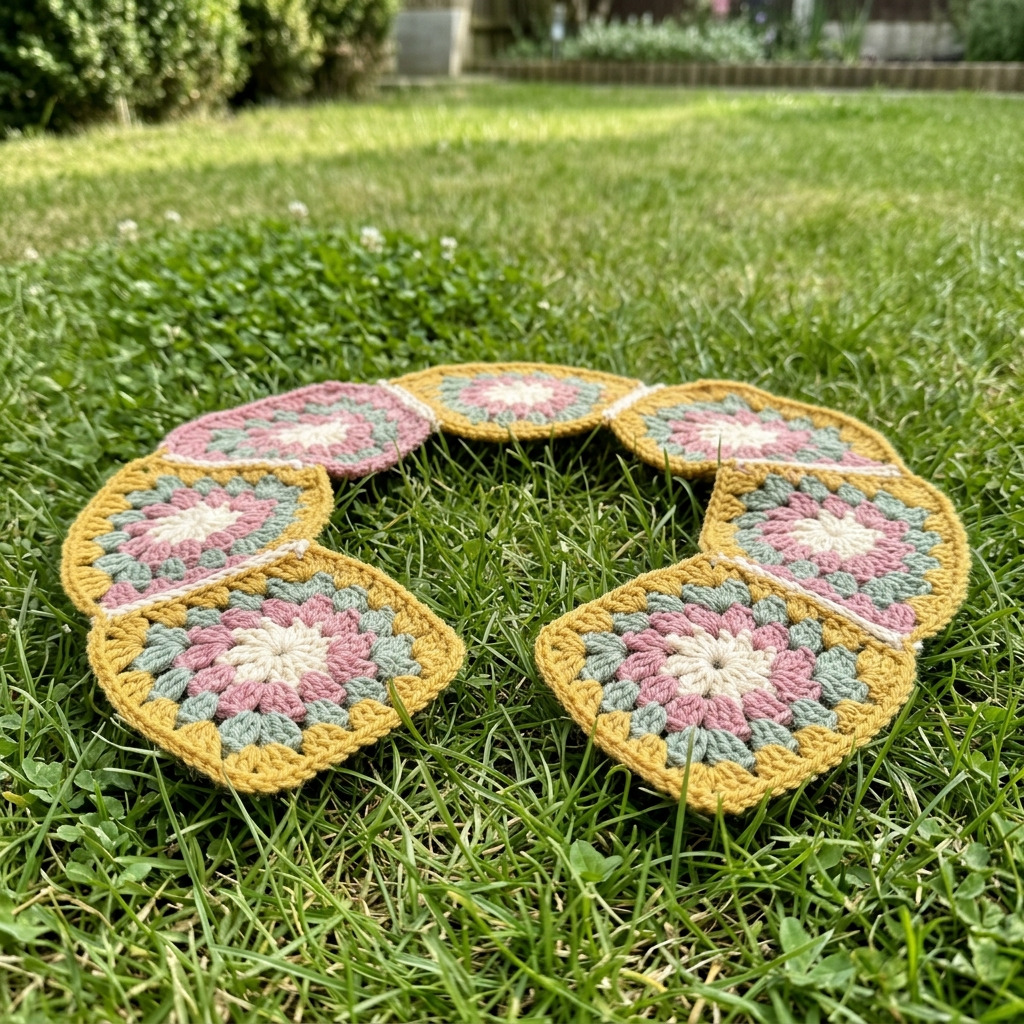
This project involves creating a colorful granny square collar that enhances a thrifted cardigan. The finished product combines the warmth of a cardigan with the charm and individuality of handcrafted crochet.
Project at a Glance
- Time required: 3-4 hours active working time; total elapsed time approximately 5 hours including drying
- Difficulty level: Intermediate, requiring skill in crocheting granny squares and sewing
- Estimated cost: $15 to $30, influenced by yarn choice and whether tools are already owned
- Finished dimensions: Approximately 24 inches in circumference and 4 inches in height
- Yield: One granny square collar
HERO IMAGE PLACEHOLDER
[Descriptive image caption of the finished project]
Materials and Tools
Materials
- Thrifted cardigan, size and color of choice
- Yarn:
- Main color: 1 skein (100g) of worsted weight acrylic yarn in Cream (e.g., Red Heart Super Saver – Soft White)
- Contrast colors:
- 1 skein each of worsted weight acrylic yarn in Dusty Pink, Sage Green, and Mustard Yellow (e.g., Red Heart Super Saver – Dusty Pink, Sage, and Mustard)
- Tapestry needle for weaving in ends: 1 piece
- Scissors: 1 piece
- Measuring tape or ruler: 1 piece
- Stitch markers (optional): 2-4 pieces
Tools
- Crochet hook: Size H/8 (5.00 mm)
- Scissors: 1 piece
- Tapestry needle: 1 piece (for weaving ends)
- Measuring tape or ruler: 1 piece
- Stitch markers (optional): 2-4 pieces (to mark stitches)
Instructions
Step 1: Make the Granny Squares
- Make a slip knot with the main color yarn (Cream) and chain 5. Join into a circle with a slip stitch.
- Round 1: Chain 3 (counts as 1 double crochet), make 2 double crochets into the ring, chain 2, 3 double crochets into the ring, chain 2. Repeat from to two more times. Join with a slip stitch to the top of the initial chain 3. (You should have 4 groups of 3 double crochets)
- Round 2: Change to Dusty Pink. Slip stitch to the next chain-2 space. Chain 3 (counts as 1 double crochet), work 2 double crochets in the same space, chain 1. In each chain-2 space from the previous round, work 3 double crochets, chain 1. Join with a slip stitch to the top of the initial chain 3.
- Round 3: Change to Sage Green. Slip stitch to the next chain space. Chain 3, work 2 double crochets in the same space, chain 1, work 3 double crochets in the next chain-1 space, chain 1. Repeat around. Join with a slip stitch.
- Round 4: Change to Mustard Yellow. Repeat the process as in round 3 to finish.
- Fasten off and weave in ends using a tapestry needle. Measure each square; it should be 4 inches in size.
Step 2: Number of Squares
- Create a total of 6-8 granny squares, depending on your desired collar width. Verify that each square measures 4 inches.
Step 3: Assembling the Collar
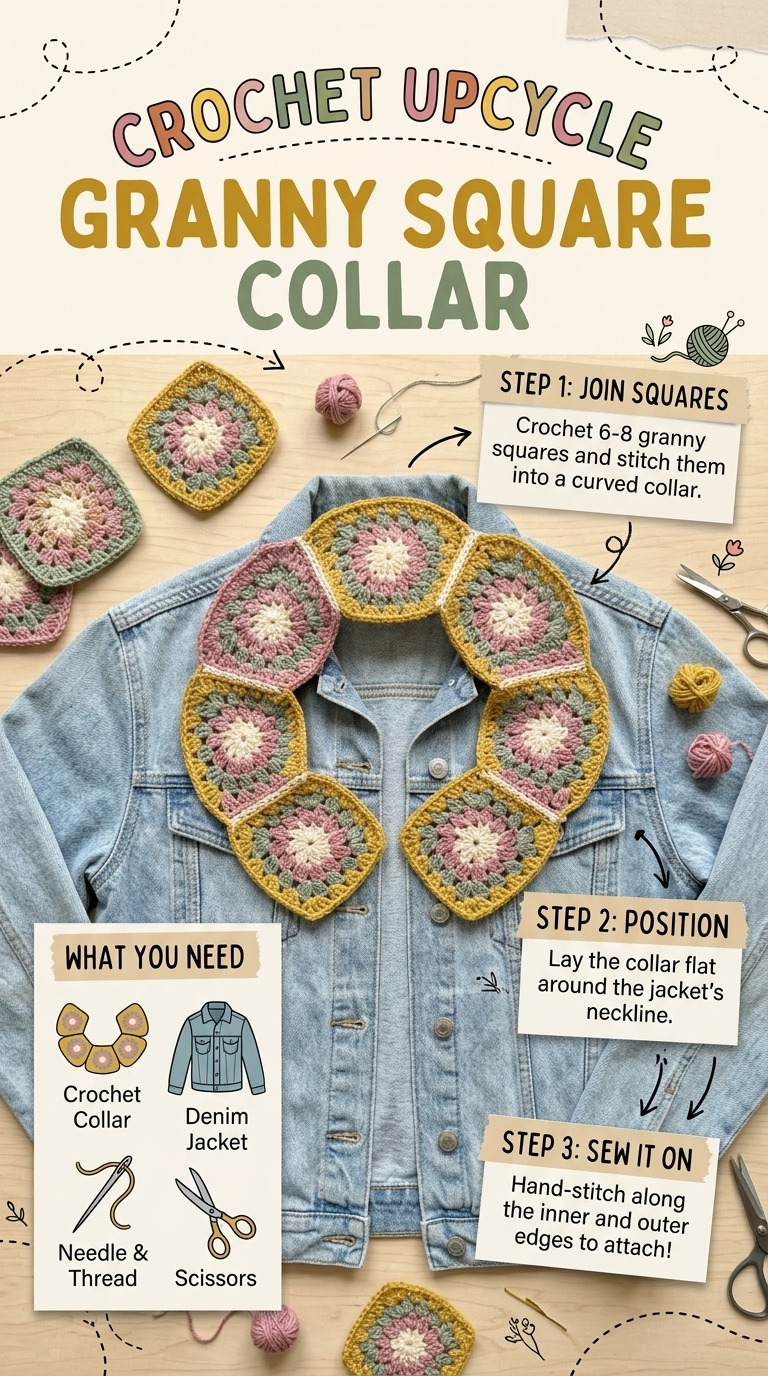
- Arrange the finished squares in a visually appealing layout for the collar, with 3-4 squares on each side.
- Using a tapestry needle and the main color yarn, sew the squares together along their edges to form a long strip that will serve as the collar.
- Ensure you leave space at the ends of the strip to attach it to the cardigan.
Step 4: Attaching the Collar to the Cardigan
- Turn the cardigan inside out for a cleaner seam. Position the granny square strip along the neckline of the cardigan, centering it evenly.
- With a tapestry needle and the main color yarn, sew the collar securely to the cardigan's neckline. Pull the yarn snugly but not overly tight to avoid puckering.
- Confirm the collar is evenly spaced and aligned before securing it all the way around the neckline.
Step 5: Finishing Touches
- Inspect for any loose yarn ends or visible strands. Weave in any remaining ends to achieve a polished appearance.
- Block the collar by lightly wetting it and laying it flat to dry, allowing it to hold its shape.
Assembly & Finishing
- Use a whip stitch or slip stitch method to join the squares using the main color yarn, ensuring the seams appear clean and unobtrusive.
- After securely attaching the collar, consider adding decorative buttons along the edges for enhanced visual appeal if desired.
- Optionally, lightly steam the collar for a refined finish, taking care not to let the steam make direct contact with the yarn to avoid altering its texture.
Measurements & Dimensions
- Final collar dimensions: Approximately 24 inches in circumference and 4 inches in height.
- Each granny square should measure 4 inches x 4 inches.
Timing Information
- Estimated active working time: 3-4 hours for crocheting squares and assembling the collar.
- Drying/blocking time: Approximately 1 hour (or longer depending on humidity).
- Total elapsed time: Approximately 5 hours.
Variations & Notes
- To achieve various looks, experiment with different color schemes or utilize variegated yarn.
- Maintain a comfortable tension while crocheting the squares to avoid curling edges.
- Store the upcycled cardigan flat to preserve the collar's shape; clean according to the yarn and cardigan care instructions.
Troubleshooting and FAQ
Troubleshooting
- The squares do not measure 4 inches. This may be due to incorrect tension. Adjust your crocheting style: if the squares are too small, use a larger hook; if too large, try using a smaller hook.
- The edges of the collar are not aligning properly when attached. Ensure that you are keeping the collar strip centered and even while sewing. If necessary, unpick and readjust the position.
- The yarn is coming apart at the seams. This could indicate that the stitches were not tight enough. Re-sew using a tighter stitch, ensuring full coverage of the edges.
- The collar is curling at the edges. This indicates too tight tension in your squares. Block the collar properly by wetting and laying flat; adjust the tension for future squares.
Frequently Asked Questions
- Can I use different types of yarn? Yes, using different yarn types can provide various textures. However, be cautious that the thickness and weight are generally similar to avoid uneven stitches.
- What is the best way to clean the cardigan after adding the collar? Follow the care instructions on the cardigan's tag; typically, hand wash or machine wash on a gentle cycle with cold water is advisable.
- Is it possible to scale this project for larger or smaller cardigans? Yes, you can adjust the number of granny squares or the size of each square to suit the cardigan’s dimensions. Just ensure your measurements remain consistent for proper fit.
- How can I prevent my collar from stretching out? Blocking the collar helps it maintain its shape. Additionally, store the cardigan flat rather than hanging to avoid stretching.
Save This Guide
Save or pin this guide to Pinterest for easy access while you build your own granny square collar with precise measurements and troubleshooting entries. Share any corrections, measured results, or substitutions that worked for you to keep this guide accurate.
Leave a Reply