
Project Overview
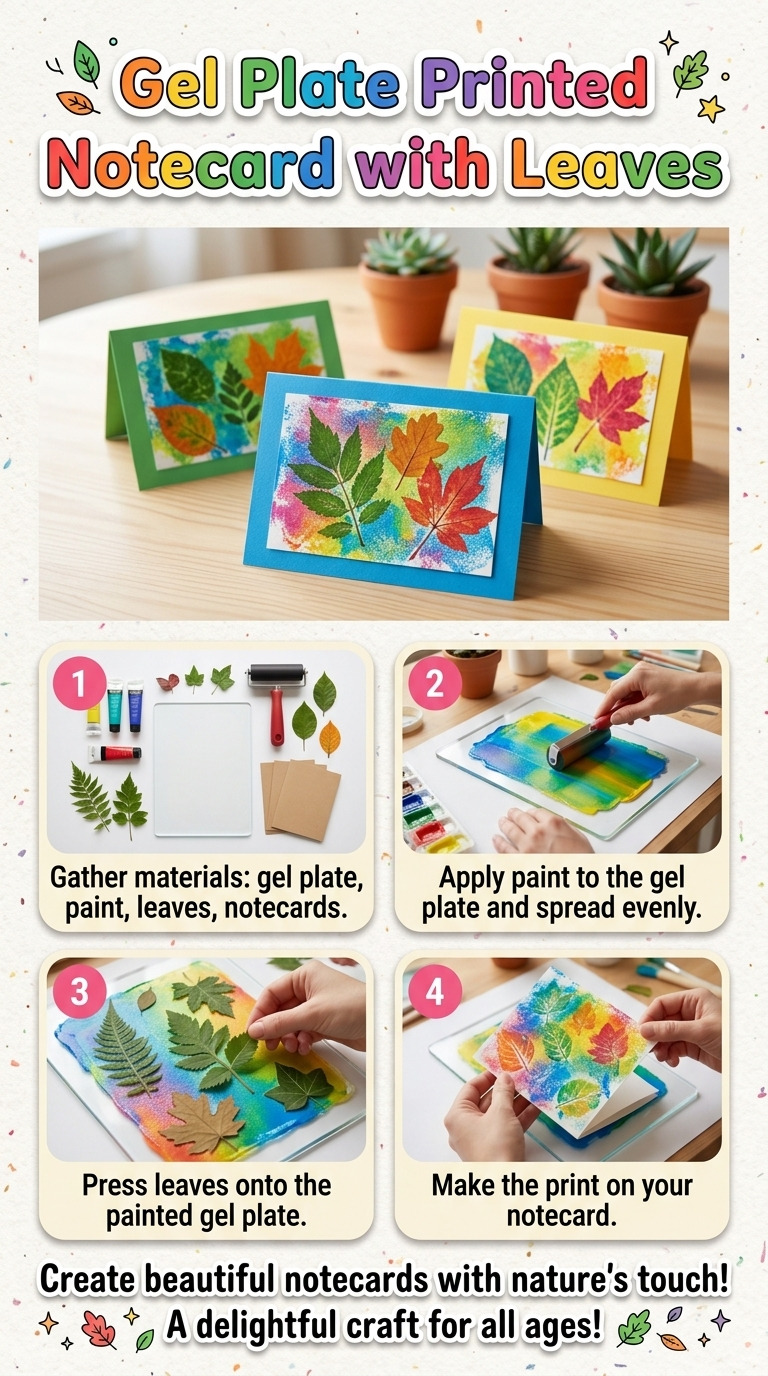
This project will guide you in creating a beautiful, personalized notecard using gel plate printing techniques combined with pressed leaves for a natural touch. The final piece will be perfect for unique greetings or invitations.
Project at a Glance
- Time required: 1 hour active working time; approximately 1 hour and 15-30 minutes total elapsed time
- Difficulty level: Intermediate, requiring familiarity with gel printing techniques
- Estimated cost: $10 to $30, varying based on the quality of materials used
- Finished dimensions: 5” x 7” when folded
- Yield: One notecard
HERO IMAGE PLACEHOLDER
[Descriptive image caption of the finished project]
Materials and Tools
Materials
- Cardstock:
- Quantity: 1 sheet
- Size: 8.5” x 11”
- Color: White or cream
- Acrylic paint:
- Quantity: 3 tubes
- Colors: Green (e.g., Sap Green), Yellow (e.g., Cadmium Yellow), and Blue (e.g., Cerulean Blue)
- Gel printing plate:
- Size: 5” x 7”
- Brayer:
- Size: 4”
- Pressed leaves:
- Quantity: 3-5 leaves in various shapes (e.g., ferns, maples, or other decorative leaves)
- Paper towel or absorbent cloth: for cleaning paint
- PVA glue or glue stick: for attaching leaves
- Water spray bottle: for misting leaves (optional)
Tools
- Workspace: A flat, clean surface (e.g., a table) covered with a plastic tablecloth or drop cloth to protect from paint
- Craft knife or scissors: for cutting the cardstock
- Cutting mat: if using a craft knife
- Ruler: for measuring
- Pencil: for marking cuts
- Safety equipment: Gloves (to protect hands from paint) and mask (if sensitive to paint fumes)
Instructions
Stage 1: Preparing the Notecard
Step 1: Prepare the cardstock
Using a ruler and pencil, mark the center of the 10” x 7” cardstock at 5” along the shorter side. Fold the cardstock in half to create a 5” x 7” notecard. Press flat to ensure the fold is crisp, creating the finished notecard shape.
Stage 2: Gel Plate Printing
Step 2: Apply paint to gel plate
Squeeze a small amount (approximately 25 mm in diameter, or the size of a quarter) of green acrylic paint onto the gel printing plate.
Step 3: Spread paint
Using the brayer, roll the paint out evenly on the gel plate until a thin layer covers the entire surface, ensuring an even consistency.
Step 4: Layer colors
Add small amounts of yellow and blue acrylic paints onto the gel plate, rolling over the surface lightly with the brayer to mix them. This should create a textured finish, combining the colors without complete blending.
Step 5: Take a print
Carefully press the folded notecard onto the gel plate, ensuring even pressure is applied across the surface with your hand. Lift the notecard off gently to reveal the printed design.
Step 6: Drying time
Set the printed notecard aside to dry completely. Wait an estimated 15 to 30 minutes, depending on the humidity level in your environment.
Stage 3: Adding Pressed Leaves
Step 7: Arrange leaves
Once the notecard is completely dry, arrange your pressed leaves on the front of the notecard. Experiment with their placement to achieve an aesthetically pleasing design.
Step 8: Glue the leaves
Using a small brush or glue stick, apply an even layer of PVA glue to the back of each pressed leaf. Press the leaves firmly onto the notecard. Allow to dry for approximately 10 minutes.
Step 9: Secure the leaves
Ensure that the edges of the leaves are firmly adhered to the card. Apply more glue if necessary, checking for edges that may lift.
Assembly & Finishing
Step 10: Final touches
Once all components are dry, you can add artistic embellishments if desired. Use additional paint splatters around the leaves for a more integrated and decorative look.
Step 11: Seal the notecard (optional)
If you desire additional durability for your notecard, lightly spray an acrylic sealer over the surface to protect the design from wear and tear.
Step 12: Drying time for sealant
Allow the sealer to dry according to manufacturer instructions, typically taking about 15 minutes.
Measurements & Dimensions
- Finished notecard dimensions: 5” x 7” when folded
- Cardstock cut size: 10” x 7”
Timing Information
- Estimated active working time: 1 hour
- Drying/curing time: 15 to 30 minutes for the prints, 10 minutes for the glue, optional 15 minutes for sealant drying
- Total time: Approximately 1 hour and 15-30 minutes
Troubleshooting and FAQ
Troubleshooting
The print appears smeared or unclear. This is likely due to either insufficient drying time before pressing the notecard onto the gel plate or applying too much paint. Ensure the print is completely dry and apply a thinner layer of paint next time.
The leaves do not adhere well. This can happen if the surface of the notecard is not completely dry, allowing for moisture to interfere with the glue. Always ensure both the notecard and the leaves remain completely dry before gluing.
Unwanted wrinkles appear in the notecard. This is commonly caused by uneven pressure while pressing the notecard onto the gel plate. Be sure to apply balanced pressure across the surface to prevent wrinkles.
Inconsistent paint color delivery. If certain areas are lighter or lacking color, this may be because the paint was not evenly rolled out on the gel plate. Practice rolling it out fully until you achieve an even consistency.
Frequently Asked Questions
Can I use different types of leaves? Yes, using a variety of leaves can create unique designs. Ensure the leaves are thoroughly pressed and dried before use to maintain flatness.
What if I cannot find a gel plate? As a substitution, you could use a flat, smooth surface that holds paint well, such as a piece of acrylic or a disposable plastic sheet. However, results may vary.
Will the notecard withstand moisture? The notecard can handle minimal moisture due to the acrylic paint and optional sealer. For optimal preservation, avoid exposing the card to excessive moisture.
Can I use more than three colors of paint? Yes, you can introduce additional colors. Be mindful of color mixing to achieve the desired effect, as some colors may blend unwantedly if applied too heavily together.
Save This Guide
Save or pin this guide to Pinterest so you can easily refer to the cut list, exact measurements, and drying times while building your notecard. Your corrections, measured results, or any successful substitutions are welcome to keep this guide accurate.
Leave a Reply