
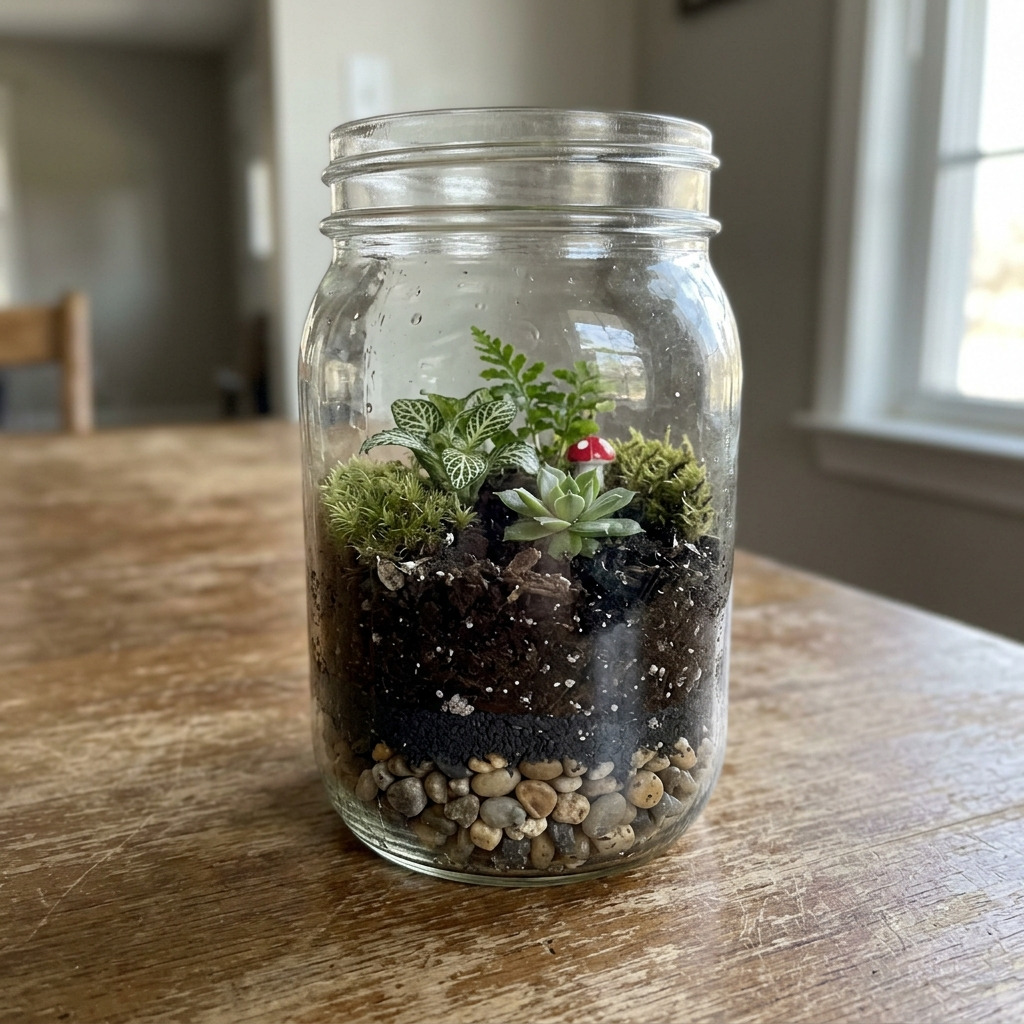
Project Overview
This project involves creating a delightful mini terrarium using a recycled glass jar, perfect for adding a touch of nature to your home decor. The finished terrarium will have a unique layout featuring soil, rocks, decorative elements, and small plants, and is designed to fit on a windowsill or desk.
Project at a Glance
- Time required: 30 minutes active working time; total elapsed time: 30 minutes
- Difficulty level: Beginner, focused on basic gardening and assembly skills
- Estimated cost: $10 to $30, depending on plant and decoration choices
- Finished dimensions: Approximately 4-6 inches in height and 5 inches in diameter
- Yield: One mini terrarium
![Descriptive image caption of the finished project]
Materials and Tools
Materials
- Recycled glass jar: 1 jar, approximately 12 oz (like a mason jar or old candle jar)
- Small pebbles: 1 cup, smooth and decorative, for drainage
- Activated charcoal: 1/2 cup, to keep the soil fresh
- Potting soil: 1-2 cups, suitable for indoor plants
- Small plants: 2-4 plants, such as succulents or small ferns
- Decorative elements: Optional (mini figurines, small stones, and moss)
- Natural moss: Small piece (for decoration, optional)
Tools
- Trowel or spoon: Standard size, for adding soil and plant placement
- Spray bottle: 8 oz capacity, for watering
- Scissors: For trimming plants if necessary
- Measuring cup: For measuring soil and charcoal
- Gloves: To protect hands while working with soil and plants
Instructions
Step 1: Layer the bottom with pebbles
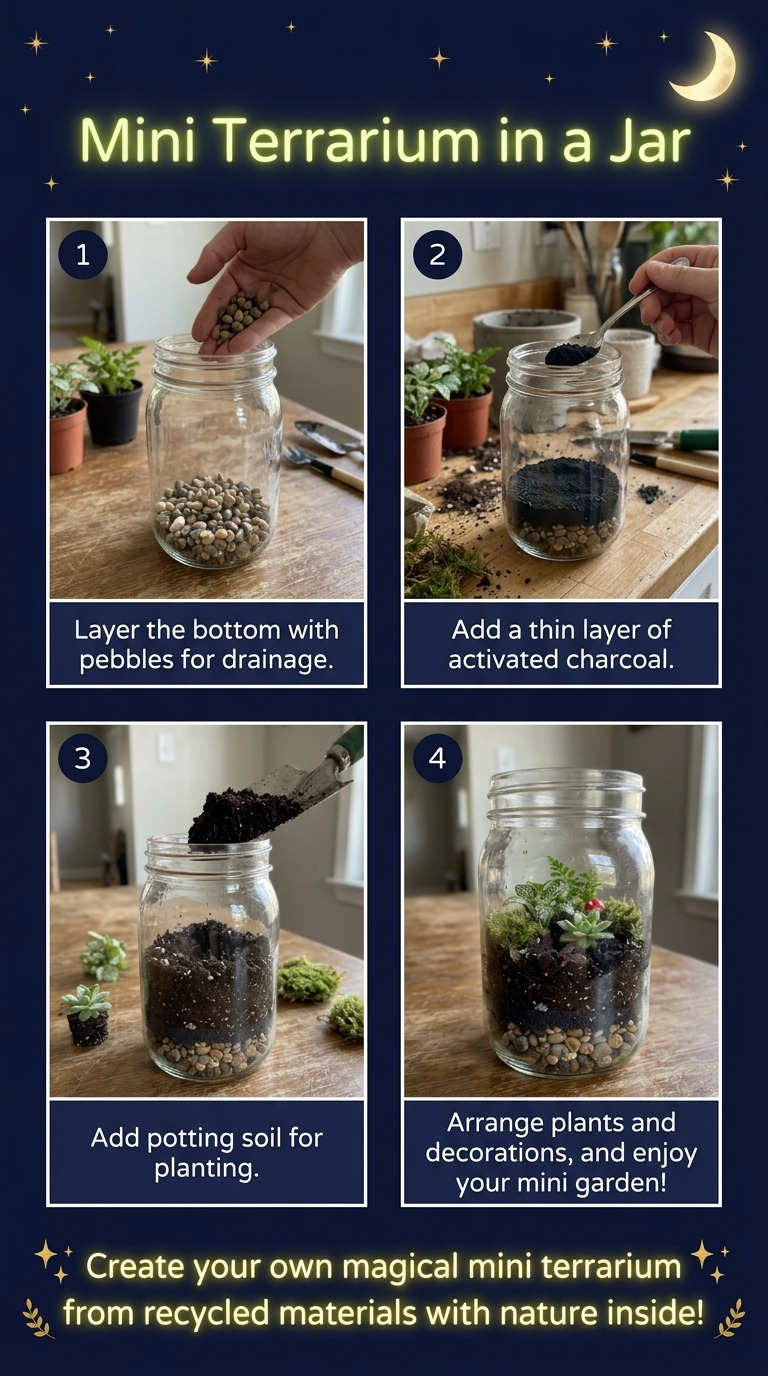
Using a measuring cup, pour 1 cup of small pebbles into the bottom of the jar to create a drainage layer. Spread it evenly using your trowel or a spoon. Expected result: The pebbles should form a flat and even layer at the bottom of the jar.
Step 2: Add activated charcoal
Measure 1/2 cup of activated charcoal and sprinkle it over the pebbles. This will help keep your terrarium fresh. Ensure it covers the pebble layer entirely. Expected result: The charcoal layer should evenly cover the pebbles without any gaps.
Step 3: Add potting soil
Measure 1-2 cups of potting soil and layer it on top of the charcoal. Aim for about 2 inches of soil. Use the trowel or spoon to smooth it out and create an even layer. Expected result: The soil layer should be level and compact enough to securely hold the plants.
Step 4: Plant your greenery
Remove small plants from their pots, gently shake off excess soil, and position them in the jar by creating a small hole in the soil with your finger. Place 2-4 small plants, ensuring they are spaced nicely. Consider using various heights for visual interest. Expected result: The plants should be firmly positioned and visible above the soil line.
Step 5: Decorate your terrarium
If desired, add decorative elements like mini figurines or additional rocks. You can also lay a small piece of natural moss on top of the soil around the plants. Expected result: The terrarium should have an aesthetically pleasing arrangement of plants and decorations.
Step 6: Watering
Lightly mist the soil and plants with the spray bottle — do not soak. This should only take a few spritzes. Expected result: The soil should be slightly damp but not pooling with water.
Step 7: Final touches
Use any remaining moss or decorative elements to cover any bare soil, ensuring a lush look. Expected result: The top layer of the soil should be covered for an attractive finish.
Step 8: Set the terrarium
Place your completed terrarium on a windowsill or well-lit area, avoiding direct sunlight to prevent overheating and wilting. Expected result: The terrarium should be positioned in a way that allows plants to receive light without direct sun exposure.
Assembly & Finishing
The layers are held together by the density of each material. No additional adhesives are needed. Water as needed, keeping the soil lightly moist. You may need to adjust watering depending on the specific plants used.
Measurements & Dimensions
- Final dimensions of the finished item: 4-6 inches in height and 5 inches in diameter
- Cut sizes used: No cuts are needed for materials.
Timing Information
- Estimated active working time: 30 minutes
- Drying/curing time: None
- Total time: 30 minutes
Variations & Notes
- Getting a clean result: Use a funnel to pour pebbles and charcoal for easy application without mess.
- Common mistakes: Avoid over-watering as it can lead to mold. Ensure proper drainage to prevent water accumulation.
- Size variations: Larger or smaller jars can be used, adjusting the amount of materials accordingly.
- Color/material variations: Experiment with colored stones, different plant types, or even fairy garden decorations for a whimsical effect.
- Care and cleaning: Mist plants every week; clean the glass jar with a damp cloth to keep it clear and visually appealing.
Make sure to monitor the plants and enjoy your new mini terrarium.
Troubleshooting and FAQ
Troubleshooting
The soil is too wet. Cause: Over-watering during setup. Correct: Reduce misting and allow the jar to sit in a well-ventilated area to dry out for a few hours.
Plants are wilting. Cause: Insufficient light or over-watering. Correct: Relocate the terrarium to a brighter spot (indirect light) and adjust watering frequency.
Mold is developing in the terrarium. Cause: Excess moisture and poor air circulation. Correct: Reduce watering and remove any visible mold growth manually. Ensure proper drainage is in place.
Plants are growing too large for the jar. Cause: Plant selection may not be suitable for the enclosed space. Correct: Choose smaller varieties or plan for periodic trimming.
Frequently Asked Questions
Can I use a different type of jar? Yes, any clear glass jar with a wide opening will suffice. Larger jars may require increased quantities of each layer.
What kind of plants work best in a terrarium? Succulents, ferns, and small indoor plants like fittonia or selaginella thrive well in terrariums due to their small size and growth habits.
How often should I water the terrarium? Water depending on humidity levels; typically once every 1-2 weeks. If condensation forms on the jar, reduce watering frequency.
Can I create a closed terrarium? Yes, using a jar with a lid can create a closed environment. It's essential to monitor moisture levels to prevent over-watering.
Save This Guide
Save or pin this guide to Pinterest for easy access while you build your mini terrarium, including the cut list, exact measurements, and troubleshooting entries. Share any corrections, measured results, or substitutions that worked for you to keep this guide accurate.
Leave a Reply