
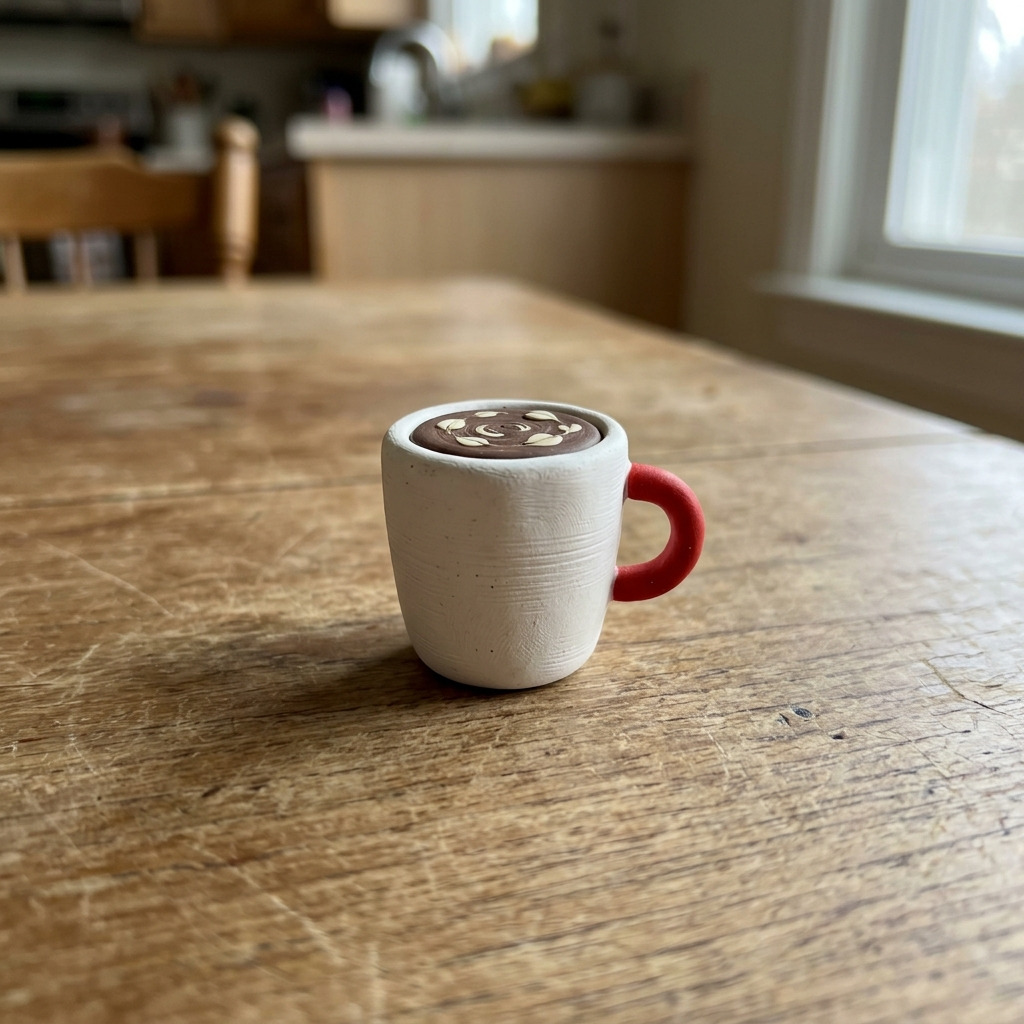
The finished item is a whimsical fridge magnet shaped like a coffee cup, crafted from colorful polymer clay. This guide provides all necessary steps, materials, and tools for creating a durable and decorative coffee cup magnet for any kitchen.
Project at a Glance
- Time required: Active working time: 1 hour; Total elapsed time: 2 hours
- Difficulty level: Beginner; Basic shaping and baking of polymer clay
- Estimated cost: $10 to $15, depending on material choices and whether tools are already owned
- Finished dimensions: Approximately 2.5 inches tall and 1.5 inches in diameter at the base
- Yield: One fridge magnet
HERO IMAGE PLACEHOLDER
[Descriptive image caption of the finished coffee cup fridge magnet]
Materials and Tools
Materials
- Polymer Clay:
- 1 oz of white polymer clay (for the cup)
- 0.5 oz of brown polymer clay (for coffee)
- 0.5 oz of cream polymer clay (optional for decoration)
- 0.2 oz of colored polymer clay (for the cup handle, e.g., red, blue, or green)
- Magnet:
- One flat adhesive magnet, 1 inch x 1 inch
- Glossy Glaze Sealant (optional):
- Small bottle, clear finish for a shiny look
Tools
- Oven: Conventional oven for baking the polymer clay
- Baking Sheet: To place the clay on while baking
- Parchment Paper: To line the baking sheet and prevent sticking
- Craft Knife: For cutting shapes and details
- Rolling Pin: To roll out the clay to desired thickness
- Acrylic Roller (optional): For a smoother finish on the clay surface
- Toothpick: To add texture and details to the clay
- Ruler: For accurate measurement of dimensions
Instructions
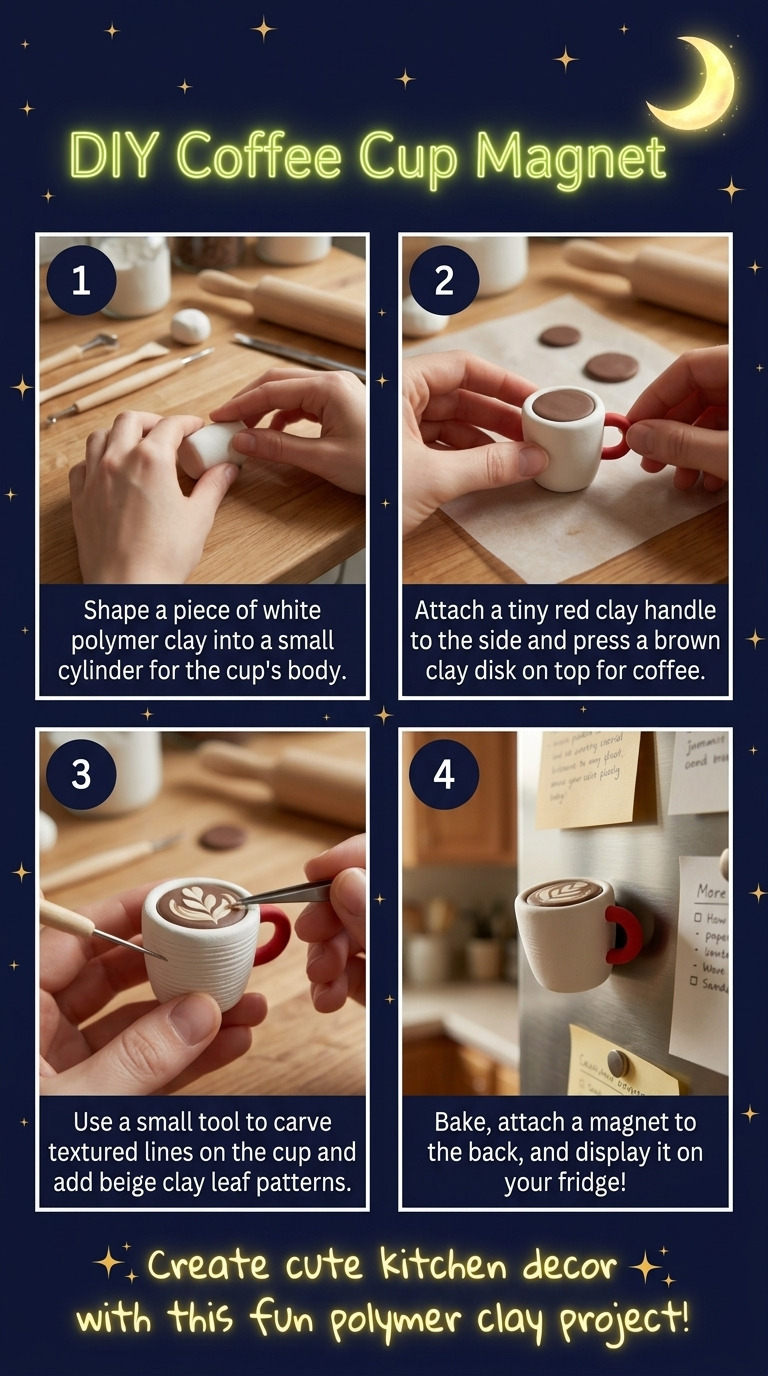
Step 1: Form the Coffee Cup
- Take 1 oz of white polymer clay. Roll it into a ball.
- Use your fingers to gently press and mold it into the shape of a cup, ensuring the height is about 1.5 inches and the diameter at the base is approximately 1.5 inches.
- The sides should taper slightly inward as they rise.
Step 2: Create the Cup Rim
- Roll out a thin, flat piece of white clay to about 1/8 inch thick. Use a ruler to measure and cut out a ring with an outer diameter of 1.5 inches and an inner diameter of 1 inch.
- Position this ring around the top edge of the cup shape to create the rim. Use the craft knife to trim excess clay if necessary.
Step 3: Make the Handle
- Roll out a small piece of colored polymer clay (e.g., red) into a cylinder measuring about 1/4 inch thick and 2.5 inches long.
- Bend this piece into a ‘C’ shape to form the handle. Attach it to the side of the cup, pressing gently to ensure it adheres well.
Step 4: Add the Coffee
- Roll the brown polymer clay into a small ball and then flatten it slightly into a disc measuring about 1 inch in diameter and 1/8 inch thick.
- Place this disc on top of the cup, ensuring it fits snugly within the rim of the cup.
Step 5: Optional Cream Decoration
- If desired, take the cream-colored clay and roll small balls approximately 1/4 inch in diameter. Flatten them slightly into discs.
- Arrange these discs on top of the brown clay to mimic the appearance of cream floating on the coffee.
Step 6: Add Texture and Details
- Use a toothpick to gently create swirls on the surface of the brown clay or add short lines around the cup to represent texture.
Step 7: Bake the Cup
- Preheat the oven to 275°F (135°C).
- Place the crafted coffee cup magnet on the prepared baking sheet lined with parchment paper. Bake for 15 minutes according to the polymer clay instructions.
Step 8: Cooling
- After baking, carefully remove the baking sheet from the oven. Allow the coffee cup to cool completely for approximately 30 minutes on the baking sheet.
Step 9: Attach the Magnet
- Once the cup is completely cool, peel the backing off the adhesive magnet and firmly attach it to the back of the cup. Make sure it is centered and pressed down firmly.
Step 10: Apply Glossy Glaze (Optional)
- If desired, apply the glossy glaze sealant to the entire surface of the finished piece for added shine. Refer to the manufacturer's instructions for drying time, which typically is around 1 hour.
Troubleshooting and FAQ
Troubleshooting
- The cup shape is uneven. This may be caused by uneven pressure when molding. Ensure uniform pressure is applied when shaping the polymer clay.
- The handle is falling off. This occurs if the handle is not pressed firmly onto the cup. Ensure adequate adhesion by pressing gently but firmly when applying the handle.
- The surface looks rough after baking. This may happen due to dust or fingerprints. Handle the clay with clean hands and consider using an acrylic roller for a smoother finish before baking.
- The coffee top does not fit within the rim. If the disc is too large, trim it down to fit snugly within the rim of the cup.
Frequently Asked Questions
- Can I use different colors for the cup? Yes, you can experiment with any colors you prefer for the cup and handle, allowing for personalization.
- What happens if I overbake the polymer clay? Overbaking can cause the clay to turn dark brown or even burn. Follow the recommended baking time closely to prevent this.
- Can I substitute the adhesive magnet with something else? A standard fridge magnet can be used instead; however, ensure it is thin enough to adhere securely to the back of the cup.
- Is the glaze necessary? The glaze is optional; it adds a shiny finish and protects the surface but is not required for durability.
Save This Guide
Save this guide to Pinterest to reference all the materials, measurements, and timing as you work on your polymer clay coffee cup fridge magnet. If you have corrections or different measurements that worked for you, please share them to help keep this guide accurate.
Leave a Reply