
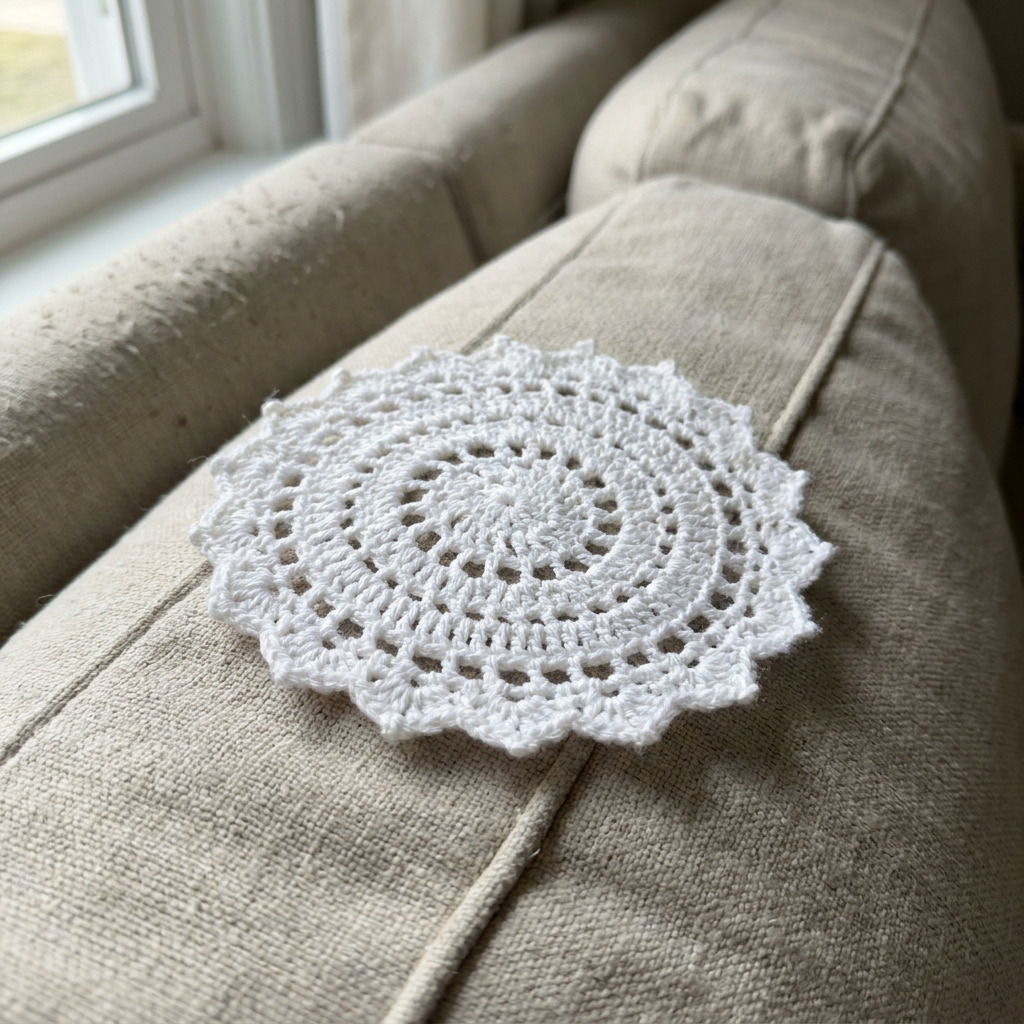
Project Overview
This project will guide you through creating a delicate lace doily coaster that enhances the aesthetic of any table setting. The straightforward technique makes it suitable for beginners, allowing completion in a single session.
Project at a Glance
- Time required:
- Active working time: 1 to 2 hours
- Total elapsed time: Approximately 5 to 8 hours (including drying/blocking time)
- Difficulty level: Beginner, requiring basic crochet skills including creating chains and double crochet stitches
- Estimated cost: $5 to $15, depending on yarn quality and whether you have the required tools
- Finished dimensions: Approximately 6 inches in diameter
- Yield: One lace doily coaster
HERO IMAGE PLACEHOLDER
[Image of the finished lace doily coaster]
Materials and Tools
Materials
- Cotton Yarn:
- Quantity: 1 ball (approximately 50g)
- Color: White, size 10 (provides a fine and delicate appearance)
- Blocking Pins:
- Quantity: 20 (to secure the doily during shaping)
- Scissors:
- Quantity: 1 (to cut yarn)
- Optional:
- Starch Spray: For added stiffness to the finished doily (not necessary, but improves durability)
Tools
- Crochet Hook:
- Size: 1.75mm (US Size 7), for crocheting the lace pattern.
- Yarn Needle:
- Quantity: 1 (for weaving in yarn ends)
- Blocking Board or Clean Towel:
- For laying the doily flat to dry and maintain shape.
Instructions
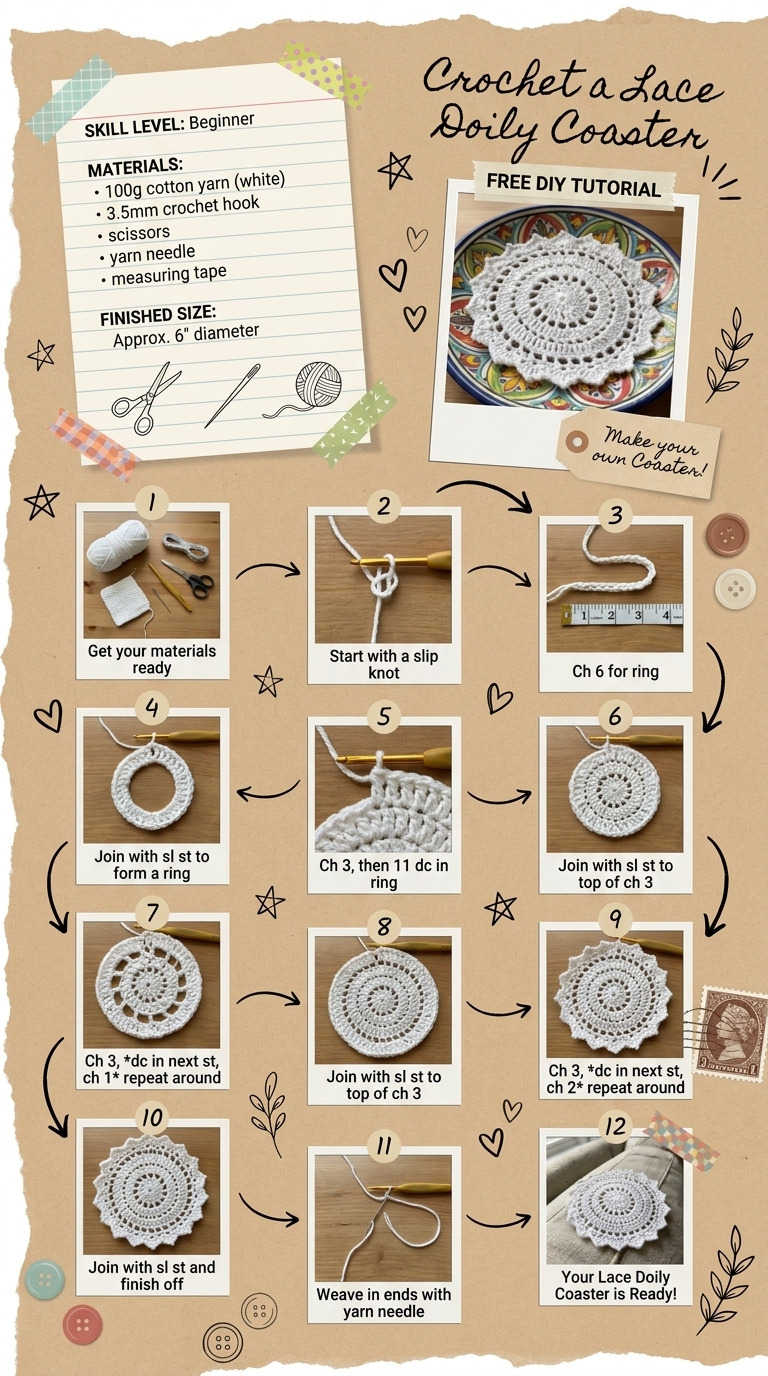
- Create the Foundation Chain: – Make a slip knot and then chain 6 stitches. – Join with a slip stitch to the first chain to form a ring. The center should be closed without any gaps.
- Round 1: – Chain 3 (this counts as your first double crochet), then work 11 double crochets into the ring. – Join with a slip stitch to the top of the chain 3. – Observation: You should have a total of 12 double crochets.
- Round 2: – Chain 3, then double crochet in the same stitch. – In the next stitch, make 2 double crochets. – Repeat this pattern around (making 2 double crochets in each stitch). – Join with a slip stitch to the top of the chain 3. – Observation: You should have a total of 24 double crochets.
- Round 3: – Chain 3, double crochet in the same stitch. – In the next stitch, make 1 double crochet, then 2 double crochets in the following stitch. – Repeat this pattern around. – Join with a slip stitch to the top of the chain 3. – Observation: You should have a total of 36 double crochets.
- Round 4: – Chain 3, double crochet in the same stitch. – In the next 2 stitches, make 1 double crochet, then 2 double crochets in the following stitch. – Repeat this pattern around. – Join with a slip stitch to the top of the chain 3. – Observation: You should have a total of 48 double crochets.
- Round 5 (Picot edge): – Chain 1, then slip stitch in the first double crochet to start the picot edge. – Chain 3, then make a slip stitch in the top of the first chain to create a picot. – Skip 1 double crochet, then slip stitch in the next double crochet. – Repeat this pattern around until you complete the round. – Join with a slip stitch to the first picot.
- Finishing: – Cut the yarn, leaving a tail of about 6 inches. – Pull the tail through the last slip stitch to secure. – Use a yarn needle to weave in any loose ends, ensuring the back of the coaster is neat.
Assembly & Finishing
- To shape the picots, gently pull each one to ensure it maintains its form.
- Block the doily by soaking it in lukewarm water for about 10 minutes.
- Gently squeeze out excess water without twisting the doily.
- Lay the doily flat on the blocking board or a towel, and secure each picot in place using the blocking pins.
- Allow the coaster to dry completely for about 4 to 6 hours.
Measurements & Dimensions
- Final dimensions: Approximately 6 inches in diameter.
- Round 1: 12 double crochets.
- Round 2: Increases to 24 double crochets.
- Round 3: Increases to 36 double crochets.
- Round 4: Increases to 48 double crochets.
Timing Information
- Estimated active working time: 1 to 2 hours depending on individual crocheting speed.
- Drying/blocking time: 4 to 6 hours.
- Total time required: Approximately 5 to 8 hours, including drying time.
Variations & Notes
- Consider using colored cotton yarn for a different aesthetic effect.
- Adjust your tension for tighter or looser stitches; this impacts the overall look of the doily.
- Ensure to join each round properly to prevent gaps, and verify that the initial chain is not twisted when forming the ring.
- Clean the coaster with mild soap and cold water; allow it to air dry flat. Store your finished doily in a dry place away from direct sunlight to prevent fading.
Troubleshooting and FAQ
Troubleshooting
- The stitches are uneven.
- Cause: Tension may vary throughout your work. Correction: Practice maintaining consistent tension by crocheting without pulling too tightly or loosely.
- The doily is not laying flat.
- Cause: Insufficient pinning during blocking could be the issue. Correction: Ensure each picot and round edge is secured with a pin when blocking to maintain the shape.
- Crochets at the end of a round overlap or crowd.
- Cause: Not maintaining proper counts when joining rounds. Correction: Count double crochets at the end of each round to ensure accurate stitch number.
- The finished doily is too small.
- Cause: Tight stitches can compress the size. Correction: Try loosening your tension for the next project.
Frequently Asked Questions
- Can I use a thicker yarn?
- Yes, but it will change the appearance and size of the final doily. A thicker yarn will generally yield a coarser texture and a larger design.
- How can I make the doily stiffer?
- You can use starch spray after blocking for added firmness. Follow the product instructions for best results.
- Is the doily machine washable?
- Hand wash with mild soap and cold water is recommended to maintain the doily's integrity and appearance.
- What can I do if I run out of yarn?
- If you run out, you can use a different color or texture yarn for the final rounds, but this will alter the final look.
Save This Guide
Save or pin this guide to Pinterest so you have the detailed cut list, exact measurements, and troubleshooting entries ready while you create your lace doily coaster. Share corrections or measured results, or mention substitutions that worked for you to help keep this guide accurate.
Leave a Reply