
Project Overview
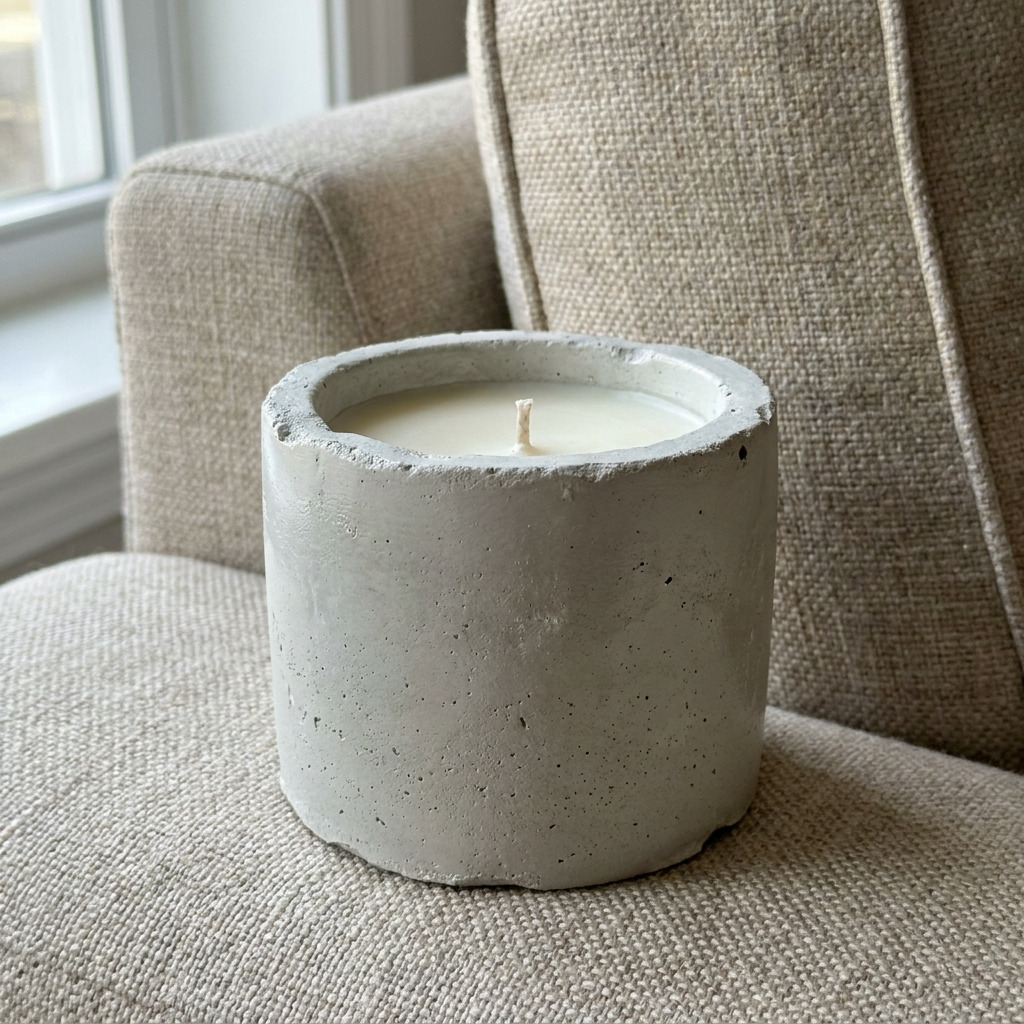
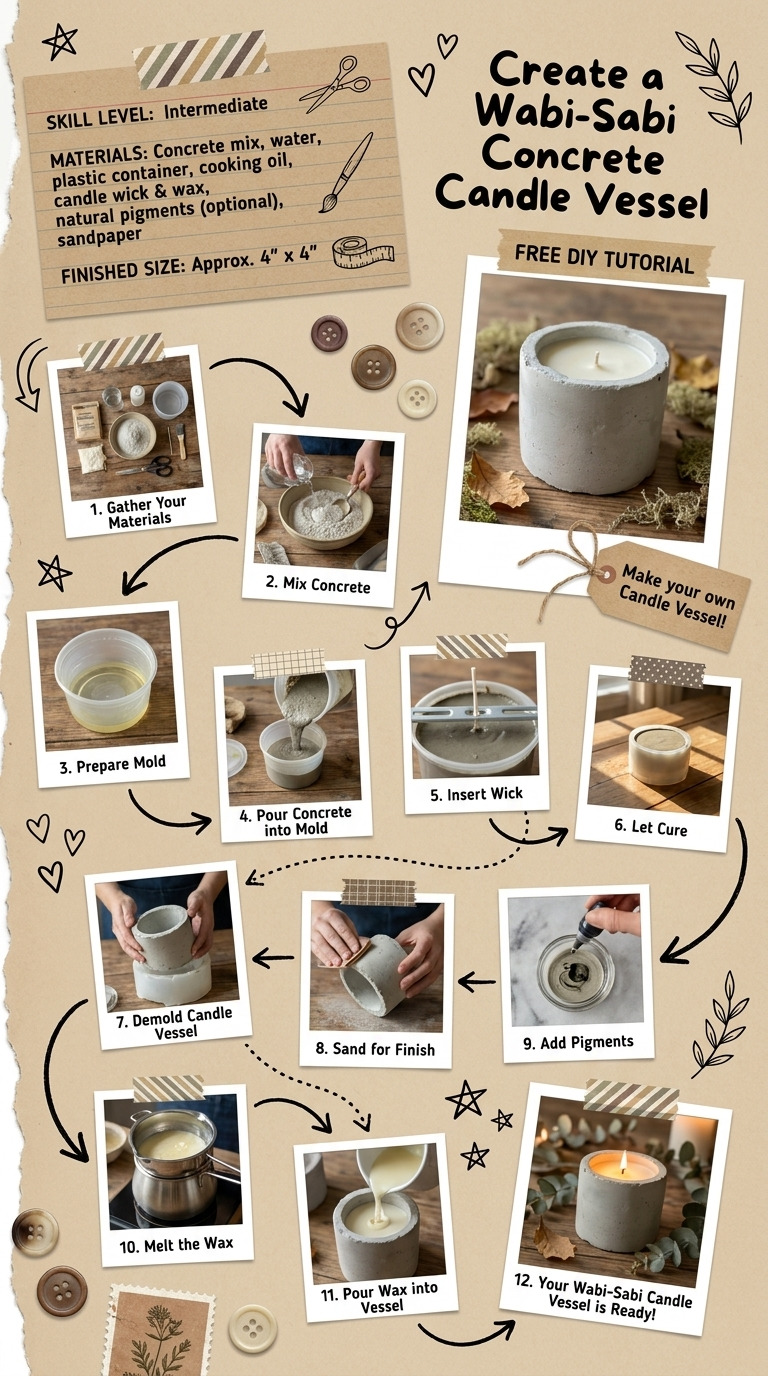
This project involves creating a small, decorative concrete vessel designed to hold candles, featuring a unique wabi-sabi finish that embraces imperfections. The finished result is a rustic candle holder that highlights the beauty of asymmetry and the natural qualities of concrete.
Project at a Glance
- Time required: Active working time: 2 hours Total elapsed time: 1-2 days (including drying and curing times)
- Difficulty level: Intermediate, requiring skills in mixing and pouring concrete
- Estimated cost: $15 to $30, depending on material choices and whether tools are already owned
- Finished dimensions: Approximately 4 inches in diameter and 4 inches in height
- Yield: 1 concrete candle vessel
HERO IMAGE PLACEHOLDER
[Descriptive image caption of the finished project]
Materials and Tools
Materials
- Quick-set concrete mix: 2 lbs (choose a lightweight mix if possible)
- Water: 0.5 lbs (measure as directed by the concrete mix)
- Plastic container (for mixing): 1 quart size
- Silicone mold (candle vessel shape): 1
- Oil (e.g., cooking oil or silicone spray): for mold release
- Sandpaper (medium grit, 120): 1 sheet
- Acrylic paint (optional, for coloring imperfections): 1 bottle in earthy tones
- Natural wax candle or wax to make your own: 8 oz (beeswax or soy wax)
- Wick: 1 x 6 inches
- Wick holder (optional): 1
Tools
- Mixing paddle (or a stick for stirring)
- Measuring cup or scale
- Gloves (for handling concrete)
- Dust mask (to avoid inhaling dust during mixing)
- Small pot (for melting wax)
- Thermometer (for monitoring wax temperature)
- Craft knife or utility knife
- Heat gun (optional, for bubbles in wax)
Instructions
Stage 1: Making the Concrete Vessel
Step 1: Mixing Concrete
- Wear gloves and a dust mask to protect yourself from concrete dust.
- In the plastic container, combine the quick-set concrete mix with 0.5 lbs of water. Mix thoroughly using the mixing paddle or stick for approximately 3-5 minutes until you achieve a smooth, non-runnymixture that holds its shape.
Step 2: Pouring Concrete
- Carefully pour the concrete mixture into the silicone mold, ensuring it fills to the top (approximately 4 inches in height).
- Tap the mold gently on the table to release any trapped air bubbles.
- Leave the concrete to set according to the package instructions, typically 30-45 minutes, until firm enough to handle.
Step 3: Demolding
- Once the concrete has set, carefully peel away the silicone mold. If the mold does not release easily, flex the mold gently until the vessel comes out.
- Allow the concrete to cure for an additional 24 hours to achieve maximum strength.
Stage 2: Finishing the Vessel
Step 4: Sanding
- After curing, take the medium grit (120) sandpaper and smooth the edges and surface of the concrete vessel. Achieve a rustic look by varying the texture and dimensions, honoring the wabi-sabi philosophy.
- Wipe away any concrete dust with a damp cloth to ensure a clean surface.
Step 5: Adding Color
- If desired, apply acrylic paint in earthy tones to accentuate imperfections in the vessel. Use a sponge or brush, applying the paint lightly and allowing some concrete color to show through for a natural appearance.
Stage 3: Preparing and Pouring the Candle
Step 6: Preparing Wax
- If using block wax, cut it into smaller pieces for easier melting. Fill the small pot with wax and place it over low heat. Use a thermometer to monitor the temperature; the wax should melt at around 170°F (76°C).
- Once melted, pour a small amount of wax into the base of the concrete vessel to secure the wick. Allow this to cool and harden (approximately 10 minutes).
Step 7: Pouring Candle
- After the base layer of wax has set, carefully pour the remaining melted wax into the concrete vessel, leaving approximately half an inch from the top. Allow the candle to set for several hours until solid.
Step 8: Final Wick Trimming
- Once the candle is completely set, trim the wick to about 1/4 inch above the wax surface.
Assembly & Finishing
- The concrete vessel and candle can be placed together. The rustic imperfections of the concrete will contrast beautifully with the smooth surface of the wax.
- Optional: Seal the concrete with a concrete sealer to enhance moisture resistance and durability.
Measurements & Dimensions
- Finished concrete candle vessel: approximately 4 inches in diameter and 4 inches in height
- Wick length: 6 inches (allow for at least 1.5 – 2 inches of wick above the wax to ensure complete burning)
Timing Information
- Estimated active working time: 2 hours
- Drying/curing time (concrete): 24-48 hours
- Total project time: 1-2 days (including drying times)
Variations & Notes
- You can experiment with different molds for various shapes or use colored concrete mixes for distinct aesthetics.
- Avoid over-mixing your concrete to prevent air bubbles, which can impact the surface texture.
- Clean any spills immediately, particularly from wax, as it solidifies quickly. Store the candle vessel in a cool, dry location, away from direct sunlight when not in use.
Troubleshooting and FAQ
Troubleshooting
The concrete vessel does not set properly. This may be due to incorrect water-to-concrete mix ratio. Ensure you follow the recommended ratios on the quick-set concrete packaging.
Bubbles appear on the surface of the concrete. This often results from air trapped during mixing. Try tapping the mold more vigorously to release trapped air bubbles before the concrete sets.
The wick does not stand upright. If the wick cannot stand, ensure the initial wax layer is fully set before adding more wax. You may secure the wick with a wick holder or tape.
Frequently Asked Questions
Can I use different types of wax? Yes, you may use any type of wax suitable for candle making, including paraffin, beeswax, or soy wax. Each type has its own melting point and burning characteristics.
How can I make the candle last longer? To extend candle burn time, consider using higher-quality wax with a higher melting point, and maintain an appropriate wick size for the vessel.
What should I do if the concrete is too wet? If the mixture appears too runny, add small amounts of concrete mix gradually to achieve the desired consistency. Avoid pouring the mixture until the texture holds shape.
Is it necessary to seal the concrete? While not mandatory, sealing the concrete vessel can enhance its durability, especially if exposed to moisture regularly.
Save This Guide
Save this guide to Pinterest so you can easily refer to the instructions, measurements, and times while crafting your concrete candle vessel. Please share any corrections, measured results, or substitutions that worked for you to help keep the guide accurate.
Leave a Reply