
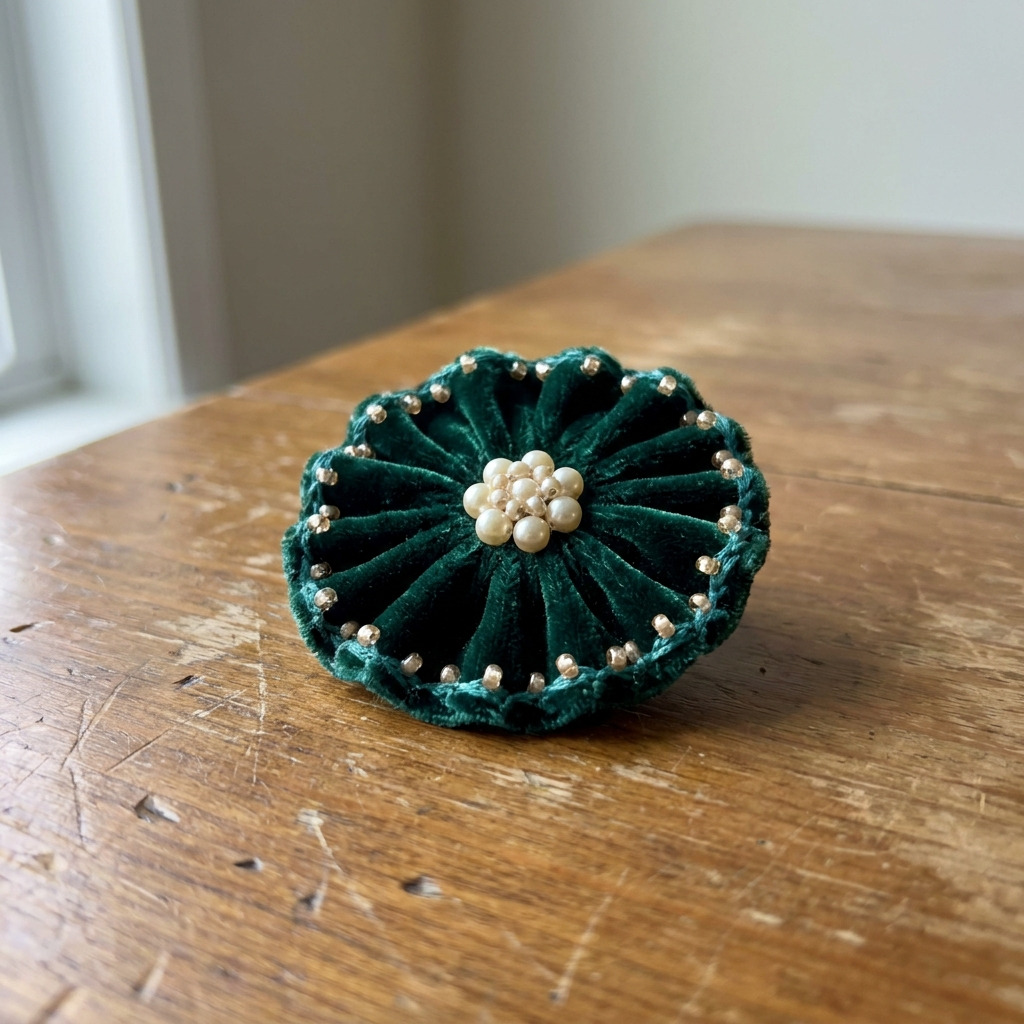
Project Overview
This project guides you through making a vintage-style brooch crafted from soft velvet fabric and embellished with decorative beads and faux pearls. The finished brooch adds a touch of elegance to any outfit, suitable for various occasions.
Project at a Glance
- Time required: 2 hours active working time, 24 hours total elapsed time
- Difficulty level: Easy, requiring basic hand-sewing skills
- Estimated cost: $10 to $30, depending on material choices and whether tools are already owned
- Finished dimensions: Approximately 3 inches in diameter
- Yield: One brooch
HERO IMAGE PLACEHOLDER
[Descriptive image caption of the finished vintage-style velvet brooch with beads and pearls]
Materials and Tools
Materials
- Fabric
- 1/4 yard of dark emerald green velvet
- Backing
- 1 square foot of interfacing (fusible fleece)
- Beads
- 20-30 small round glass beads (light champagne color)
- 10-15 faux pearl beads (10 mm)
- Pin Back
- 1 metal brooch pin back (approximately 2 inches)
- Thread
- 1 spool of teal embroidery thread
- Glue
- 1 tube of strong fabric glue (e.g., E6000)
- Optional Materials
- Fray Check (to prevent fabric fraying)
- Additional decorative items (e.g., vintage buttons or charm pendants)
Tools
- Craft scissors
- Needle for hand sewing
- Hot glue gun (optional)
- Ruler
- Fabric marking pen or chalk
- Iron
- Cutting mat or surface
- Safety equipment: Dust mask (when working with glue)
Instructions
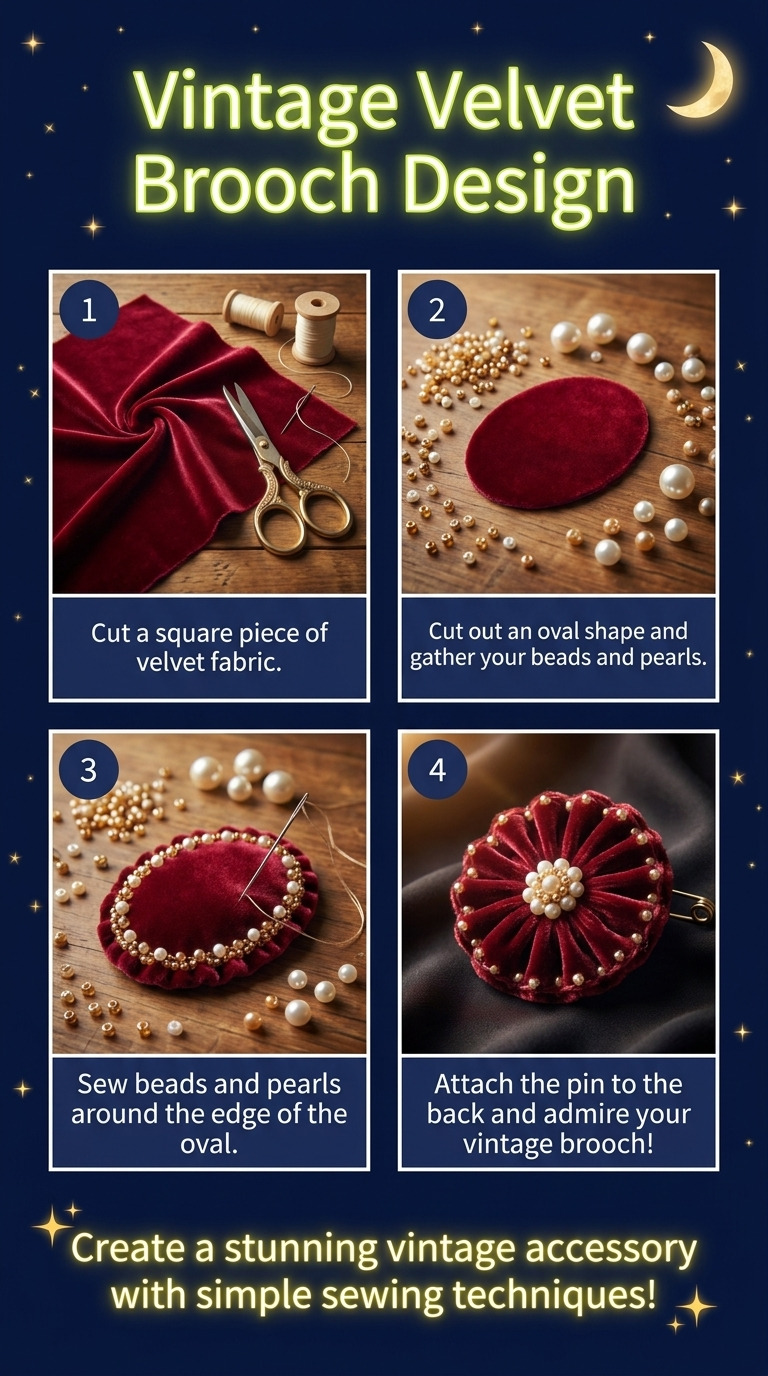
Step 1: Cut the Velvet Circle
- Measure and mark a 4-inch diameter circle on the velvet fabric using a fabric marking pen.
- Cut the circle carefully with craft scissors. The edge should be clean with no fraying visible.
Step 2: Cut the Interfacing
- Using the same 4-inch diameter circle, cut out one circle from the interfacing material. This will be used to strengthen the brooch.
Step 3: Heat Bond the Interfacing
- Place the interfacing circle on the wrong (back) side of the velvet circle.
- Using an iron on medium heat, press gently to fuse the interfacing to the velvet. Allow to cool for 1 minute. The interfacing should be securely bonded without wrinkles.
Step 4: Sew the Brooch Edging
- Thread the needle with the teal embroidery thread and knot the end. Perform a simple running stitch approximately 1/4 inch from the edge of the velvet circle.
- Gather the stitching slightly to create a ruffled effect and tie off securely after completing the circle. The edge should appear ruffled but even.
Step 5: Attach the Beads
- Using the same embroidery thread and a needle, begin sewing the small glass beads around the edges of the brooch. Space them evenly, approximately every 1 inch.
- After attaching each bead, tie a double knot for security. Ensure that the beads sit firmly in place with no movement.
Step 6: Create the Centerpiece
- Sew the faux pearl beads in a clustered arrangement in the center of the brooch. Utilize a strong knot for each bead to ensure they remain secured.
- The centerpiece should appear three-dimensional and aesthetically pleasing.
Step 7: Attach the Pin Back
- Flip the brooch over to the wrong side. Apply a generous drop of fabric glue to the metal brooch pin back and press it securely against the interfacing.
- Allow to dry for 24 hours for the bond to achieve maximum strength and durability.
Step 8: Final Inspection
- Inspect the brooch for any loose beads or edges. If necessary, apply a drop of glue to any beads or areas that require additional security.
- Ensure that there are no visible threads remaining on the brooch for a clean final appearance.
Troubleshooting and FAQ
Troubleshooting
The beads are coming loose. This may occur if knots are not tied securely. Reinforce the knots or add additional fabric glue to ensure the beads are firmly attached.
The edges are fraying. If you did not use Fray Check or if it was applied inadequately, fraying might occur. Reapply Fray Check to the edges or consider sewing a tighter gathering stitch along the border.
The brooch lacks structure. If the interfacing did not adhere properly, it may not provide the necessary structure. Repeat the bonding process with heat to strengthen the bond.
The pin back is not secure. Insufficient glue application or insufficient drying time can cause the pin back to detach. Ensure the glue is applied evenly, and allow a full 24 hours for drying.
Frequently Asked Questions
Can I use other types of fabric? Yes, other types of fabric can be used, such as satin or cotton. Note that substitutes may alter the final texture and appearance of the brooch.
How can I add more decorations to the brooch? Feel free to incorporate additional decorative items like buttons or charm pendants. This will require more secure stitching to hold heavier items.
Can I scale the size of the brooch? Yes, changing the diameter of the fabric circle will create either a smaller or larger brooch. Adjust the number of beads proportionately to maintain aesthetics.
What is the best way to clean my brooch? Store the brooch in a soft pouch to prevent abrasion. Clean gently with a damp cloth; avoid heavy cleaning solutions that could damage fabric.
Save This Guide
Save or pin this guide to Pinterest to have the complete cut list, measurements, and drying times on hand while you create your vintage-style velvet brooch. Please provide any corrections, measured results, or substitutions that worked for you so the guide can remain accurate.
Leave a Reply