
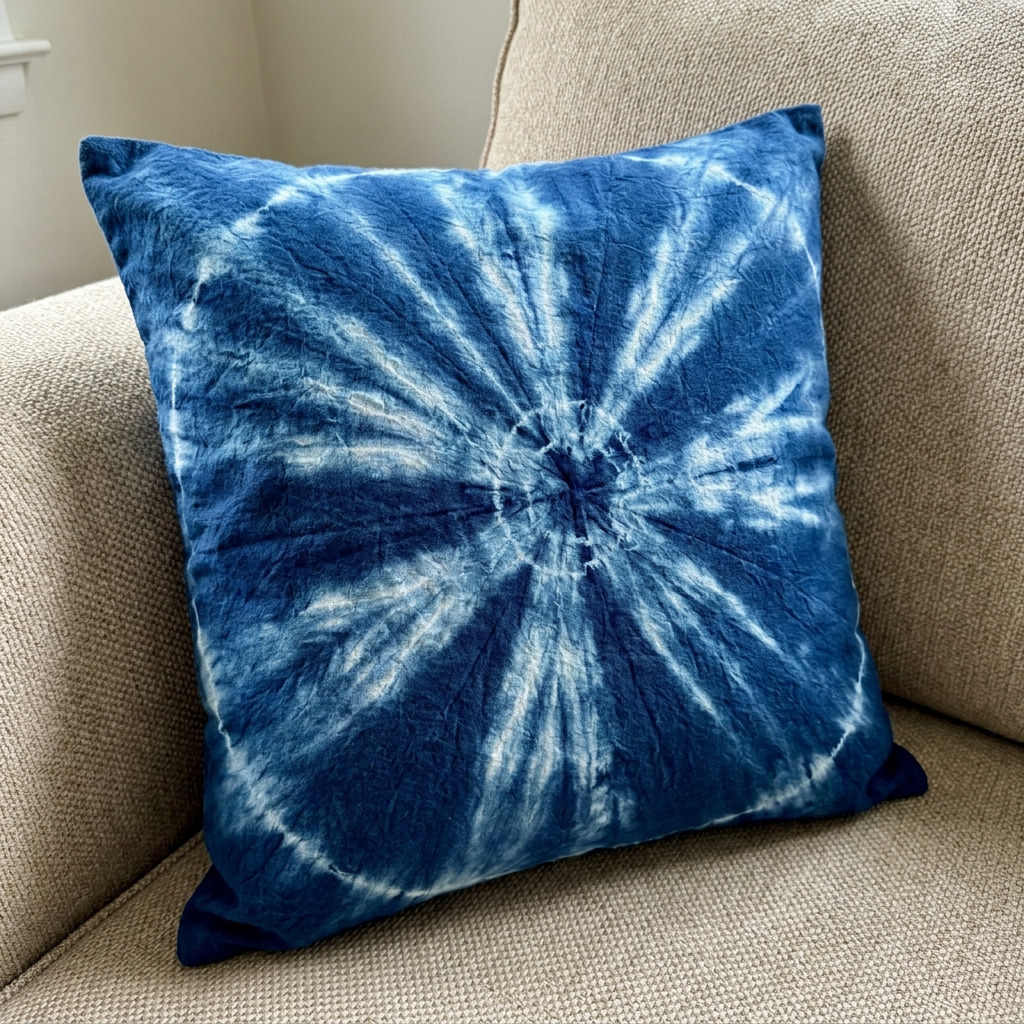
Project Overview
This project will guide you through making a beautiful Adire-inspired indigo tie-dye pillow cover, using traditional tie-dye techniques to create stunning patterns. The finished pillow cover will enhance your décor with a unique handcrafted design.
Project at a Glance
- Time required: Active working time: 2-3 hours; Total elapsed time: Approximately 10-12 hours, including drying and setting times
- Difficulty level: Intermediate; Requires skill in sewing and dye application
- Estimated cost: $30 to $50, driven by the price of the indigo dye kit and fabric choice
- Finished dimensions: 18 inches x 18 inches pillow cover
- Yield: One pillow cover
HERO IMAGE PLACEHOLDER
[Adire-inspired indigo tie-dye pillow cover featuring intricate patterns]
Materials and Tools
Materials
- Fabric:
- 1 yard of cotton fabric, 100% cotton, natural white or off-white color
- Dye:
- Indigo dye kit, such as Jacquard or Dharma Trading Co., one kit
- Ties:
- Rubber bands, one package, or string, sufficient length for multiple bindings
- Clothespins (optional, for holding designs in place)
- Other:
- Plastic squeeze bottle(s), for dye application
Optional Materials
- Additional small pieces of fabric in contrasting colors for stitching details (optional, quantity as desired)
- Stitching thread, matching or contrasting colors, one spool
Tools
- Rubber gloves, one pair, for handling dye
- Eye protection, safety goggles, one pair
- Plastic drop cloth or large garbage bags, sufficient to cover the workspace
- Plastic bucket, one, for mixing dye
- Scissors, one pair
- Measuring tape or ruler, one
- Sewing machine (or needle and thread for hand sewing), one
- Iron and ironing board, one set
- Plastic wrap (optional, for wrapping dyed fabric while setting)
Instructions
Step 1: Workspace Setup
Cover your work surface with a plastic drop cloth or large garbage bags to protect from dye spills. Ensure the workspace has sufficient ventilation.
Step 2: Cutting the Fabric
Cut the cotton fabric into a square measuring 19 inches x 19 inches. This size allows for seams when constructing the pillow cover.
Step 3: Pre-treatment of Fabric
Wash and iron the fabric to remove any chemicals or sizing from manufacturing. Do not use fabric softener as it can affect dye adherence.
Step 4: Prepare the Tie-Dye Patterns
Decide on the tie-dye pattern you want to create. Common patterns include spirals, sunbursts, or geometric shapes. Use rubber bands or string to bind sections of the fabric tightly, creating resist areas that will not absorb dye.
Step 5: Mix the Dye
In a plastic bucket, mix the indigo dye according to the instructions provided in the dye kit. Stir well until the dye is thoroughly mixed.
Step 6: Dye the Fabric
Put on rubber gloves and eye protection. Submerge the bound fabric into the dye solution and leave it for approximately 10 minutes to develop color. Remove the fabric from the dye and gently squeeze it to release excess dye.
Step 7: Set the Dye
Wrap the dyed fabric in plastic wrap or place it in a plastic bag to allow the dye to oxidize for 6-8 hours, or preferably overnight. This will enhance the richness of the indigo color.
Step 8: Rinse the Fabric
After the dye has set, rinse the fabric under cold water until the water runs clear. Be careful not to unbind the tied sections during rinsing. Allow the fabric to air dry completely, preferably laid flat.
Step 9: Unbind the Fabric
Once the fabric is dry, carefully unbind the rubber bands or string to reveal the tie-dyed pattern.
Step 10: Sew the Pillow Cover
Fold the dyed fabric in half, right sides together, forming a 19 inches x 19 inches square. Sew around the edges using a ½ inch seam allowance, leaving a 6-inch opening on one side for inserting the pillow form. Clip the corners to reduce bulk and turn the pillow cover right-side out.
Step 11: Insert the Pillow Form
Insert a standard 18 inches x 18 inches pillow form into the cover through the opening.
Step 12: Finish the Opening
Fold the raw edges of the unsewn side inward and sew it closed, using a sewing machine or by hand stitching for a neat finish.
Step 13: Assembly & Finishing
Ensure all seams are secure and there are no exposed edges. Iron the pillow cover for a crisp finish.
Optional Step: Add Embellishments
Sew on additional fabric pieces or create decorative stitching along the edges for added embellishments, if desired.
Measurements & Dimensions
- Final Dimensions: 18 inches x 18 inches pillow cover
- Fabric Cut Size: 19 inches x 19 inches square
Timing Information
- Estimated Active Working Time: 2-3 hours (not including drying and setting time)
- Drying/Curing Time: 6-8 hours for dye setting; 1-2 hours for fabric drying
- Total Time: Approximately 10-12 hours
Troubleshooting and FAQ
Troubleshooting
- The tied sections are bleeding dye. This could be due to insufficient binding or excess water. Ensure areas are tightly bound, and avoid over-saturation during dyeing.
- The colors are not vivid. This may result from not allowing enough time for dye to oxidize. Make sure the fabric is wrapped properly and left for at least 6-8 hours.
- The fabric appears streaky. Uneven application of dye can cause this. Ensure an even submersion of the fabric and a steady, uniform application if using squeeze bottles.
- The pillow cover has fraying edges. If the fabric is not properly finished before use, edges can fray. Ensure to sew all edges securely.
Frequently Asked Questions
- Can I use other types of fabric? Yes, but 100% cotton is recommended for best dye adherence. Synthetic fabrics may not hold the dye well.
- What if I do not have a sewing machine? You can hand sew the pillow cover, though it may take longer. Ensure each stitch is secure.
- How can I maintain the color of the pillow cover? Spot clean with mild soap and water. Avoid machine washing or bleach to preserve the dye.
- Can I use different colors with the indigo dye kit? The indigo kit is primarily for blue tones. For different colors, other dye kits or natural dyes can be explored.
Save This Guide
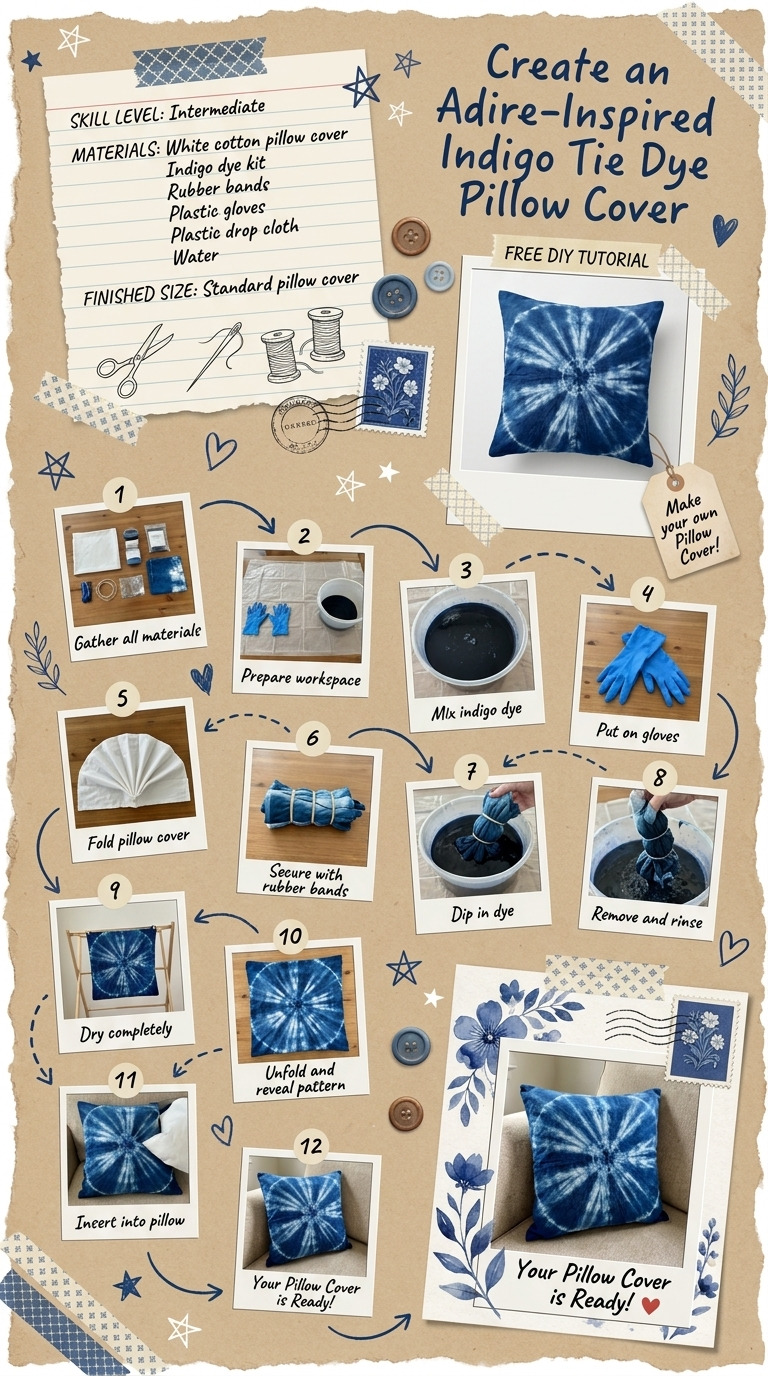
Save or pin this guide to Pinterest for easy access while you build your Adire-inspired tie-dye pillow cover. It contains the complete cut list, exact measurements, cure and drying times, and troubleshooting entries. Corrections, measured results, or substitutions that worked well are welcome to keep this guide accurate.
Leave a Reply