
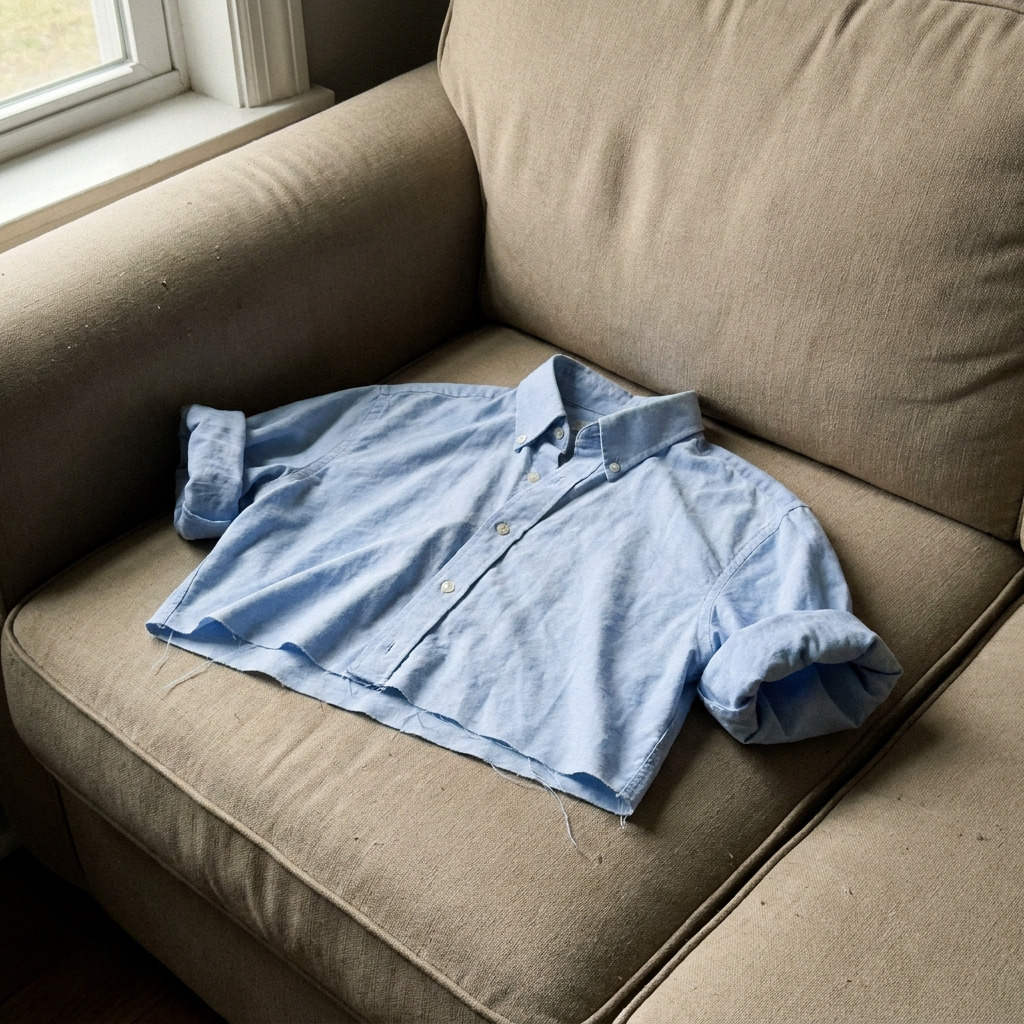
This project transforms a men's button-up shirt into a stylish cropped blouse. It is a fun and eco-friendly way to revamp a thrifted find into something fashionable.
Project at a Glance
- Time required:
- Active working time: 1 hour
- Total elapsed time: 1 hour
- Difficulty level: Beginner, requiring basic sewing skills
- Estimated cost: $10 to $20, depending on the original shirt's price and sewing supplies on hand
- Finished dimensions: Approximately 18 inches in length from the shoulder seam
- Yield: 1 cropped blouse
HERO IMAGE PLACEHOLDER
[Descriptive image caption of the finished project]
Materials and Tools
Materials
- Men's button-up shirt: 1 piece, any cotton fabric, size medium to large recommended
- Sewing thread: 1 spool, color matching the shirt (neutral colors such as white or black)
- Chalk or fabric marker: 1 piece for marking cutting lines
- Sewing pins: 10-15 pieces to hold fabric in place
Tools
- Sewing machine: standard straight stitch machine
- Sewing needle: size 12 for general use
- Fabric scissors: 1 pair, sharp
- Measuring tape: 1 piece for measurements
- Iron: for pressing seams
- Ironing board: for pressing
Instructions
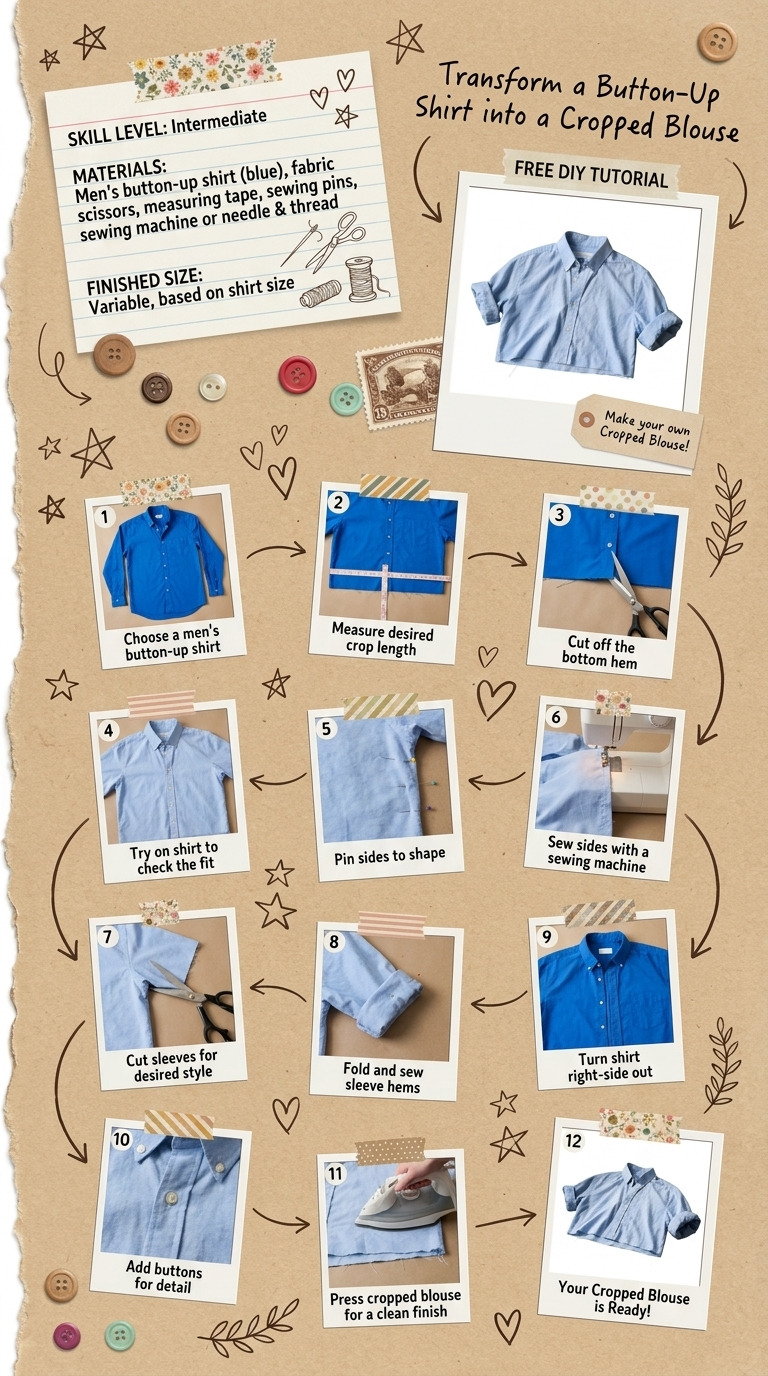
Step 1: Mark Cutting Line
Measure 18 inches down from the shoulder seam on both the front and back of the shirt. Use chalk or fabric marker to mark this length, connecting the marks across the full width of the shirt.
Step 2: Cut the Shirt
Using fabric scissors, carefully cut along the marked line to remove the bottom portion of the shirt. Set the cut portion aside for potential future use.
Step 3: Prepare the Hem
Fold the raw edge of the new hem up by 1/4 inch and press with an iron to create a clean edge. Fold it again by 1/4 inch and press again to form a neat double fold.
Step 4: Pin the Hem
Using sewing pins, secure the folded hem in place all around the shirt. Ensure the hem lies flat without any gathers or puckers.
Step 5: Sew the Hem
Using the sewing machine, switch to a straight stitch. Sew along the bottom edge of the hem, approximately 1/8 inch from the fold. If sewing by hand, use a needle and thread to create small running stitches along the folded hem.
Step 6: Create Sleeves (Optional)
If the shirt has long sleeves, decide whether to roll them up or remove them. To remove, cut along the seam where the sleeve is attached, then hem the armhole using the same method as the bottom hem. If retaining the sleeves, roll them up to the desired length.
Step 7: Finishing Touches
Optionally, add embellishments such as buttons on the collar or decorative patches if the shirt design allows. Carefully secure any embellishments in place.
Step 8: Final Press
Press the new hem and any embellishments with an iron for a polished finish. This action ensures crisp lines and a professional look.
Troubleshooting and FAQ
Troubleshooting
- The fabric frays at the hem. Cause: Insufficient hem allowance. Correct by re-folding the hem to 1/4 inch and ensuring proper stitching.
- The blouse is too tight or loose. Cause: Cutting the shirt too close to the body or not accounting for ease. Correct by trimming additional fabric or simply adjusting the waistline style.
- The hem is uneven. Cause: Measurement errors during marking. Correct by measuring the hemline again and adjusting as needed.
- The shirt gets stuck in the sewing machine. Cause: Thick fabric or incorrect needle type. Change the needle to one suitable for thicker fabric, or reduce the thickness by not cutting multiple layers.
Frequently Asked Questions
- Can I use a non-cotton shirt? Yes, but be cautious of the fabric's stretch and drape. Non-cotton fabrics may require different handling techniques, such as adjusting the sewing machine tension.
- What if I don’t have a sewing machine? You can sew the blouse by hand using a needle and thread; however, this will require more time and patience to ensure even stitches.
- How do I care for the new blouse? Wash in cold water on a gentle cycle and line dry to avoid shrinking. It can be pressed with an iron on a low setting to maintain its shape and neatness.
- What embellishments work well? Decorative buttons, lace trim, or patches can enhance the design, but ensure they are securely attached to avoid unravelling.
Save This Guide
Save or pin this guide to Pinterest to have easy access to the cut list and exact measurements while you create your new cropped blouse. Share any corrections, measured results, or successful substitutions to keep this guide accurate for future makers.
Leave a Reply