
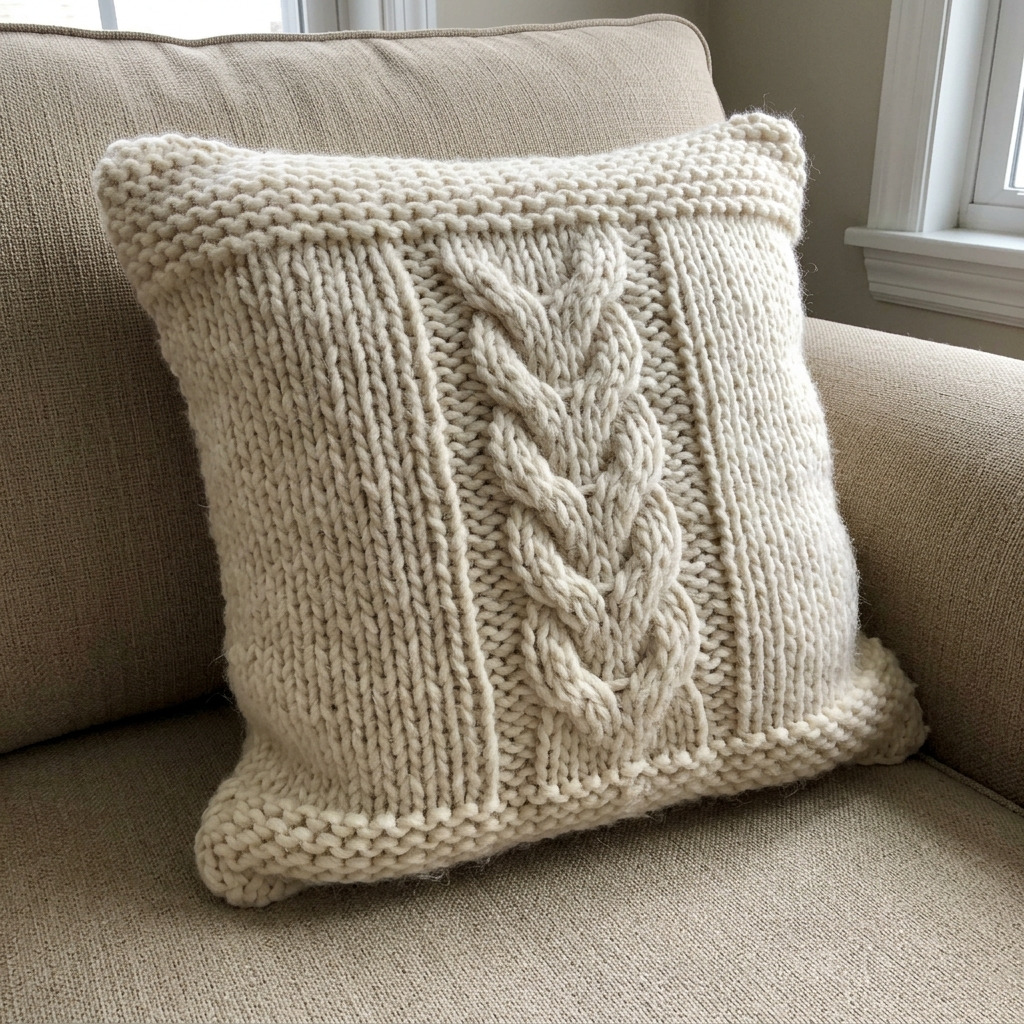
Project Overview
This project involves creating a cozy, chunky cable knit pillow cover that adds texture and warmth to any room. The finished piece will feature a beautiful cable pattern and will fit a standard 18" x 18" pillow form.
Project at a Glance
- Time required: Active working time: 2 hours; Total elapsed time: 2 hours
- Difficulty level: Beginner (basic knitting skills required)
- Estimated cost: $25 to $40 (cost varies with yarn choice and whether you own the necessary tools)
- Finished dimensions: 18 inches x 18 inches
- Yield: One pillow cover
HERO IMAGE PLACEHOLDER
[Descriptive image caption of the finished project]
Materials and Tools
Materials
- Super bulky yarn: 2 skeins, size 6, color: creamy white
- Knitting needles: 10 mm (US 15) circular knitting needles, 24 inches long
- Cable needle: 10 mm
- Pillow insert: 1 standard 18" x 18" pillow form
- Safety stitch markers: 2 pieces
- Tapestry needle: for weaving in ends
- Scissors: for cutting yarn
Tools
- Circular knitting needles: 10 mm
- Cable needle: 10 mm
- Scissors: for cutting yarn
- Tapestry needle: for sewing seams
- Safety stitch markers: to mark pattern stitches
- Measuring tape: to check dimensions as you knit
Instructions
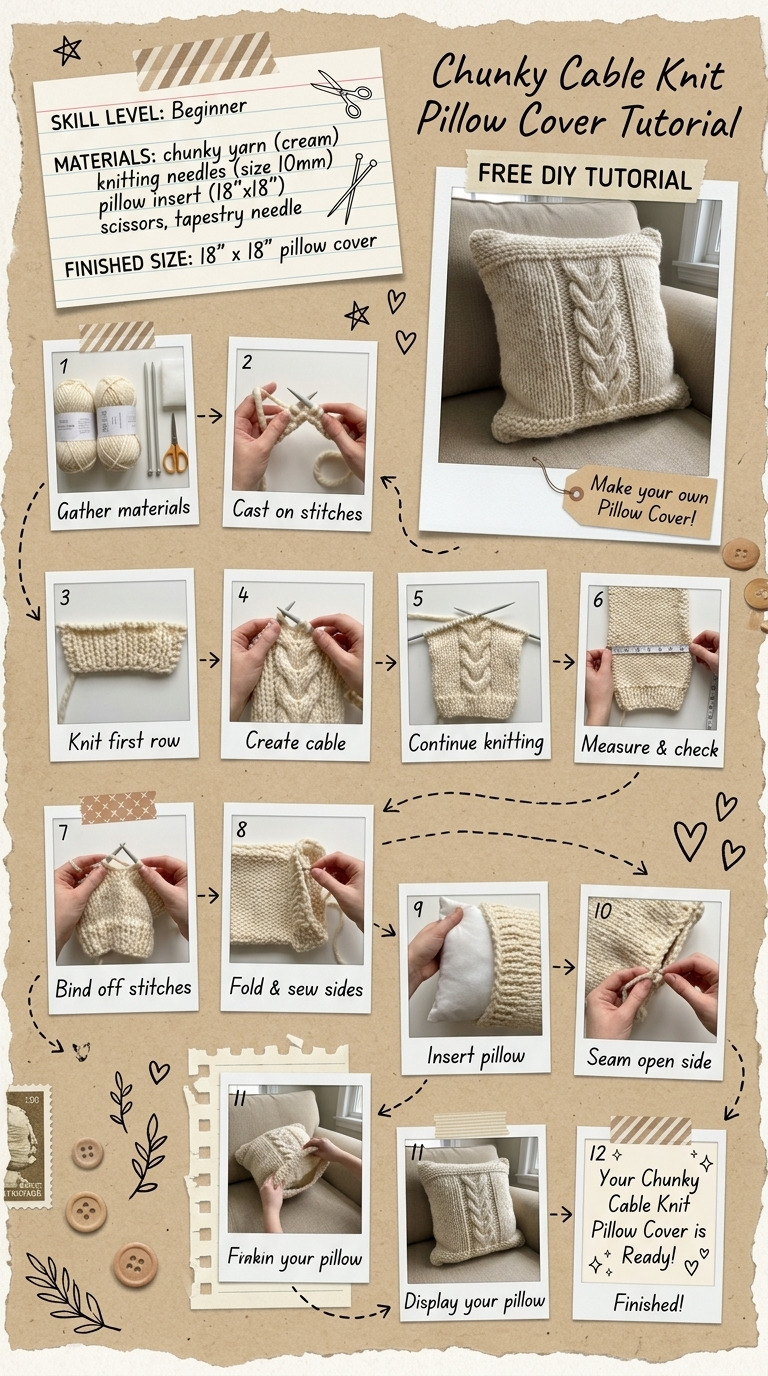
Step 1: Cast On
- Cast on 42 stitches using the long-tail cast-on method with the super bulky yarn.
- The edge should be straight and flexible, allowing for stretch.
Step 2: Knit the First Row
- Turn your work and knit every stitch (knit across) to create the garter stitch border.
- Repeat this for the next 5 rows, resulting in a total of 6 rows of garter stitch.
- The piece should have a visible garter stitch edge approximately 1 inch in height.
Step 3: Begin Cable Pattern
- Row 1: Knit 6, place a safety marker, K12, C4B (cable 4 back), K12, place a safety marker, knit 6.
- Row 2: Purl all stitches.
- Row 3: Knit 6, slip the first 2 stitches onto the cable needle and hold to the back, knit the next 2 stitches from the left needle, then knit the 2 stitches from the cable needle. K12, C4B, K12, repeat the markers, knit 6.
- Row 4: Purl all stitches.
- The first section of the cable pattern will be established, with the cable forming prominent twists.
Step 4: Repeat the Pattern
- Repeat Steps 3 to 4 until your work measures 18 inches from the cast-on edge.
- Measure from the cast-on edge to verify that the length reaches exactly 18 inches.
Step 5: Knit the Garter Stitch Border
- Knit 6 more rows in garter stitch (each row knitting every stitch).
- The border should now extend to approximately 2 inches in height.
Step 6: Bind Off
- Bind off all stitches loosely to allow stretch.
- The edge should be flexible and matching the rest of the pillow cover’s dimensions.
Step 7: Finishing
- Cut the yarn, leaving an 8-inch tail.
- Use a tapestry needle to weave in loose ends on the inside of the work.
- Ensure all ends are securely woven to avoid future unraveling.
Assembly & Finishing
- Place the knitted piece flat, lining up the garter stitch edges.
- Fold the piece in half, inside out, aligning the edges perfectly.
- Using the tapestry needle, sew the side edges together using a whip stitch or mattress stitch, leaving one side open for the pillow insert.
- Turn the piece right side out ensuring the edges are cleanly folded.
- Insert the pillow form into the cover and sew the last side shut using the same stitch method.
Measurements & Dimensions
- Finished dimensions of pillow cover: 18 inches x 18 inches
- Cast on: 42 stitches to create width
- Each cable section repeats every 4 rows.
Timing Information
- Estimated active working time: 2 hours
- Total elapsed time: 2 hours
Variations & Notes
- Consider using colored yarn for a bolder look, or different textures for interest.
- If using a different yarn weight, adjust needle size and stitch count to ensure proper fit for the pillow insert.
- Care: Hand wash in cold water and lay flat to dry to maintain shape and prevent shrinking.
Troubleshooting and FAQ
Troubleshooting
- **The stitches are too tight and hard to knit. Cause: Yarns might be too tense during tension. Correction: Loosen your grip on the yarn while knitting.
- The cables are not clearly defined. Cause: Incorrectly executed cable stitches. Correction: Ensure you are holding the correct number of stitches on the cable needle before knitting.
- The pillow cover measures less than 18 inches. Cause: Insufficient repeats of the cable pattern. Correction: Measure as you knit to ensure the correct length is achieved.
- The edges curl noticeably. Cause: Inadequate garter stitch rows for the border. Correction: Increase the number of rows in the garter stitch sections.
Frequently Asked Questions
- Can I use a different type of yarn? Yes, but ensure the replacement yarn maintains a similar thickness and stretch to avoid changes in dimensions.
- What if I want a larger pillow cover? Increase the cast on stitches evenly in multiples of the cable pattern. Adjust the needle size as necessary.
- Can I machine wash the pillow cover? It is recommended to hand wash in cold water and lay flat to dry to avoid shrinking or distorting the cable patterns.
- How do I adjust the pattern for a different sized pillow? Modify the cast on number based on the pillow size and recalculate the cable pattern if scaling up or down.
Save This Guide
Save or pin this guide to Pinterest for quick reference while you build your knitting project. It includes the complete materials list, exact measurements, and troubleshooting entries. Submit any corrections, measured results, or successful substitutions so the guide can remain accurate and up-to-date.
Leave a Reply